Last Updated on
How would you like to create a Google Sheet that automatically wraps text into columns? This tutorial shows you how to do it using formulas.
Google Sheets is a spreadsheet application that allows you to store data and organize information. It has become very popular because it is free and simple to use.
You can easily create a column that contains text or numbers, but sometimes you want to add a little bit of flair to your document without hiding any of the text. In this case, you can use the Wrap Text function.
This tutorial will show you how to wrap text in Google Sheets and go through each step in a step-by-step guide, including screenshots to help you along the way.
How to Wrap Text In Google Sheets
This tutorial will show you how to wrap text in Google Sheets:

Step
Create A New Spreadsheet
Before we start creating our new spreadsheet, let’s make sure we have all the tools available on our computers. We need to download and install Google Drive.
If you don’t already have it installed, search for it online for more details.
After installing Google Drive, open it up from the Start menu.
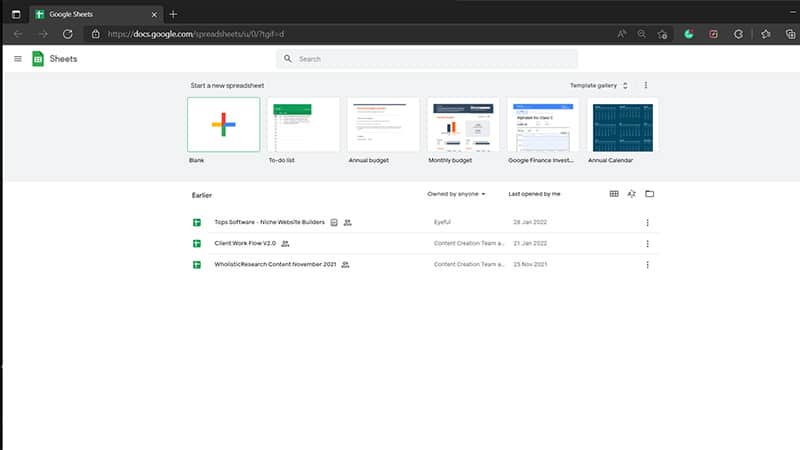
You should see a screen similar to this one:
Now click on the + icon in the top-right corner of the window.
Give your new document a name and then select where you want to save it before saving.
Step
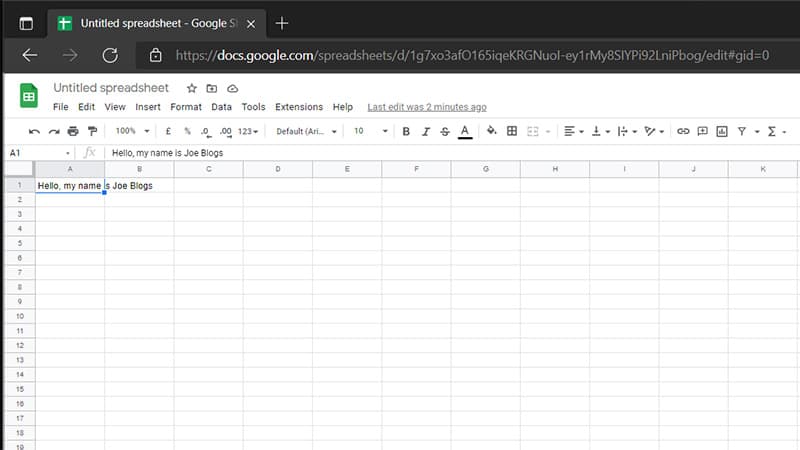
Select The Cell With The Text That You Want To Wrap
In the screenshot below, you can see that cell A1 includes a sentence that does not fit in the cell.
Step
Open Up The ‘Text Wrapping’ Menu
You can do this in a variety of ways. First, you can click on the symbol found in the toolbar which looks similar to a curved arrow.
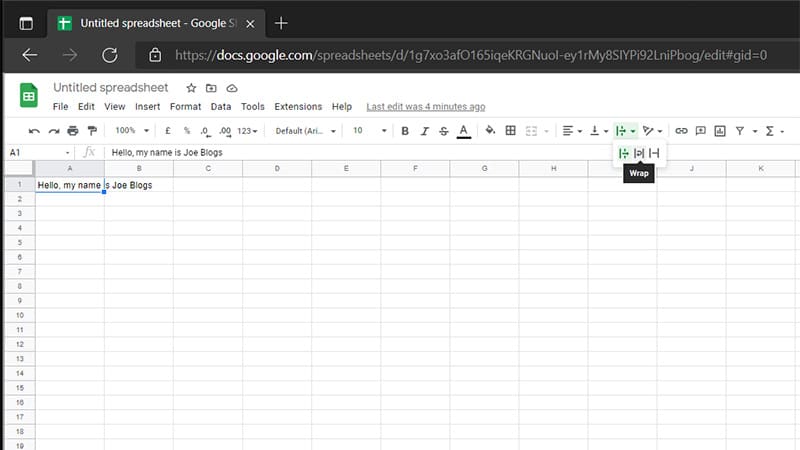
Alternatively, you can click “format” in the toolbar and then go to “text wrapping”.
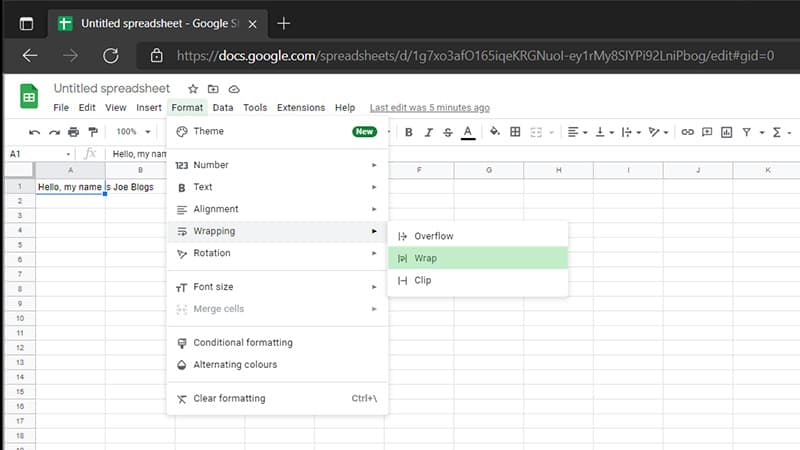
You will then click ‘wrap’ to wrap your text.
Step
Adjusting The Column Width
This step is optional, but you can adjust the column width containing the cell that you wrapped the text for.
If you do decide to do this, the height of the wrapped cell rows will adjust to fit the text and it should look something like this.
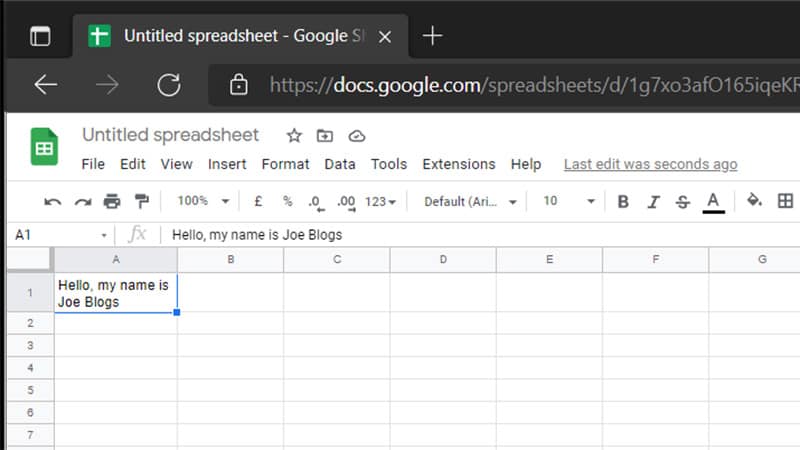
After doing so, the sentence fits inside of a single cell and column A has been expanded to give more horizontal space for the text in the cell.
If your column is too thin when you wrap a chunk of text, your row height can become very tall.
This means that when you have a lot of text in one cell, it can be helpful to give the cell more space by adjusting the column before applying the “wrap” function.
How To Unwrap Text In Google Sheets
This tutorial will show you how to unwrap text in Google Sheet:
Step
Unwrap Text
If you decide you don’t like how the text looks when it is wrapped, especially if you are inputting a lot of data you would rather be all in one line, you should click on the cells that have the text that you need to unwrap.
Then open up the “text wrapping” option from the toolbar again, or find the “format” menu, and click on “overflow”.
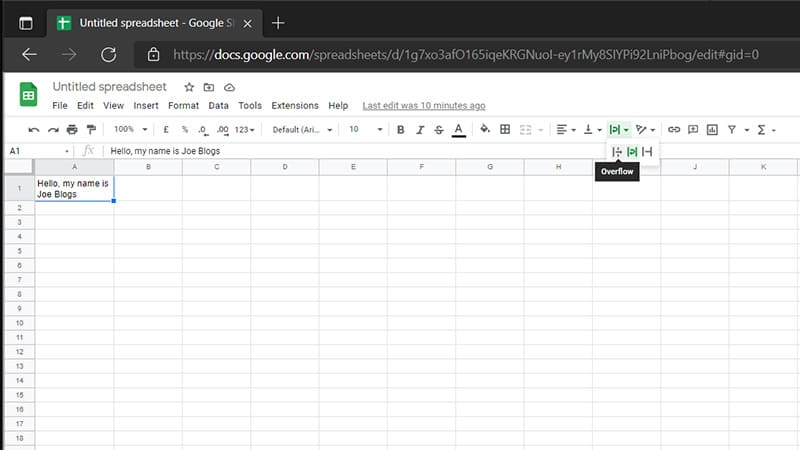
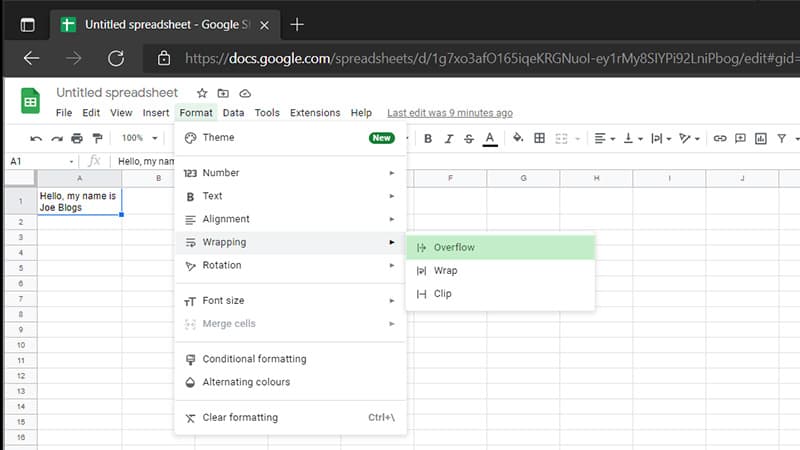
The text will then overflow into the cell to the right and will have returned to its default setting.
Final Thoughts
We hope after reading this article you have learned how to successfully wrap and unwrap text in a Google Sheet. Although Google Sheets takes a bit of practice to navigate and use, this is one of the simpler tricks you will learn along the way.

