
Last Updated on
I’ll never date another apostrophe – the last one was too possessive
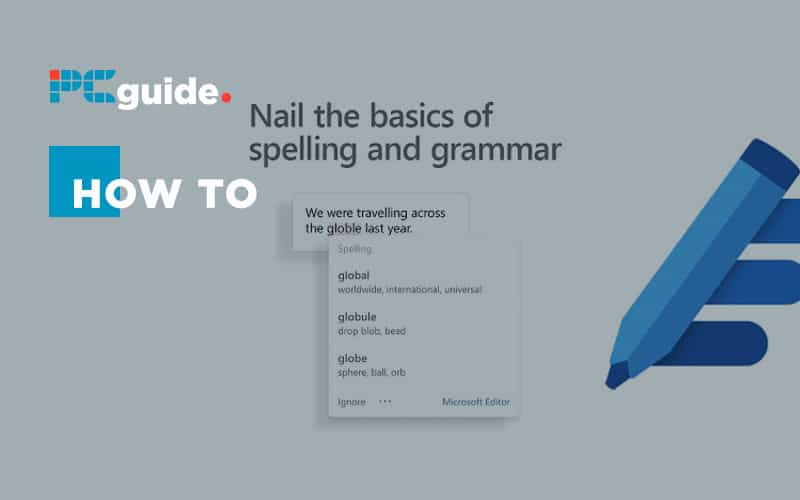
From today Microsoft has started morphing users of its popular online Office 365 package to the new branding of Microsoft 365, and while many of the new features are still some months away and will be rolled out quietly in the background, one newbie that you can make use of is the Microsoft Editor which will passive-aggressively tell you your writing doesn’t make sense (note, it may just be me).
Anybody who writes a lot or even for a living will be aware of services such as Grammarly which have for a while now tried to be a sort of AI sub-editor, removing the stress of getting those pesky, commas in the correct place (that’s a joke by the way – just in, case)
Microsoft would very much like a piece of the grammar pie, and while Grammarly did offer a very useful free tier, there was a much more expensive pro version on offer subscription-style.
Now with you already paying for your 365 subs, you could potentially save the money you spend on Grammarly and direct it to Seattle instead, but how do you access the new feature? It isn’t instantly apparent.
The first thing that needs to happen is to make sure you have the latest version of Word installed with your subscription.
Head to the File menu in the ribbon and hit Accounts. There you will find a ‘Check for Updates’ button which you should go ahead and activate. Hopefully, you will find you are up to date, but if not, let Word do its thing and come back in five minutes or so.
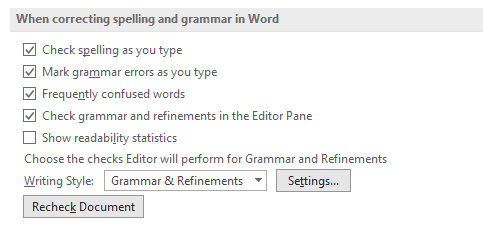
After this stage, you need to select Options at the bottom of the File menu, and from there look for Proofing (big clue, it’s the third one down, let us know if you can’t find it).
 Now check to see under the heading ‘When correcting spelling and grammar in Word’ that the ‘Check grammar and refinements in Editor pane’ is checked and you are good to go.
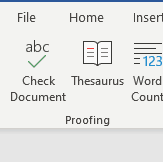
Now all you need to do to be made to feel bad about your level of education is to take a document you wish to check, select Review from the top ribbon and activate the first option ‘Check Document’.
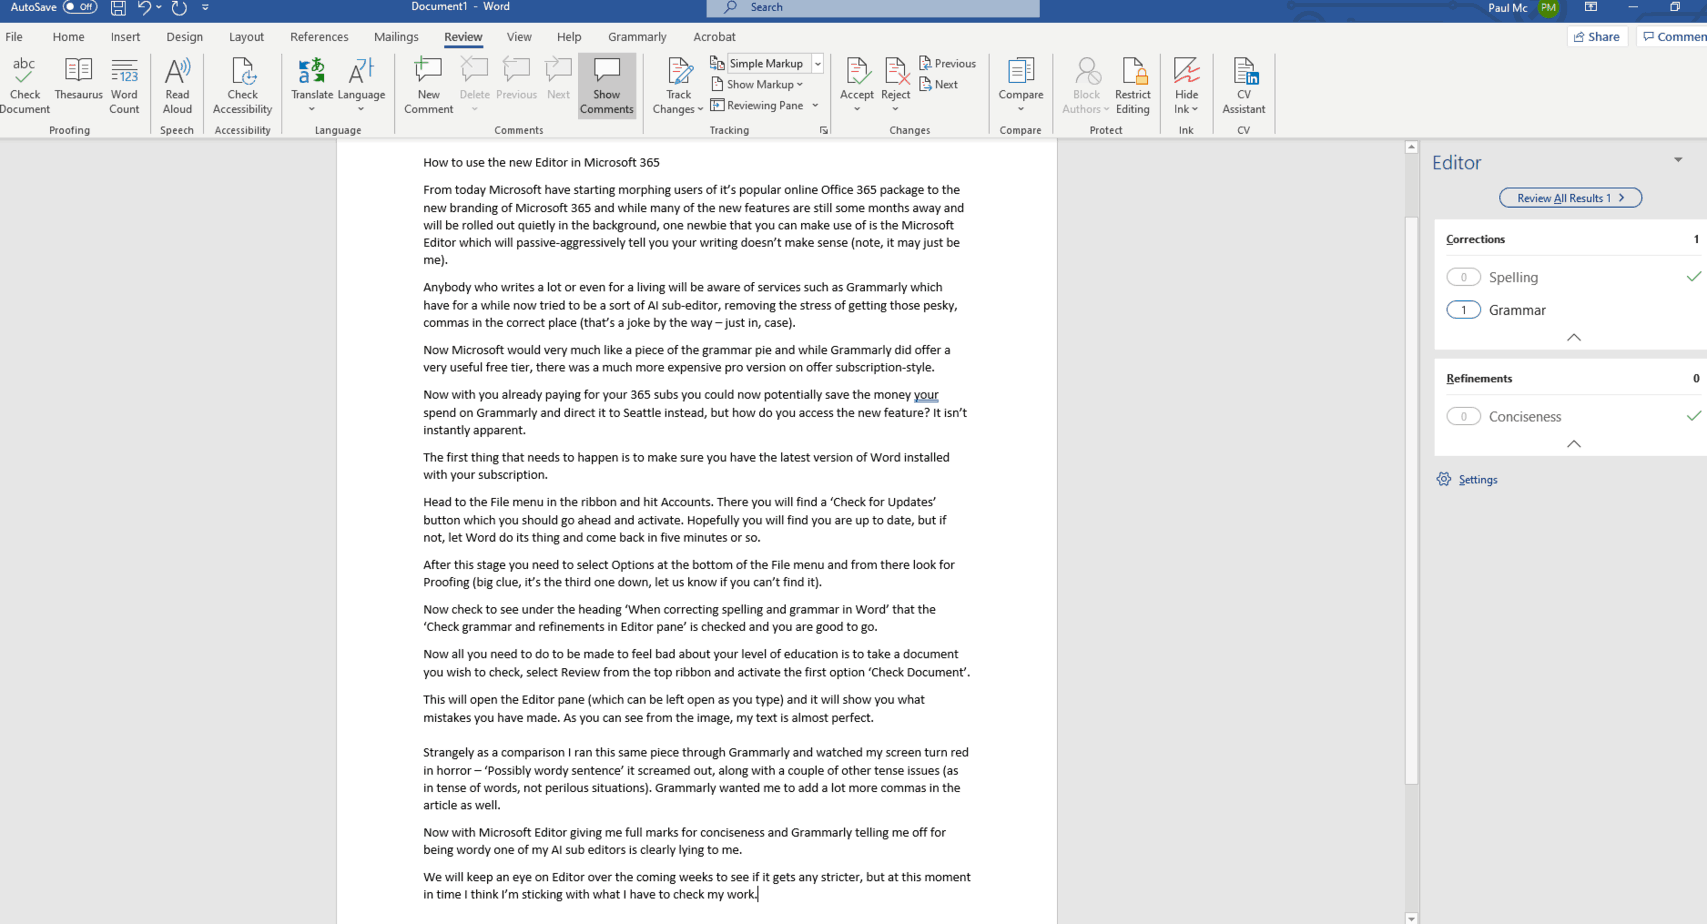
This will open the Editor pane (which can be left open as you type), and it will show you what mistakes you have made. As you can see from the image, my text is almost perfect.
Strangely as a comparison, I ran this same piece through Grammarly and watched my screen turn red in horror – ‘Possibly wordy sentence’ it screamed out, along with a couple of other tense issues (as in the tense of words, not perilous situations). Grammarly wanted me to add a lot more commas in the article as well.
Now with Microsoft Editor giving me full marks for conciseness and Grammarly telling me off for being wordy, one of my AI sub-editors is clearly lying to me.
We will keep an eye on Editor over the coming weeks to see if it gets any stricter, but at this moment in time, I think I’m sticking with what I have to check my work.
It’s also worth pointing out that neither option picked up my incorrectly places commas in my joke at the start.
