
Last Updated on
So, you’ve either had your monitor for a while now or you’ve just hooked up your PC to it and noticed that there are some tiny little dots on your screen. These dots could actually be dead pixels and will become extremely annoying if you can’t see past that they’re actually there. Don’t lose all hope though, if you do have dead pixels on your monitor, there could be ways to fix them, rejuvenating life back into your monitor, hopefully making it as good as new.
There are multiple ways in which you can potentially fix dead pixels but they’re not absolutely guaranteed and unfortunately, sometimes they’ll forever be lost to the void. Pixels that are fully dead, can’t be revived but those that are stuck can. We’re going to list all the methods in which are most likely to fix your stuck, dead pixels, and no, none of them involve putting your monitor in rice.
How To Identify Dead Pixels On Your Monitor
Before you get to any fixing, you’re going to need to identify if you do actually have dead pixels on your monitor screen. You can do this by using a website like Dead Pixel Buddy which displays a block color of your choice to hopefully highlight those pixels that are looking a little worse for wear.
If you do see some on your screen, if they’re fully dead, they’ll appear as black on a white background whereas saveable ones will show as white on a black background. You can still try the methods of rejuvenation below on those black ones but it will be highly unlikely to succeed.
How To Fix Dead Pixels
Now we’re at the point where we can try and get those pesky pixels fixed. There are a number of methods but as alluded to earlier, we’re only going to focus on those that are the most likely to succeed.
How To Fix Dead Pixels With JScreenFix
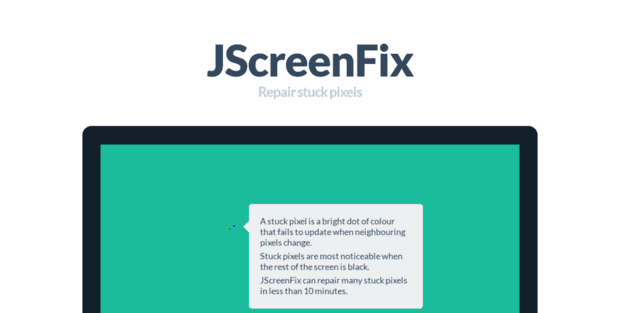
JScreenFix is a website that has been developed for one purpose – helping you bring your pixels back to working order. It works by flashing the affected area with a full spectrum of colors in a ‘white noise’ fashion, to breathe life back into the pixels.
Here’s how to access and use JScreenFix:
- Open your favorite web browser and head over to the JScreenFix website
- Hit the “Launch JScreenFix” button at the bottom of the page
- Move the square of colorful pixels over the ‘dead’ section
- Leave this to do its work for between 10-30 minutes
If this fixed your dead pixels then fantastic but if not, try using JScreenFix’s tool a couple more times as it might just require more work before they spring back to life again. However, if you’re not successful after multiple tries, you might have to go for another method.
How To Fix Dead Pixels With PixelHealer
![]()
Unlike JScreenFix, PixelHealer is a downloadable program for Windows rather than being web-based. Again, it differs from JScreenFix with its methodology as it uses a block color flashing technique rather than the almost ‘white noise’ effect to try and get those pixels working again.
If you do want to use PixelHealer, you’ll need to get it downloaded first, click here to get that started. Once installed, here’s how to use the program:
- Open up PixelHealer
- Select the size of the window you’d like to play those flashing colors
- Choose your desired time scale (we’d recommend between 10-30 minutes)
- Select which colors you’d like in the rotation
- Hit “Start Flashing” to begin the process
If this fixed your dead pixels then perfect but if not, try using PixelHealer a few more times to jumpstart them. However, if you’re not successful after multiple tries, you might have to either go and use JScreenFix if you haven’t already, otherwise read on for one more method.
How To Fix Dead Pixels With YouTube Videos
YouTube is rife with tutorials, tips, and tricks for pretty much anything you can think of. Thankfully, there’s also a bunch of videos to hopefully aid you in fixing your dead pixels. Most of the videos out there utilize a similar method to that of PixelHealer, flashing block colors extremely fast in an effort to get them working again. There are also some ‘white noise’ effect ones similar to JScreenFix that could help if the block colors fail.
But don’t these do the same thing as the methods we’ve already listed? Yes, that’s right but YouTube is an extremely easy site to use and you can jump between videos if you want to try alternatives rather than having to go to different websites or download any new programs. Basically, it’s an ease of use thing if you want to try a bunch of different videos for fixing your pixels.
Because there’s a sea of options out there, we recommend starting for this one as it’s an hour-long, ample time to get those pixels going as well as going through a number of colors and speeds. If you don’t fancy going for a block color route, as stated, there are also ’white noise’ variants. We recommend going for this video as again, it’s lengthy providing enough time to get the job done.
If you’ve got this far and your pixels haven’t come back to life then it might be time to accept defeat. You can continue to run whichever pixel rejuvenation method you opt for and still hold out hope but if it’s still not working after multiple tries and hours of flashing, it might be worth putting down the tools. You don’t want to potentially create more bad pixels from continuing to put them under intense usage.
If you are accepting defeat, why not treat yourself to a brand new monitor to replace your current model. Something like the Asus ROG Swift PG27UQ 27″ Monitor is an absolutely stellar pick, boasting that impressive 4k resolution as well as a 144Hz refresh rate, perfect for gaming and any work that requires silky smooth motion.