
How to convert NVIDIA ShadowPlay HDR footage to SDR

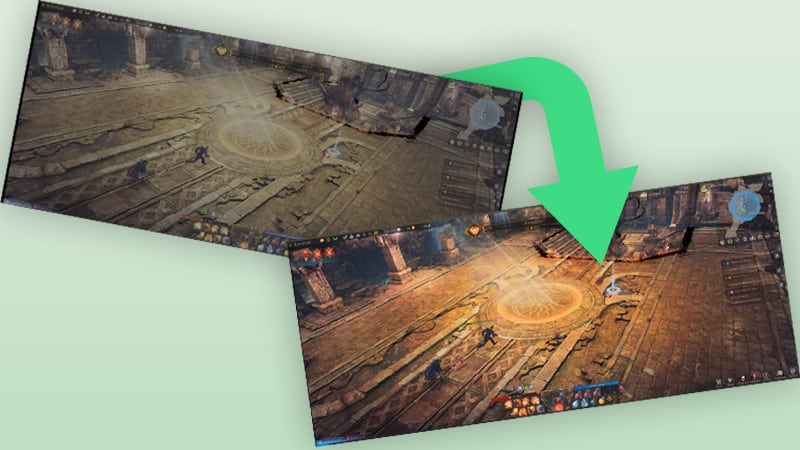
Table of Contents
NVIDIA’s ShadowPlay is a crucial feature for any budding video game content creator. The way it works so smoothly – when it does work – without any real negative impact on your performance in-game is astonishing. Remember when everyone had to use FRAPS and it would murder the frame rate of even the lowest key game? Or how about trying to juggle OBS’ settings to ensure that you weren’t capturing with your low bitrate streaming settings just having to finesse them just right every single time?
We can all agree that ShadowPlay is simple, it’s effective and for the most part, works just as you’d expect. The one thing that’s currently tripping some creators up is the shift to HDR, which can play havoc with the way that it captures video.
Prime Day is finally here! Find all the biggest tech and PC deals below.
- Sapphire 11348-03-20G Pulse AMD Radeon™ RX 9070 XT Was $779 Now $739
- AMD Ryzen 7 7800X3D 8-Core, 16-Thread Desktop Processor Was $449 Now $341
- ASUS RTX™ 5060 OC Edition Graphics Card Was $379 Now $339
- LG 77-Inch Class OLED evo AI 4K C5 Series Smart TV Was $3,696 Now $2,796
- Intel® Core™ i7-14700K New Gaming Desktop Was $320.99 Now $274
- Lexar 2TB NM1090 w/HeatSink SSD PCIe Gen5x4 NVMe M.2 Was $281.97 Now $214.98
- Apple Watch Series 10 GPS + Cellular 42mm case Smartwatch Was $499.99 Now $379.99
- ASUS ROG Strix G16 (2025) 16" FHD, RTX 5060 gaming laptop Was $1,499.99 Now $1,274.99
- Apple iPad mini (A17 Pro): Apple Intelligence Was $499.99 Now $379.99
*Prices and savings subject to change. Click through to get the current prices.
See, HDR – High Dynamic Range – is the step above your typical TV output and has entered almost every consumer method of watching something in the last few years. While editing for it is expensive (EIZO’s monitors run upwards of several thousand dollars), opening up your video editor to be greeted by the flat, dull footage of your SDR based user interface of the video editor can be demoralising.
For instance, the clip we’ve used as an example is that of Lost Ark, a new role-playing game from Smilegate and Amazon, wherein the stallion behind the keyboard defeats a wicked demon boss. The issue is, when originally captured, the brave warrior forgot to turn off their HDR on the monitor before capturing. This then resulted in the footage looking like this:
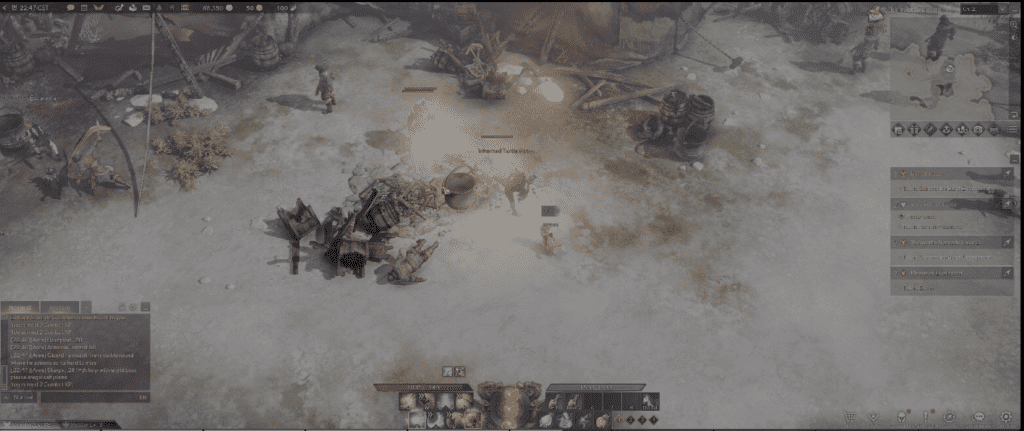
Horrible, right? Well, it’s actually easy to do a quick botch fix in post, but you’ll need to download and there’s a free method to do it with DaVinci Resolve, so if you happen to edit in your ‘acquired’ copy of Premiere Pro or other software, you might want to give it a download and check to see if you can run it comfortably.
However, I wouldn’t worry about smooth playback in the software itself, as we’ll be using the colour page, but if it’s going to become your primary editor, you might still want to consider the hefty specs it requires.
Import media
First, let’s import our footage by going to either the Media, Cut or Edit pages and hit CTRL+I (or right-click in the Media Pool and choose Import) to begin the importing process. Find your media and create a timeline to your liking. For this instance, we were in the midst of making a TikTok best settings and practices page, so we’ll be using custom settings.
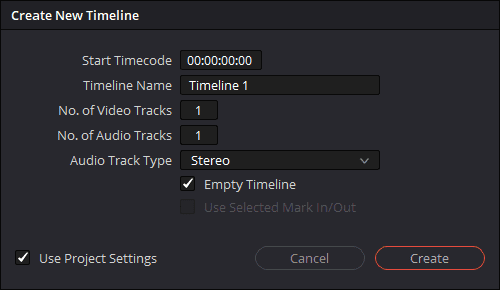
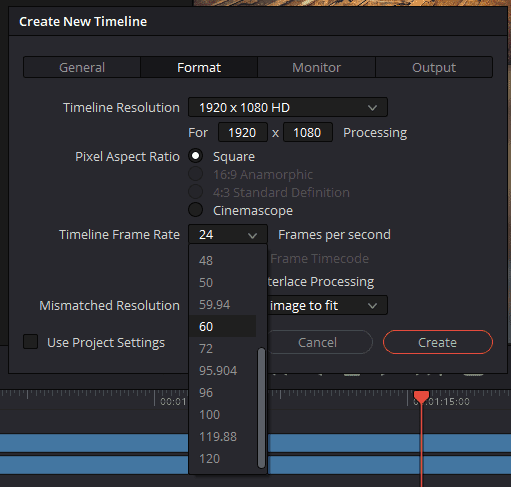
For gaming, you’ll want to choose custom, as it’s one of the ways to just simplify everything when bringing in footage to the timeline. Deselect Use Project Settings, then head into Format and choose your framerate to be more in line with 60FPS. Anything higher than 120 won’t work and most platforms don’t particularly support it just yet. If you chose to capture at 30FPS, set it to 30.
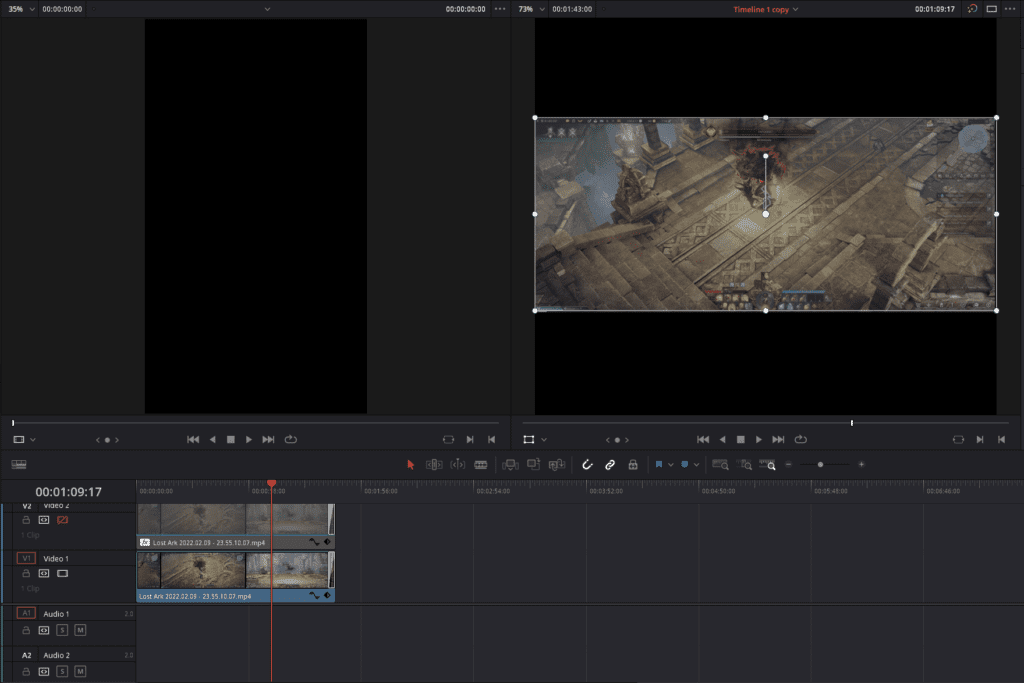
In your timeline now, you should see the dull-looking footage when you drag the whole thing onto it. Your Source Viewer should also be showing the same thing if you have one set up. There’s nothing we can really do from here, so head into the Color Tab to begin the process of converting your footage over into an SDR colour space.
Convert HDR to SDR
Now we’re not strictly ‘converting’, but it’s the nice catch all to the process and makes things simpler. You won’t get the original file to playback in SDR no matter what you try, so we’ll be creating a new file for you to use in the future.
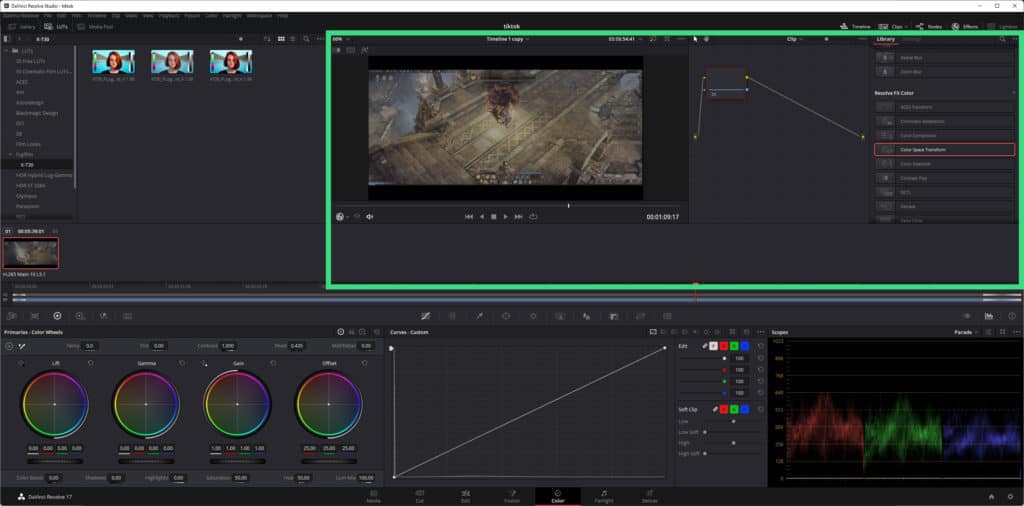
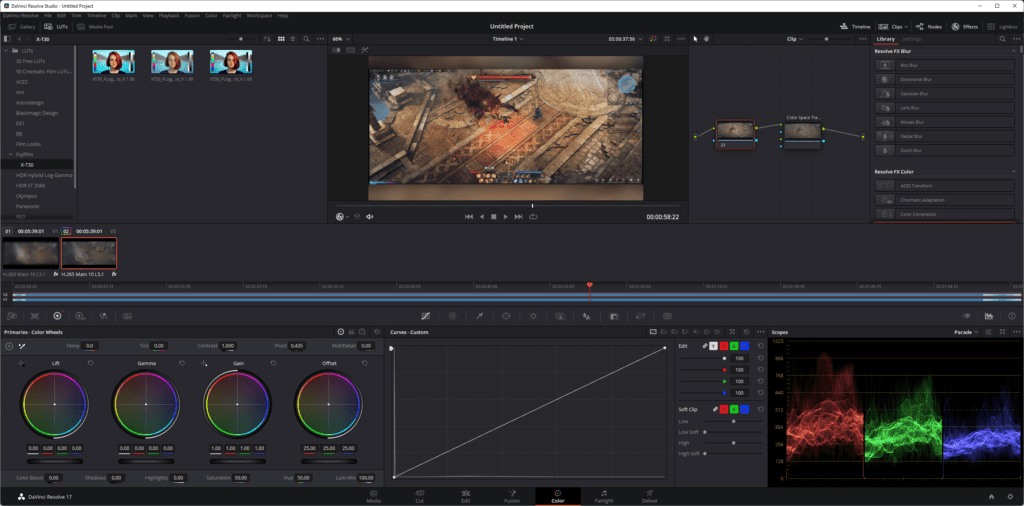
The Color Page might look intimidating if you’ve never used it before, but it’s broken down into several segments and for this tutorial, you won’t need to look at most of the stuff in here anyway.
We’ll be using the Library function, Node graph and source viewer (in green).
The Library function houses all the specific effects for the Color Page, along with some others that can be accessed elsewhere in DaVinci Resolve. We need to head into Resolve FX Color and choose Color Space Transform. This is where the magic happens.
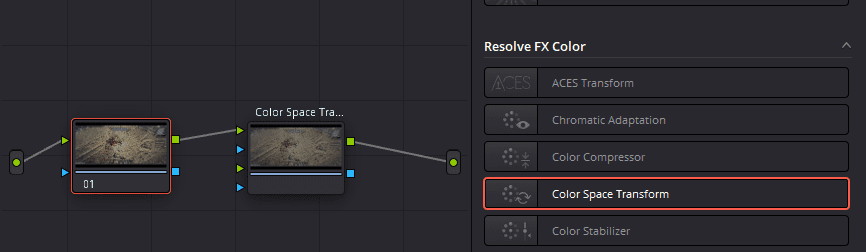
Color Space Transform allows us to convert our HDR colour spaces to that of SDR or others entirely. If you for some reason want to apply a specific LUT to the footage to mimic say, a Fujifilm F-LOG shot, you can do this by forcing the colour space to alter over into that one specific one.
Drag the effect onto the node graph and then connect up the green lines as indicated in the above screenshot. When you press that particular node, you’ll be given the options seen below.
HDR footage from NVIDIA’s ShadowPlay usually comes with the Colour Space of Rec.2020 (VLC will say BT.2020, but they’re the same thing) and an Input Gamma of either Rec.2100 ST2084 or just ST2084. Choose whichever one looks more natural to you. In the screenshot it might say I chose Rec.2100 ST2084, but I actually decided to go with just the regular ST2084.
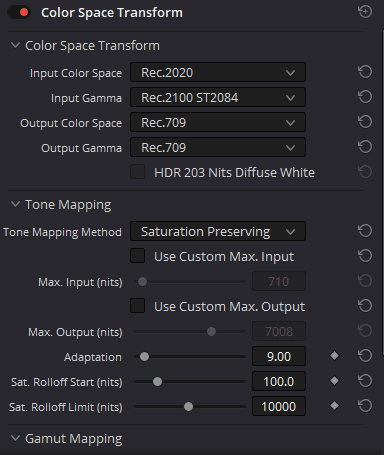
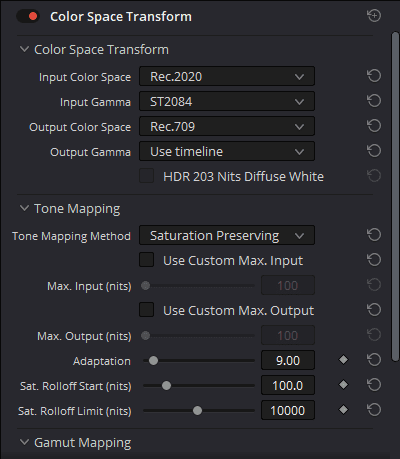
We then need to turn the footage’s spaces and gamma into Rec.709. 709 is used across every monitor as the very basic method of bringing colour data to the screens. The game might still look a little washed out, so you can make adjustments to the settings, but I found the defaults with Saturation Preserving made it look as close to how I think it should look on screen.
If you still feel that your footage isn’t matching up, make a new correction node after the Color Space Transform to make any further alterations with the colour wheels underneath.
This was the end result, embedded via YouTube for those scared of TikTok.
About the Author