
How To Add A Text Box In Google Docs

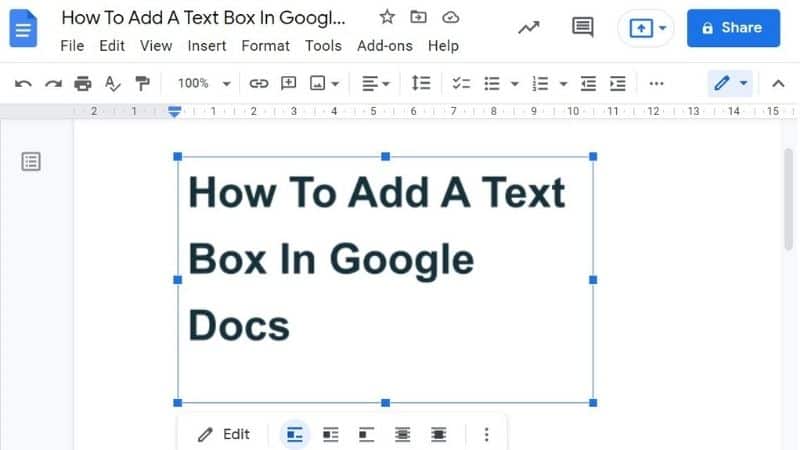
Table of Contents
How to add a text box or input field in Google Docs?
Google Docs is a free online word processor that allows you to create documents, spreadsheets, presentations, drawings, and forms. The service has become very popular since its launch in 2007.
Prime Day is finally here! Find all the biggest tech and PC deals below.
- Sapphire 11348-03-20G Pulse AMD Radeon™ RX 9070 XT Was $779 Now $739
- AMD Ryzen 7 7800X3D 8-Core, 16-Thread Desktop Processor Was $449 Now $341
- ASUS RTX™ 5060 OC Edition Graphics Card Was $379 Now $339
- LG 77-Inch Class OLED evo AI 4K C5 Series Smart TV Was $3,696 Now $2,796
- Intel® Core™ i7-14700K New Gaming Desktop Was $320.99 Now $274
- Lexar 2TB NM1090 w/HeatSink SSD PCIe Gen5x4 NVMe M.2 Was $281.97 Now $214.98
- Apple Watch Series 10 GPS + Cellular 42mm case Smartwatch Was $499.99 Now $379.99
- ASUS ROG Strix G16 (2025) 16" FHD, RTX 5060 gaming laptop Was $1,499.99 Now $1,274.99
- Apple iPad mini (A17 Pro): Apple Intelligence Was $499.99 Now $379.99
*Prices and savings subject to change. Click through to get the current prices.
But what if you want to include some other type of data, such as a number or date?
How To Add A Text Box In Google Docs – step by step
In this tutorial, I'll show you how to add a simple text box to a Google Doc.
Step
Create The Document
This will bring up the dialog shown below.

Click on “Other” from the list of options. A new window should appear with several templates available for your use. Choose the one called “Text Box”. Once you’ve done so, click OK.
The next screen shows an empty document. You can now begin adding content to it.
Step
Add Text
Click on the Insert tab, this will open up and present you with various options to insert into your document.
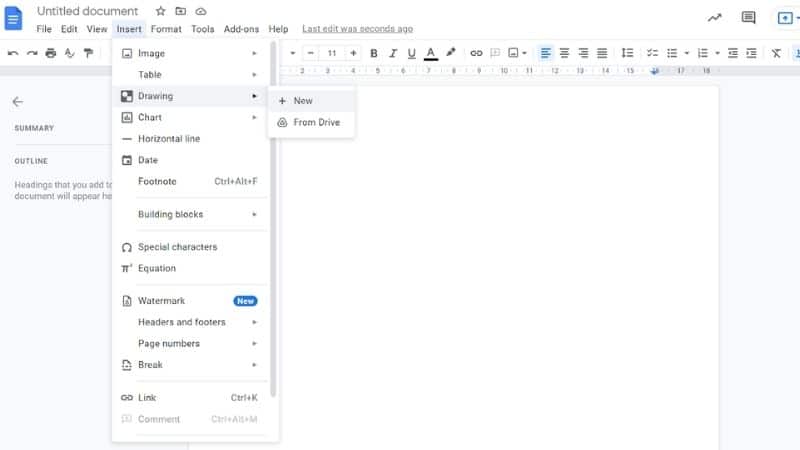
You will then be presented with a small menu containing all the different types of objects that are available to insert into your document. Click on the “Drawing” option and then “New”. Now, this may be an unusual way to start inserting a text box, but in Google Docs, this is how it's done. So, follow along to find out how it works!
Step
The Text Box Window
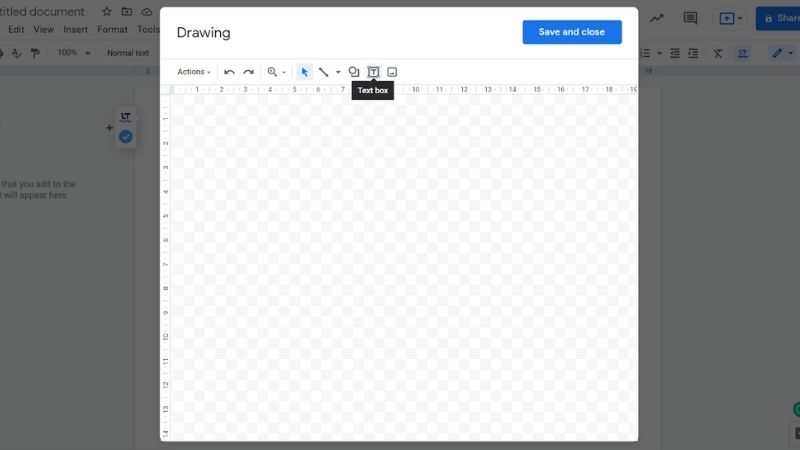
A new window will appear showing the current selection. Now we need to enter some text. So, click on the “text box” button along the top of the toolbar.
Step
Draw Your text Box Shape
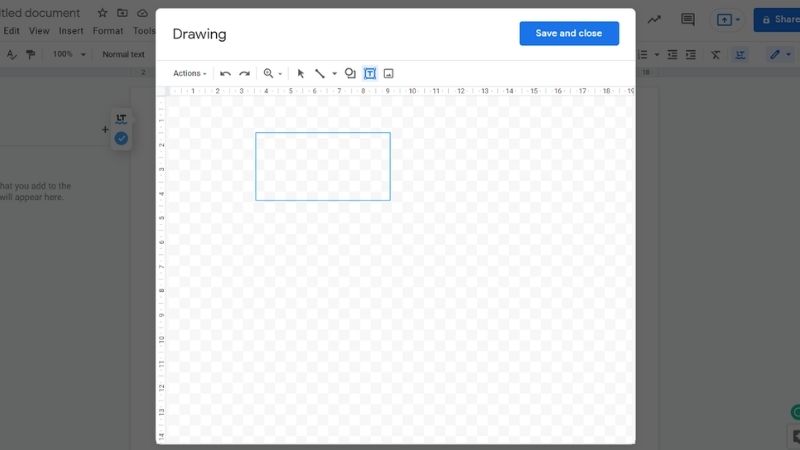
You're going to see a screen like this with the T in a box icon. Select this icon. Draw your text box as the image below shows.
Once you’re finished entering text, press Enter. Your text will be inserted at the cursor position.
Step
Writing Your Text
Type your text into the box that will show once you have drawn it. We've done a sample for you above showing what you could type into your text box.
Step
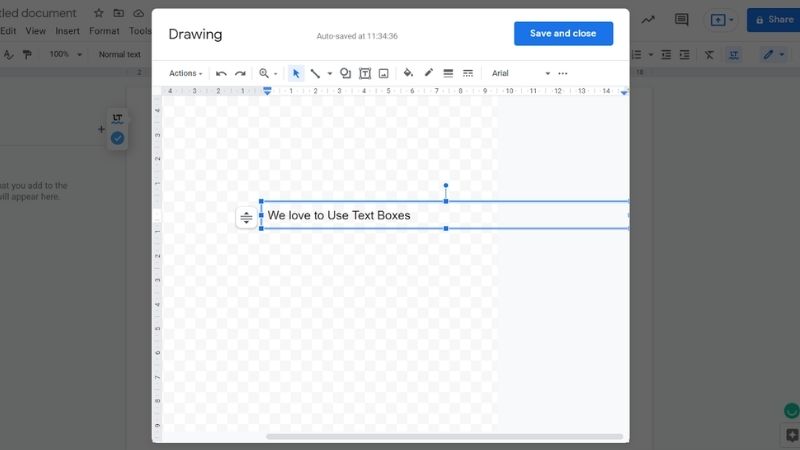
Save And Close
If you click the “Save and Close” Icon, this will secure your text box in place and insert it into your document as shown below.
![]()
Step
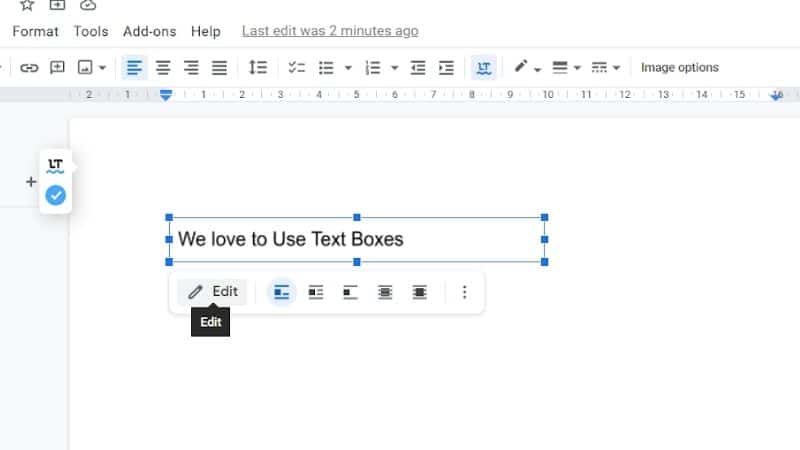
Editing
You can also edit your text box if you feel you would like to change the information you have typed. Or if you have made an error in the first attempt. So, don't worry if you've made a spelling mistake, simply select “Edit” on the text box you have created and edit it into your desired text.
Step
Formatting Text
To make your text look good, there are two main things you need to know about formatting. First, you need to understand the difference between font style and font size.
Font Style refers to the way letters are displayed. There are many fonts available, each with its own unique characteristics. For example, Times New Roman displays letters in a bolder fashion than Helvetica Neue Bold.
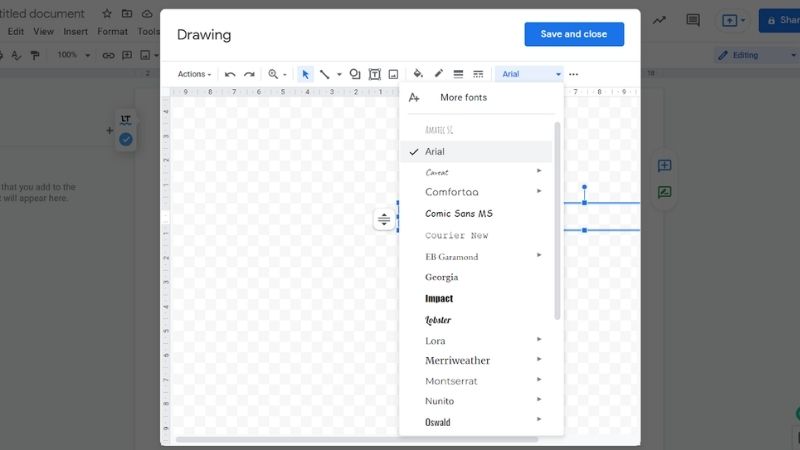
You can edit your font size and style through the editing stage of your text box, as shown above.
Final Thoughts
We hope that this article has shown you exactly how to insert a text box into your document and how you can alter and change it once it has been created! Google Docs is a fantastic tool to use, and using the text boxes is a great way to use it.
About the Author