
How to vertically mount a GPU in a few easy steps (with pictures)

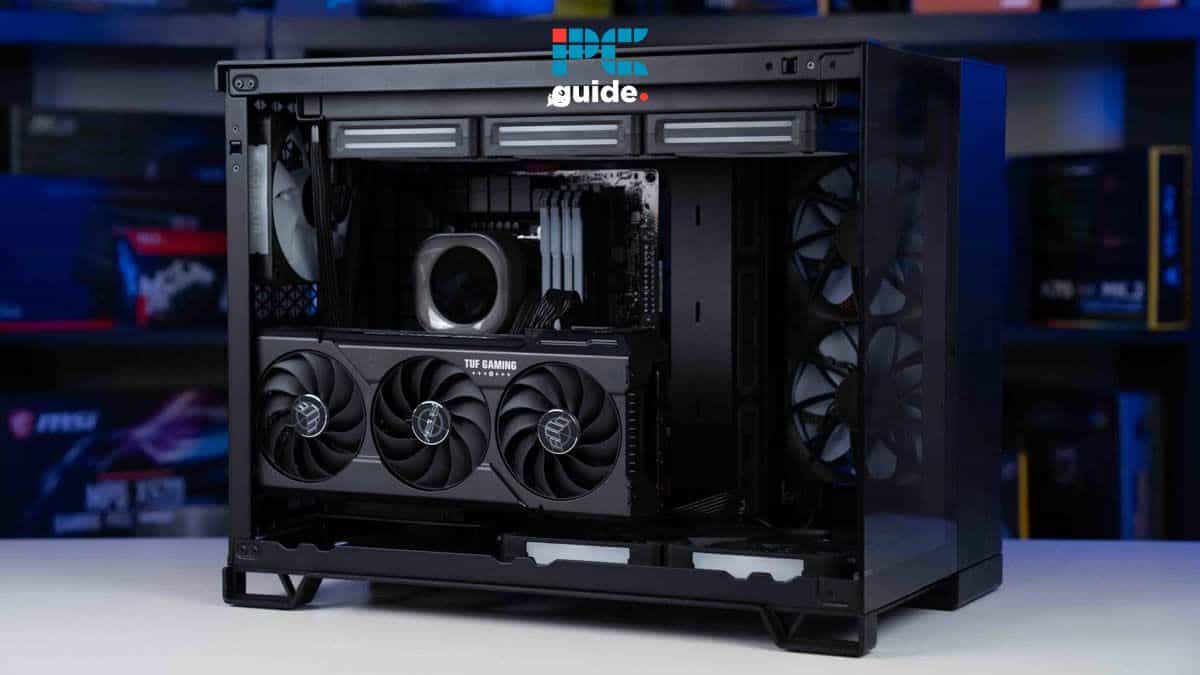
Table of Contents
Were you planning on vertically mounting your GPU? You've come to the right place, as we've got everything you need to know.
Mounting a GPU vertically adds something new to your build, as almost all builds have horizontally mounted GPUs. However, mounting your GPU vertically isn't as straightforward because the PC case and motherboard aren't designed in that orientation.
Prime Day is finally here! Find all the biggest tech and PC deals below.
- Sapphire 11348-03-20G Pulse AMD Radeon™ RX 9070 XT Was $779 Now $739
- AMD Ryzen 7 7800X3D 8-Core, 16-Thread Desktop Processor Was $449 Now $341
- ASUS RTX™ 5060 OC Edition Graphics Card Was $379 Now $339
- LG 77-Inch Class OLED evo AI 4K C5 Series Smart TV Was $3,696 Now $2,796
- Intel® Core™ i7-14700K New Gaming Desktop Was $320.99 Now $274
- Lexar 2TB NM1090 w/HeatSink SSD PCIe Gen5x4 NVMe M.2 Was $281.97 Now $214.98
- Apple Watch Series 10 GPS + Cellular 42mm case Smartwatch Was $499.99 Now $379.99
- ASUS ROG Strix G16 (2025) 16" FHD, RTX 5060 gaming laptop Was $1,499.99 Now $1,274.99
- Apple iPad mini (A17 Pro): Apple Intelligence Was $499.99 Now $379.99
*Prices and savings subject to change. Click through to get the current prices.
In this guide, we'll take you through the process of vertically mounting a GPU. So, let's get right into it.
Quick Answer
To vertically mount a GPU, you will need to remove the appropriate amount of expansion slots from the back of the case, and install a vertical mounting bracket in it.
What you'll need
Here are some tools you'll need to get the job done.
- iMBAPrice Anti-static wrist strap
- Amartisan magnetic screwdriver set
- Cooler Master vertical GPU holder kit V3
Here's how you can vertically mount your GPU
Follow these steps to successfully mount your GPU vertically.
Step
Turn off your PC
The first thing you need to do is to turn off your PC. Make sure to do it via Windows and not pull the plug directly, as that can lead to corrupted files as the system abruptly turns off.
After that, remove the power cable from the wall socket to ensure a complete electricity cut-off during mounting.
Step
Remove the side panel
Depending on your PC case, the side panel could be secured in place via normal screws or knurled screws that can be removed by hand. Remove those screws and slide off or unclip the side panel to remove it.
Step
Assemble the vertical mounting bracket
Take out the vertical mounting bracket from the case and ensure that it has the mounting kit, riser cable, and screws in it.
Vertical mounting brackets come in different shapes and sizes, but all serve the same purpose. However, you need to see if your casing has enough space to mount your GPU vertically without being too close to the side panel. That can lead to the GPU overheating as the hot air doesn't have an outlet.
Visualize where the vertical mount will go and remove the appropriate amount of expansion slots from the back. After that, if your mounting kit has two separate parts, attach them using the accompanying screws.

Step
Attach the PCIe riser cable
The mounting kit has a horizontal platform on which the GPU rests. You should find two attachment points on that platform on which one end of the PCIe riser cable will fit. Secure the riser cable using the screws, and you're good to go.

Step
Attach the vertical mounting bracket inside the case
Depending on how much space you have in your case, you can attach the riser cable to the motherboard's PCIe slot before or after attaching the vertical mount with your casing.
Align the mounting kit with the open expansion slots at the back, and take your time to make little adjustments for the perfect placement. Once you're sure about the placement, attach two screws, one at the top and the other at the bottom, and check again.
After that, fully secure the vertical mount in place by tightening all the screws.

Step
Mount the GPU
Take your GPU, remove any plastic film on it, and align it with the PCIe slot on the kit. Gently push it down and ensure it sets properly.
After that, secure the GPU bracket with the vertical mounting bracket.

Step
Connect the cables
Connect the HDMI or DPI cable at the back of the GPU, as well as the PCIe cable.

Step
Turn on the PC
Connect the power cable to the PC, turn on the PSU switch, and turn it on. If the GPU fans spin and everything works normally, the vertical mounting is successful.
Can you vertical mount a GPU inside any case?
You can't vertically mount a GPU in any case, as it depends on how much space there is inside. For example, you might have enough space to mount the GPU vertically, but the positioning of the expansion slots might push the GPU near the side panel, which is less than ideal as it needs room to dissipate the hot air.
Is it good to mount a GPU vertically?
Mounting a GPU vertically might look aesthetically pleasing, but from a functional perspective, it takes most, if not all, of the available PCIe slots, meaning you can't install anything else in your PC, such as a sound card.
Other than that, the positioning needs to be ideal so that the GPU isn't cramped near the side panel or the motherboard. This is important because side panels generally don't have vents, and hot air needs to be let out for adequate airflow and lower temperatures.
Wrapping up
This was everything you needed to know about how to vertically mount a GPU, and we hope that our step-by-step guide helped you achieve your dream build. One thing to note is that a vertical GPU might look nice as it is different from the normal horizontal mount, but extra attention is required regarding its placement. It also takes up more space, meaning you can't connect additional devices.
That said, a large casing should help with the placement and airflow issues, and we've got you covered there as well. Check out our best full tower case guide for the top picks available.
About the Author