How to Make Private Ring Doorbell With Raspberry Pi

Table of Contents
Ring doorbells aren't exactly the most secure things in the world and having to maintain a complete connection with Amazon's servers to maintain footage or photos of those who come up to your door is going to be a bit of a hassle if Amazon ever pull the plug on the brand.
There's also the fact that they seem to have a habit of sharing footage with law enforcement and potentially using the footage for their own means (we can't all read every line of the extravaganza that is their privacy policy). So let's build our own doorbell that can store photos, video and alert us in two different ways via IFTTT, Python and a doorbell sound.
Prime Day is finally here! Find all the biggest tech and PC deals below.
- Sapphire 11348-03-20G Pulse AMD Radeon™ RX 9070 XT Was $779 Now $739
- AMD Ryzen 7 7800X3D 8-Core, 16-Thread Desktop Processor Was $449 Now $341
- ASUS RTX™ 5060 OC Edition Graphics Card Was $379 Now $339
- LG 77-Inch Class OLED evo AI 4K C5 Series Smart TV Was $3,696 Now $2,796
- Intel® Core™ i7-14700K New Gaming Desktop Was $320.99 Now $274
- Lexar 2TB NM1090 w/HeatSink SSD PCIe Gen5x4 NVMe M.2 Was $281.97 Now $214.98
- Apple Watch Series 10 GPS + Cellular 42mm case Smartwatch Was $499.99 Now $379.99
- ASUS ROG Strix G16 (2025) 16" FHD, RTX 5060 gaming laptop Was $1,499.99 Now $1,274.99
- Apple iPad mini (A17 Pro): Apple Intelligence Was $499.99 Now $379.99
*Prices and savings subject to change. Click through to get the current prices.
What is IFTTT?
Setting up the Doorbell Sound #2
You'll need to provide your own sound and place it in the same file as your Python code for it to find it. You can use whatever you want.
Next we're going to need to define the bell actually being rung when the button is hit, so we'll go:
def ring():
r = requests.post('maker.ifttt.com/trigger/YOUR_THING_HERE/with/key/YOUR_KEY_HERE
sound.play()
print("Ding dong!")
In IFTTT's WebHook documentation page it'll give you options for JSON, but we don't need it so only include them if you think you'll scale up to JSON in the future.
But here, all we're doing is telling Python that whenever our own piece of code is activated by the button we're going to install later, to hit the WebHook and bring down a notification.
This is ideal if you don't have a PIR sensor and still want to be included!
If you don't have a PIR sensor and want to complete the doorbell as is, skip ahead to when we install the button further down the page.
Now let's get the sensor up and running before we move back to the doorbell itself.
PIR Sensor Python Code
while True:
filename = strftime("/home/pi/Desktop/image-%d-%m %H:%M-%S.jpg", gmtime())

vid_filename = strftime("/home/pi/Desktop/image-%d-%m %H:%M-%S.h264", gmtime())

doorbell.when_pressed = ring

print("Waiting for Motion")

sen.wait_for_motion()

print("Detected Motion")

r = http://requests.post('https://maker.ifttt.com/trigger/YOUR_TRIGGER/with/key/YOUR_KEY_HERE')

cam.annotate_text = strftime("%Y-%d-%m-%H:%M:%S")

cam.capture(filename)

print("Photo Saved")

cam.start_recording(vid_filename)

print("Recording...")

cam.wait_recording(10)

cam.stop_recording()

print("Recording saved")

time.sleep(5)
Code Explainer: PIR Sensor
The ‘while True:' statement triggers the rest of the script, but leaves it running on a loop. This was the one of thing that stopped me from working with PIR sensors at first, as I thought all the ones I had ordered had broken upon wrong wiring. Turns out, the script just needs to know to reset the sensor at the end.
This is why sandwiched right at the bottom is a ‘time.sleep(5)' function, as we really don't want every little motion to trigger this thing off and take six thousand photos because of a leaf. This will force the Pi to take a break, reset the loop in five seconds. You can set this to whatever you want, but I found five to be enough for a security camera.
You'll notice that I'm still saving everything to the Desktop, which is wrong. You should save these to an external SSD for best performance as saving directly to the SD card will result in your entire system slowing down when you've finished taking photos.
Just take note of your directory you want to save to and point the code there.
The time format is dictated by the strftime and gmtime, but also allows the program to save individual images and videos instead of just overwriting everything.
While it's not wired up, we might as well still put in the doorbell code, which we're going to indicate with doorbell.when_pressed = ring and let our user know if they can see the shell terminal that it is currently waiting for motion with a print command.
Then, have it wait with the sen.wait_for_motion() and tell the user that motion has been detected with another print command.
Keeping up? Because this is where you can deviate if you wish.
In IFTTT, if you decided to go with two different action sets, you should take note of the other command to tell the sensor to ping WebHook with the information to send you another notification set instead of just the bog-standard one from the well-written notification.
Before we trigger the camera on, we need to tell it to write some text over the top. The font is weird and to be honest, it's clear enough to read for any valuable use, so let's roll with it.
Then we activate the camera! The camera code included is mostly focused on taking a photo on motion and then recording the ten seconds after for any further evidence needed. Then it tells us if it's finished the job.
Once this is done, we loop back through with the ‘while True'.
Wiring up a ‘doorbell' to the Pi
Lastly, we need to wire up our doorbell. Take a button, I have some from the Elegoo set and connect one leg to a ground and one to PIN 17.
After this, the last bit of code for our friends who aren't with a PIR sensor goes like this:
doorbell.when_pressed = ring
So skip the previous steps and just run this bit.
Tidying it up and putting it all into a case is going to come soon, but for the time being, get some ideas of where to print cases with our articles on 3D Printers, as well as the plentiful resources online.
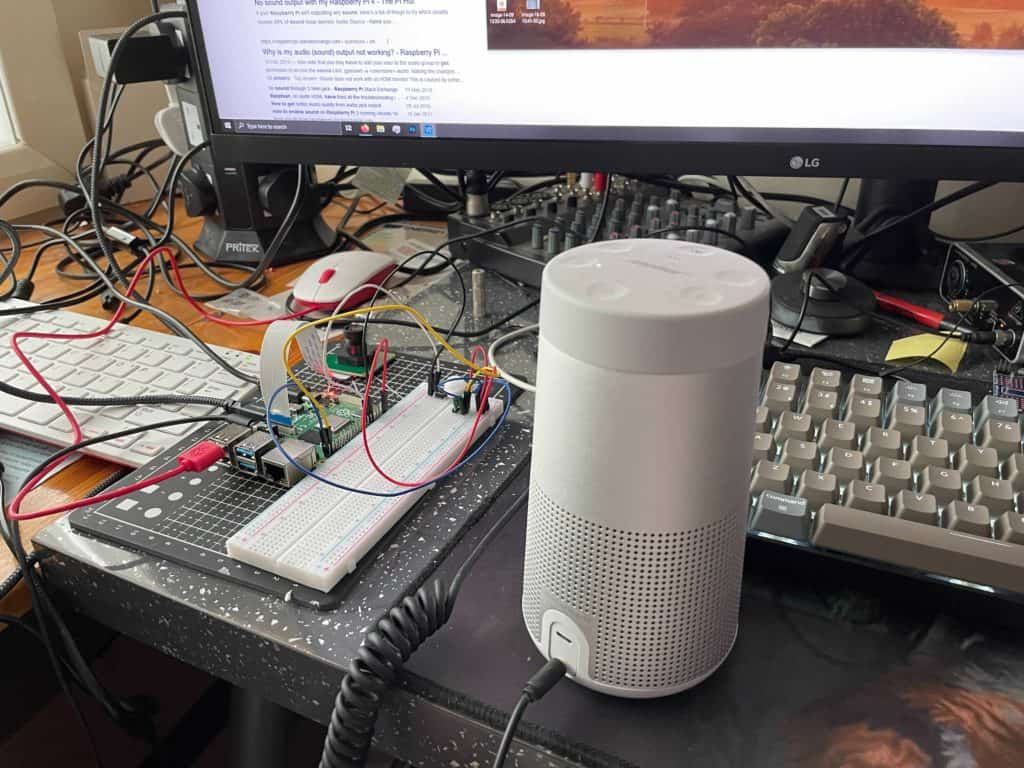
Right now though? We've got a working prototype of our very own Ring camera that doesn't distribute files online for the police to take and misconstrue! The only thing you'll need to add extra outside of any tidying is a simple 3.5mm speaker or connect the Pi to a Bluetooth speaker to hear your doorbell sound!
IFTTT stands for If This Then That, a freemium service that connects different services together and then when one is triggered, it sets off another. The free version allows us to work with three different actions and each action can do two things. If you wanted to spend some money on the Pro version you're more than welcome, but we'll be working on the free version for this project.
What do we need?
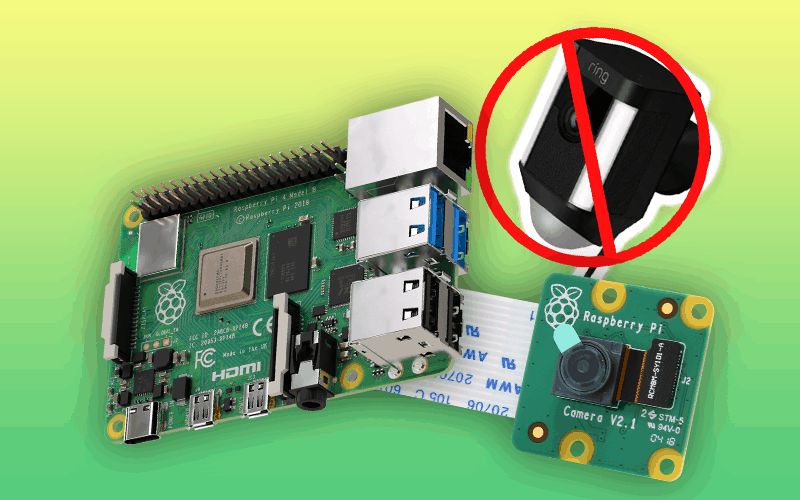
I'm using a Raspberry Pi 4 for this project, but a Raspberry Pi Zero W (the one with internet connectivity) will also do a great job.
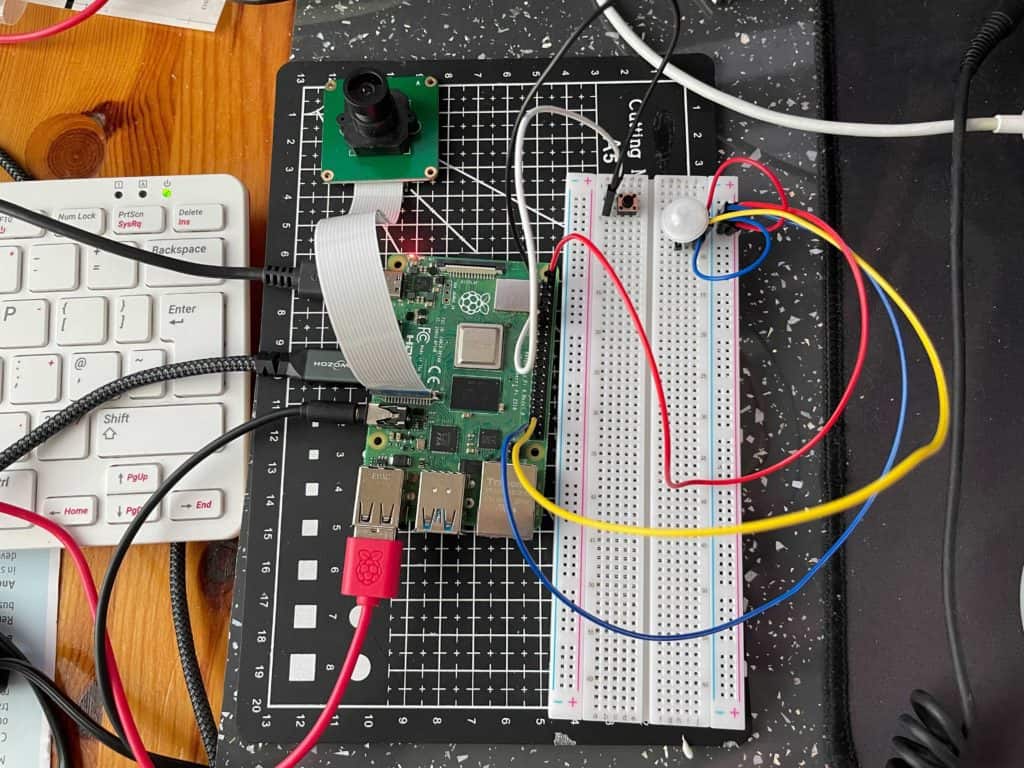
Because we're just prototyping for now, a breadboard, wires (female to male and male to male), a button and a PIR sensor. The Elegoo Ultimate Pack comes with everything, but the one thing I'm using different is something from another brand. It works in a similar way, just without the sensitivity knobs on the side.
A PIR sensor uses infrared to detect motion, it can be quite sensitive so don't move the plastic top or it'll go haywire.
A small speaker or Bluetooth speaker to hear the ring.
Let's also make sure our Raspberry Pi is ready and updated by doing:
sudo apt-get update
sudo apt-get upgrade
Powering the PIR Sensor via GPIO
Let's begin by turning off the Pi if it's still on and connect the wires up. On the breadboard, plug in your PIR sensor and make not of which sides are positive and negative, the middle should usually be your activity pin.
With it plugged in, plug in two easily identifiable FEMALE TO MALE wires into the positive and negative rails on the very end of your breadboard, ensuring they're in the same line. Then, take two similar male-to-male wires, plugging those from the positive and negative rails into the PIR sensor's own positive and negative.
This doesn't need to be directly behind the pins, just the same row/column behind it. I have them situated just one space behind it.
Now we have power set up, let's give it some juice. Take the positive to a FIVE VOLT PIN (top two on the left next to the yellow hole at the very top) and then your negative to a ground pin.
Choose an activity wire and plug it into the third pin on your PIR sensor and plug it into PIN 26 (you might want to choose the ground next to it) and we can begin coding.
Setting up IFTTT for Raspberry Pi
We need IFTTT to alert our phone that someone has either been detected or someone has rung the bell. We can use either clever wording in the notification or use two of the three free actions we can create to do what we need to do. Take your pick, I'll still guide you through both.
In IFTTT, begin by creating your first action choosing WebHooks and Notifications. WebHooks is a service that receives information or sends it over the web for an end result, the notifications will allow the IFTTT app on your phone or tablet to send push notifications without having to use PushBullet.
For WebHooks, we want to just receive a web request. This will push you to the next page to name the event. Name it what you want, but make sure you change the code that we have featured here to match that if you do deviate.
We went with door_seen for the web request and then the notification we just chose a simple IFTTT push notification.
Once this is done, we need to grab the WebHook Key from the app which we can do by clicking the WebHook logo in the completed applet and then Documentation. Make note of this as it's vitally important for the Pi to talk to IFTTT.
In the same Documentation page you'll find the string of code needed to bring everything together later on, where you'll also put in your event name.
That's it for IFTTT right now, head into Thonny or your favourite Pi IDE and we'll begin the actual scripting process.
Python to IFTTT via the Raspberry Pi
For our little doorbell and sensor, we're going to be using Python 3 and going to need to bring in some libraries along with it.
If you followed our instructions for the Pi Camera, you'll recognise some of these and if you're brand new, we'll be taking you through them anyway.
from gpiozero import Button, MotionSensor import requests import time
from time import gmtime, strftime
from pygame import mixer
from picamera import PiCamera
Code Explainer: Libraries for Sensor
Here, we've told Python to bring in the GPIO Pins, but to only bring in the Button and Motion Sensor information.
To get Requests, you'll need to head into your terminal and use:
pip install requests
If you haven't got pip installed, you can do so by using the terminal and typing:
sudo apt-get install python3-pip
Pip is a simple way to pull down needed files and libraries from resources that support it.
Requests is described as being built for humans and is a fairly simple way to interact with the web.
Of course, we'll need time and two alternatives for file names and annotations on the images being captured.
pygame is a resource that features a lot of different tools for Python to take advantage of, but we only need the sound-producing module for it here, so that's why we're only importing mixer.
If it's not already installed do so by:
pip install pygame
And of course, the camera module, bringing in the hardware via PiCamera.
Setting up the Doorbell Sound #1
Next we need to define the hardware to the pins it is using and to tell Python what we intend to call them:
doorbell = Button(17)

cam = PiCamera()

sen = MotionSensor(26)
Next, define some file names. I'm not a master of python, but when cobbling this code together in an attempt to stop images overwriting one another, this worked for me.
filename = ""

vid_filename = ""
And to initialise the Mixer, as well as bring in a chosen sound:
mixer.init()

sound = mixer.Sound('doorbell-1.wav')


