
How to log in to your Cox router – our step-by-step guide

Reviewed By: Kevin Pocock
Table of Contents
If you can’t seem to figure out how to log in to Cox router, we’ve got you covered right here with our walkthrough guide.
Logging in to your Cox router allows you to access the admin panel. From here, you can manage the settings and do tasks like changing the WiFi name and password, restricting websites using parental controls, and monitoring internet usage. In simpler words, you will need to log in to your Cox router at some point to manage your network.
Prime Day is finally here! Find all the biggest tech and PC deals below.
- Sapphire 11348-03-20G Pulse AMD Radeon™ RX 9070 XT Was $779 Now $739
- AMD Ryzen 7 7800X3D 8-Core, 16-Thread Desktop Processor Was $449 Now $341
- ASUS RTX™ 5060 OC Edition Graphics Card Was $379 Now $339
- LG 77-Inch Class OLED evo AI 4K C5 Series Smart TV Was $3,696 Now $2,796
- Intel® Core™ i7-14700K New Gaming Desktop Was $320.99 Now $274
- Lexar 2TB NM1090 w/HeatSink SSD PCIe Gen5x4 NVMe M.2 Was $281.97 Now $214.98
- Apple Watch Series 10 GPS + Cellular 42mm case Smartwatch Was $499.99 Now $379.99
- ASUS ROG Strix G16 (2025) 16" FHD, RTX 5060 gaming laptop Was $1,499.99 Now $1,274.99
- Apple iPad mini (A17 Pro): Apple Intelligence Was $499.99 Now $379.99
*Prices and savings subject to change. Click through to get the current prices.
To help you out, we’re going to explain how to access Cox router settings by logging into your Cox router. The step-by-step guide will also tell you where to find the login details.
Quick Answer
Connect your device to your Cox router > Open your web browser > Enter the router’s IP address > Input your login credentials > Manage Cox router settings > Log out when you’re done
How you can log in to your Cox router
Here are the steps you need to follow to log in to your Cox router:
Step
Connect to your Cox router
Ensure your computer, laptop, or smartphone is connected to your Cox router. You can do this by establishing a wireless connection or using an Ethernet cable.
Step
Open a web browser
Launch your preferred web browser on your device. Popular web browsers include Chrome, Firefox, and Safari. Make sure you are using the latest version for optimal performance.
Optionally, if you are using an Arris TG1682 Panoramic Wifi Gateway, Technicolor CGM4331, Technicolor CGM4141, or CommScope TG4482 you can use the Cox Panoramic WiFi app.
Step
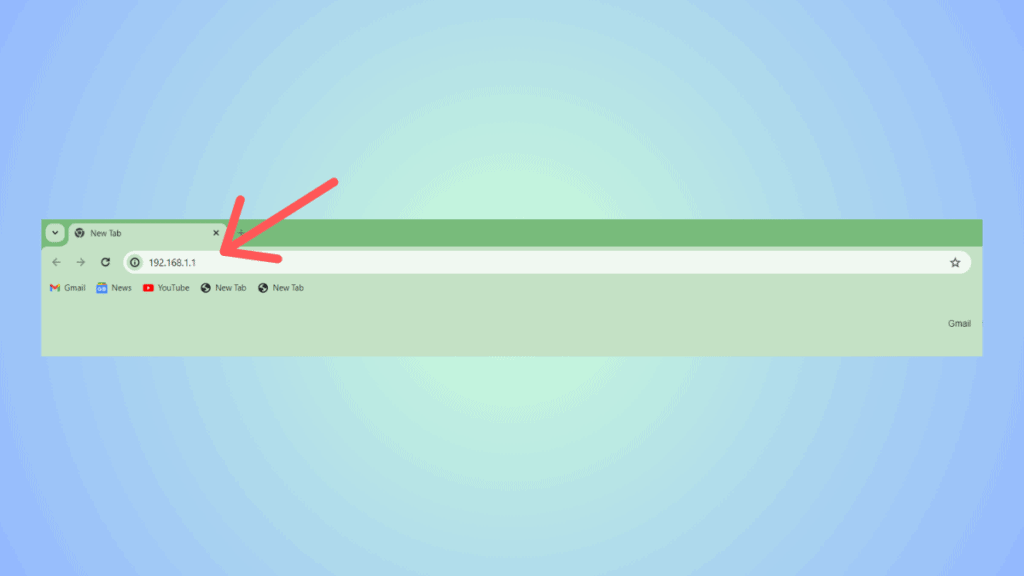
Enter the router’s IP
In the address bar of your web browser, type in the IP address for your Cox router. The IP address is usually 192.168.0.1 or 192.168.1.1. Press Enter.
Step
Enter your login credentials
You will be directed to the Cox router’s login page. Here, enter your login credentials. The default login username should be “admin” and the password should be “password”. If you want to find your exact details, you can check out the sticker on the bottom of the router or the user manual.

If you have changed them previously, use the updated login information.
Step
Access Cox router settings
After entering your login credentials, click the “Login” or “Submit” button. This will grant you access to your Cox router’s settings.
Step
Customize your router settings
You have successfully logged in to your Cox router. Now, you can customize various settings to suit your preferences. You may want to change your Wi-Fi network name (SSID), set a new password, or adjust security settings.
Step
Save your changes
Once you have made the desired changes, be sure to save them. Look for a “Save” or “Apply” button on the router’s settings page. Click on it to save your modifications.
Step
Logout from your router
After saving your changes, it’s essential to log out of your Cox router for security reasons. Look for a “Logout” or “Sign Out” button on the router’s settings page. Click on it to log out.
How can I reset my Cox router login password?
In case the Cox router default login password is not working or you forgot the credentials, you’ll need to factory reset your router. This will take it back to its default settings, and you’ll have to set up everything from scratch. To factory reset your Cox router, press and hold the reset button, which can be found on the back of the device. After 15 seconds, let go of the button and wait for the reset process to finish.
How can I find the IP address for my Cox gateway?
To find the router’s IP address, check the back or bottom of your router for a label displaying the default IP address. Commonly used addresses are 192.168.0.1 or 192.168.1.1.
What is the default username and password for Cox router?
The default username is ‘admin’, and the default password is either ‘password’ or ‘admin.’ Remember to change these to something else after you get the router to keep your network secure.
Conclusion
Logging in to your Cox WiFi router doesn’t have to be a daunting task. By following these simple steps, you can quickly access your router’s settings and customize them according to your preferences, especially when using the integrated Cox app. Remember to save your changes and log out for enhanced security. Enjoy a seamless internet experience with your Cox router. If you are still experiencing issues even after following these steps, then we recommend that you contact Cox customer support.
If you’re planning to upgrade your current router, check out our top picks for the best router for Cox.
About the Author