How to Fix Modern Setup Host – High CPU and Disk Usage
Table of Contents
Modern Setup Host is a piece of software designed by Microsoft that is baked into every PC and version of Windows 10 and 11 to handle the update process that they now do in the background. The issue is, that this program can often suck up resources it isn’t supposed to, mainly due to a number of reasons.
Why is Modern Setup Host using 100% of my Disk?
Last Resort: Disable Updates
Prime Day is finally here! Find all the biggest tech and PC deals below.
- Sapphire 11348-03-20G Pulse AMD Radeon™ RX 9070 XT Was $779 Now $739
- AMD Ryzen 7 7800X3D 8-Core, 16-Thread Desktop Processor Was $449 Now $341
- ASUS RTX™ 5060 OC Edition Graphics Card Was $379 Now $339
- LG 77-Inch Class OLED evo AI 4K C5 Series Smart TV Was $3,696 Now $2,796
- Intel® Core™ i7-14700K New Gaming Desktop Was $320.99 Now $274
- Lexar 2TB NM1090 w/HeatSink SSD PCIe Gen5x4 NVMe M.2 Was $281.97 Now $214.98
- Apple Watch Series 10 GPS + Cellular 42mm case Smartwatch Was $499.99 Now $379.99
- ASUS ROG Strix G16 (2025) 16" FHD, RTX 5060 gaming laptop Was $1,499.99 Now $1,274.99
- Apple iPad mini (A17 Pro): Apple Intelligence Was $499.99 Now $379.99
*Prices and savings subject to change. Click through to get the current prices.
If for whatever reason, this becomes a regular occurrence and upgrading or replacing the hardware just isn’t an option, you can turn off Windows Updates altogether.
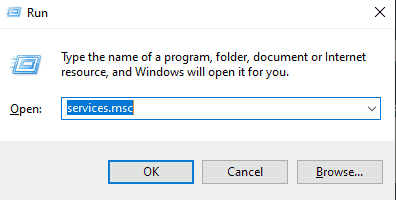
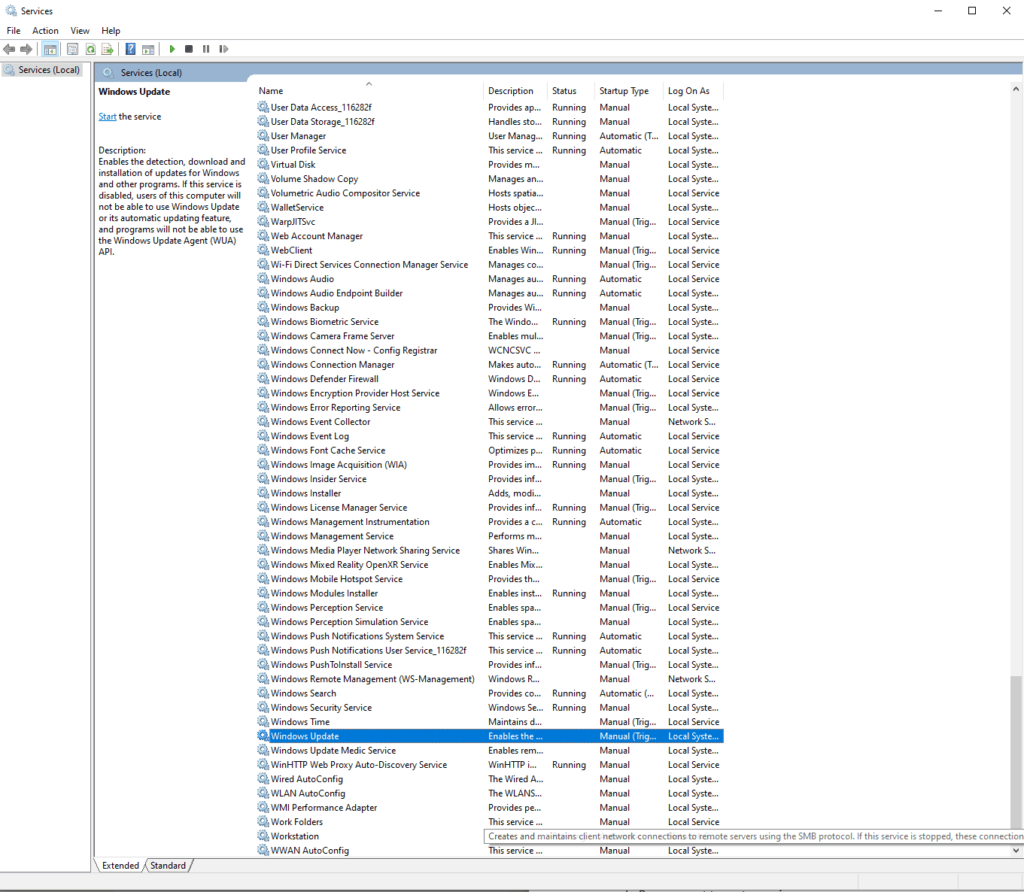
Kill the Process as stated above, then in Start/Search type ‘Run’. In Run, we want to go to services.msc.
Change Windows Update Properties
This will bring up the Services menu, it’s a thick list of everything that the PC does on a frequent basis and can be very damaging to the PC if you begin to wander off to change various settings.
Run down the list and find Windows Update, right-click and go to Properties.
In the Properties Menu we only really need to change a couple of settings, both in drop-down menus. First, Startup Type, choose Disable, and following that, Recovery, choose the first option which should be set to automatically try again once it fails. Again disable this by choosing ‘Take No Action’.
This is the last resort to take, as disabling the Windows Update for too long can leave your PC vulnerable to viruses, attacks, or ransomware.
Because Modern Setup Host (MSH) is made to bring updates to Windows with as little trouble as possible, it’s got to use your disk drive to download them. However, because Windows 10 is pretty agnostic with specifications – unlike Windows 11 – it can find itself installed on hardware that just can’t cope with the speed at which it is expected to keep up.
If your disk drive is failing, old or you’ve canceled the Modern Setup Host via one of the methods below, you might find that an excess of old data has begun to clog up the system, that it is actively trying to delete the many files that have found themselves in your drive.
Why is Modern Setup Host using 100% of my CPU?
As said above, if the specifications of your machine don’t match with the modern needs, you can find that your PC just might not make the cut. However, as well as mentioned above, the PC might be working frantically to not only pull in a download connection but also clear the PC of old data at the same time.
Essentially, it might be time to upgrade.
How to fix Modern Setup Host
Follow the steps below and we’ll take you through what to do! It’s very easy, but you’ll find that it’ll either alleviate the various issues you’re running into.
Task Manager
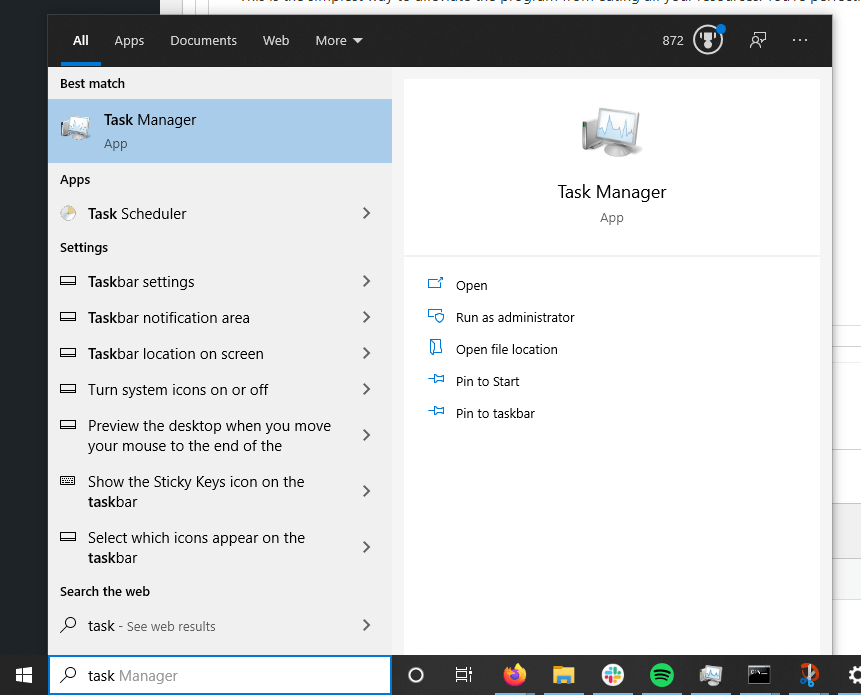
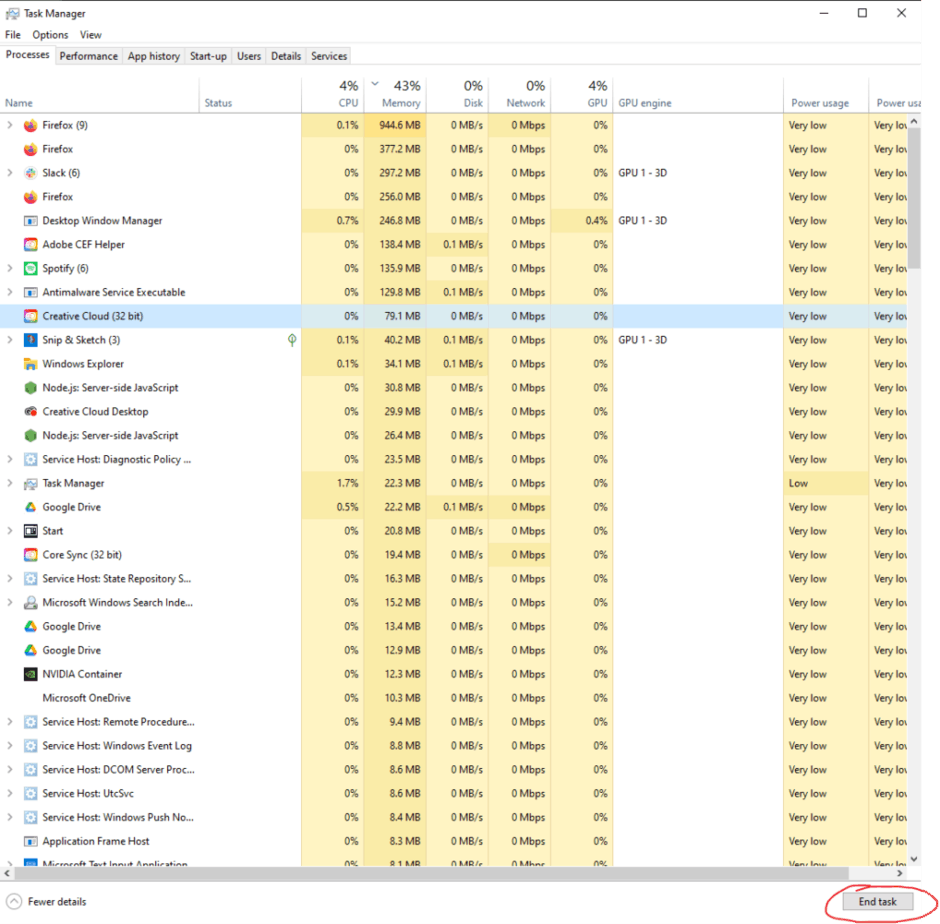
Head to the Start Menu or Search Bar/Button, then search for Task Manager. You can also hit CTRL+ALT+Delete, then select Task Manager.
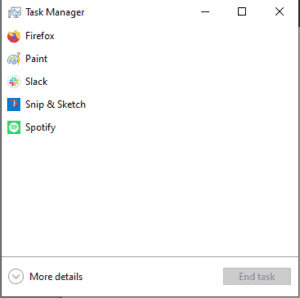
If you end up with a little box and not the full-sized as shown in the picture above, then just press More Details in the corner.
While the PC I’m on actually is fully updated and doesn’t feature the MSH in the list, we’ll use an equally irritating program to demonstrate.
End Process
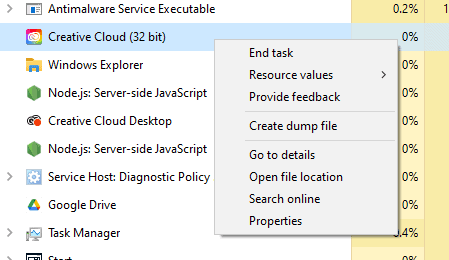
There are two methods to doing this, you can either highlight the program and hit End Process, this will immediately kill the program and stop it in its tracks. There’s also a dedicated button at the bottom.
Be aware, doing this can have minor consequences if the PC was mid-download or mid-deletion, which can lead to it repeating the same issues once you restart or reboot the program manually.
Command Line
This is a little bit more… high-tech, but you only have to copy three lines and wait a little bit. To start, of course, head to Start. Type in CMD to bring up the Command Prompt.
Don’t click as usual, but right-click to bring up the contextual menu and Run as Administrator. We need the elevated controls to get this to work.
The fearsome black box will appear, but don’t get scared off, as we’ll have it under our control sooner than later.
DISM.exe
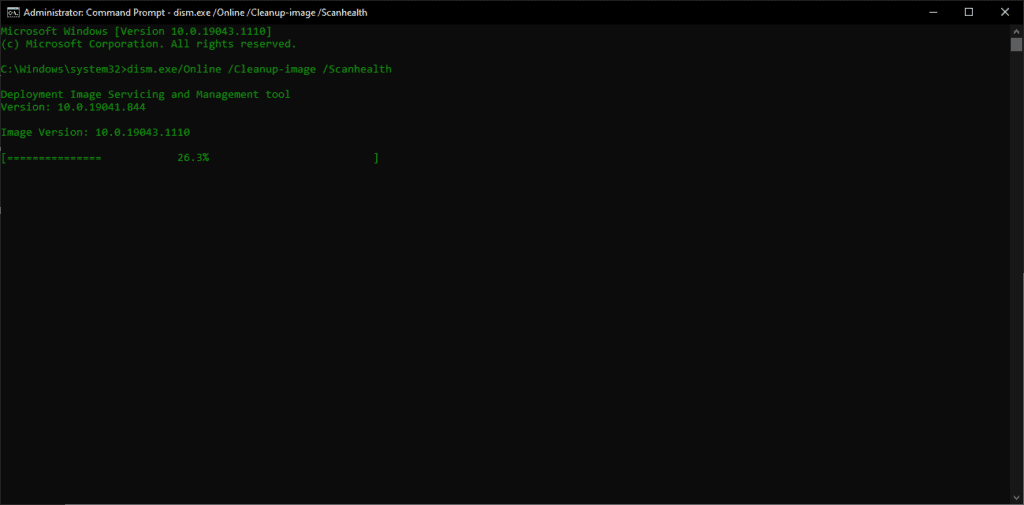
Once in, we’ll be handling the DISM.exe, Deployment Image Servicing, and Management, which essentially hits the drive with another level of preparedness for updates and installs.
Run the following commands, waiting for each one to finish before the next. You can copy these off this page as usual but just right-click in the Command Prompt to paste into it, as CTRL+V might not work.
DISM.exe /Online /Cleanup-image /Scanhealth
DISM.exe /Online /Cleanup-image /Checkhealth
DISM.exe /Online /Cleanup-image /Restorehealth


