Check the CPU usage using these 4 methods
Table of Contents
If you want to learn how to check CPU usage so you can get rid of applications that are taking a toll on the processor, you’ve landed on the right page.
If your PC has been lagging or crashing recently and you can’t figure out why it’s happening, then it would be wise to check if the CPU is under load or not. Some applications can end up consuming a lot of CPU, which can affect the overall performance of your system. In such a case, you need to identify these applications and get rid of them as soon as possible.
Prime Day is finally here! Find all the biggest tech and PC deals below.
- Sapphire 11348-03-20G Pulse AMD Radeon™ RX 9070 XT Was $779 Now $739
- AMD Ryzen 7 7800X3D 8-Core, 16-Thread Desktop Processor Was $449 Now $341
- ASUS RTX™ 5060 OC Edition Graphics Card Was $379 Now $339
- LG 77-Inch Class OLED evo AI 4K C5 Series Smart TV Was $3,696 Now $2,796
- Intel® Core™ i7-14700K New Gaming Desktop Was $320.99 Now $274
- Lexar 2TB NM1090 w/HeatSink SSD PCIe Gen5x4 NVMe M.2 Was $281.97 Now $214.98
- Apple Watch Series 10 GPS + Cellular 42mm case Smartwatch Was $499.99 Now $379.99
- ASUS ROG Strix G16 (2025) 16" FHD, RTX 5060 gaming laptop Was $1,499.99 Now $1,274.99
- Apple iPad mini (A17 Pro): Apple Intelligence Was $499.99 Now $379.99
*Prices and savings subject to change. Click through to get the current prices.
Luckily, there are four different ways to check CPU usage, which can also show you how much CPU each individual application is using.
Quick Answer
The quickest way to check CPU usage is by opening the Task Manager > Performance > CPU. Alternatively, you can also use the Command Prompt, Resource Monitor, or a third-party tool like HWInfo to check the CPU usage.
How to check CPU usage
Here are different methods that can help you monitor your CPU usage.
Step
Using Task Manager to check CPU usage
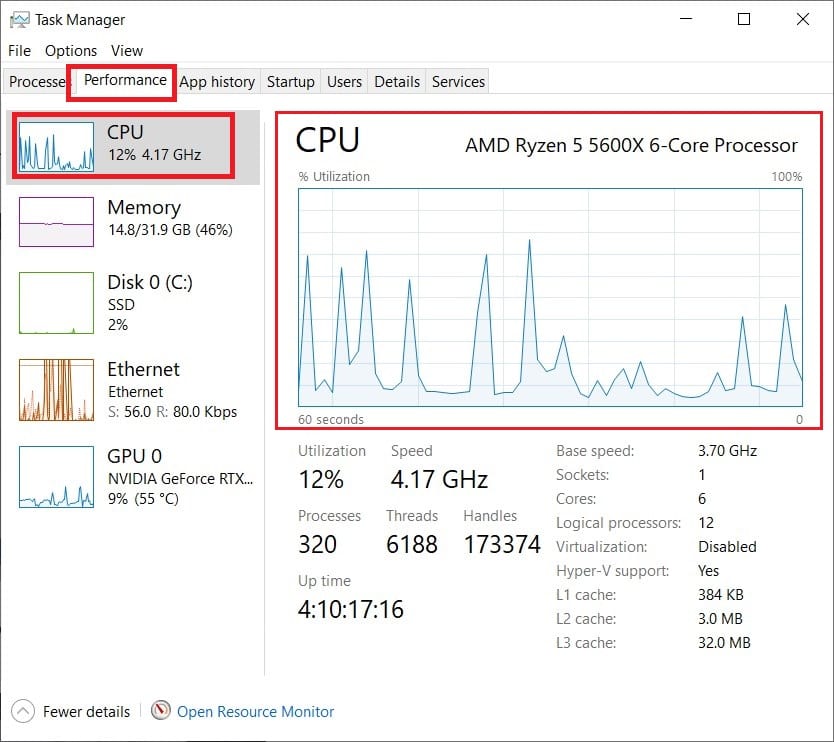
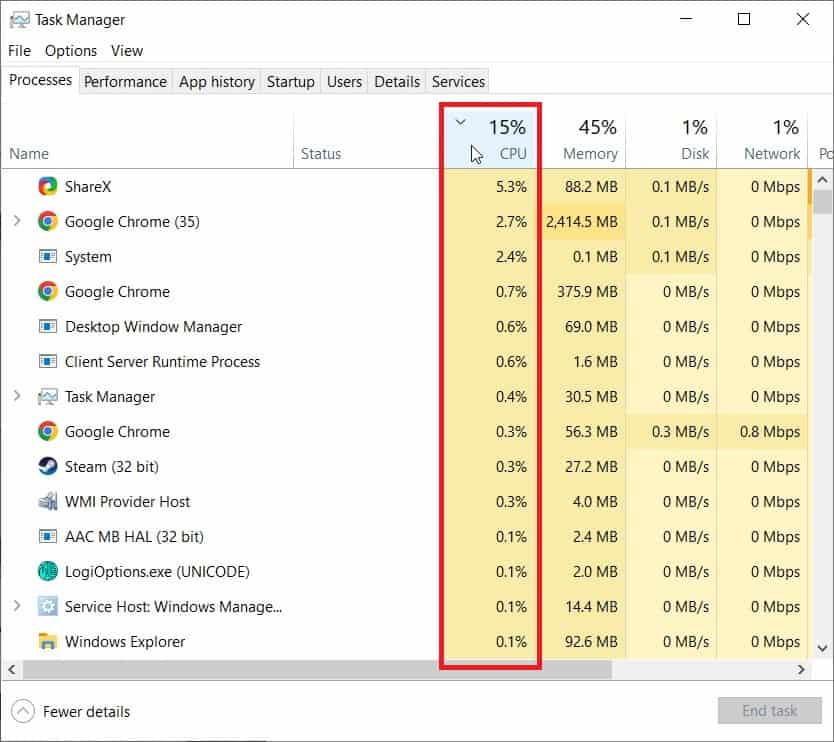
Task Manager is the best way to check CPU usage, as it can also tell you how much CPU an individual application is using.
- Press the CTRL + SHIFT + ESC keys simultaneously to open the Task Manager. Alternatively, you can right-click on the Task Bar and select Task Manager from there.
- Now, go to Performance and click on CPU. The chart on the right side will tell you the current CPU usage.
- You can also go back to Processes, click on CPU, and see which application is using the most CPU resources.
Step
Using Command Prompt
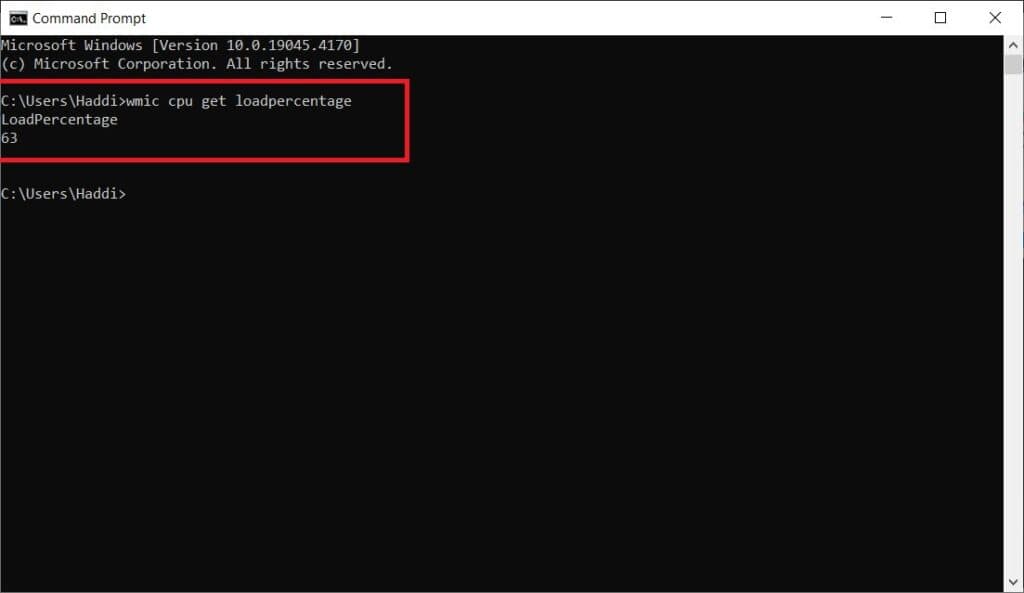
Another way to check CPU usage is using the Command Prompt. While this won’t provide you with much details, you’ll still get an idea of how much CPU is currently being used.
- Go to Windows Search Bar, type Command Prompt, and click on the first option that appears.
- Next, type wmic cpu get loadpercentage and press enter to see the current CPU usage.
Step
Using Resource Monitor
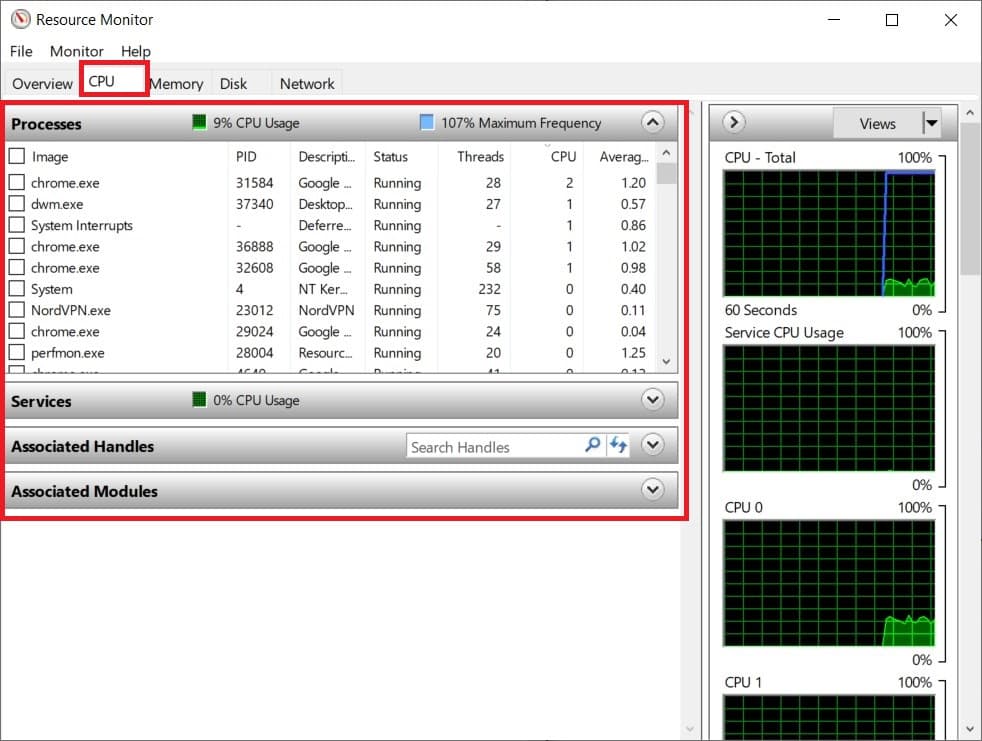
If you want more details, then you’d want to use the Resource Monitor to check CPU usage.
- Type Resource Monitor in the Windows Search Bar and select the first option that appears.
- Click on CPU.
- Here, you can see how much CPU is currently being used. On top of that, you can check the average CPU consumption of individual applications.
Step
Using a third-party tool to check CPU usage
While Windows itself has a handful of options to check CPU usage, you can also use a third-party tool for the same purpose. In this example, we’ll be using HWInfo for the task.
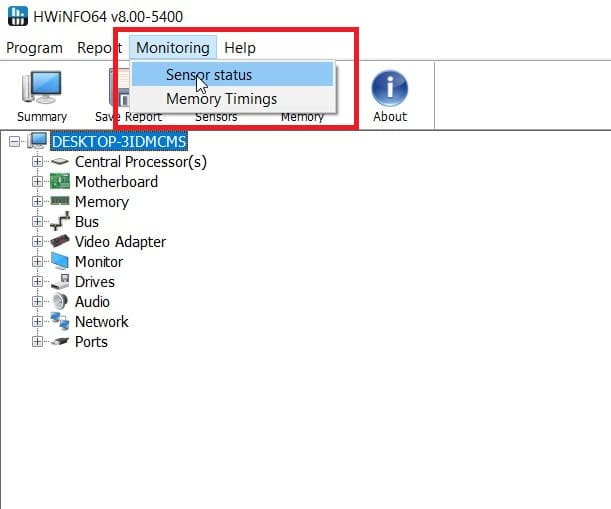
- After downloading and installing HWInfo, go to Monitoring and then select Sensor Status.
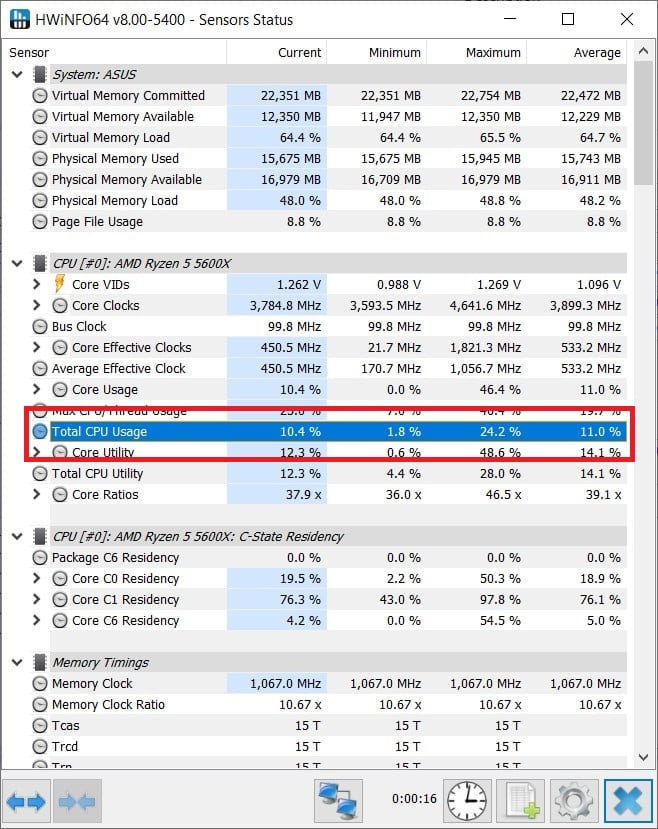
- Scroll down and find the total CPU usage.
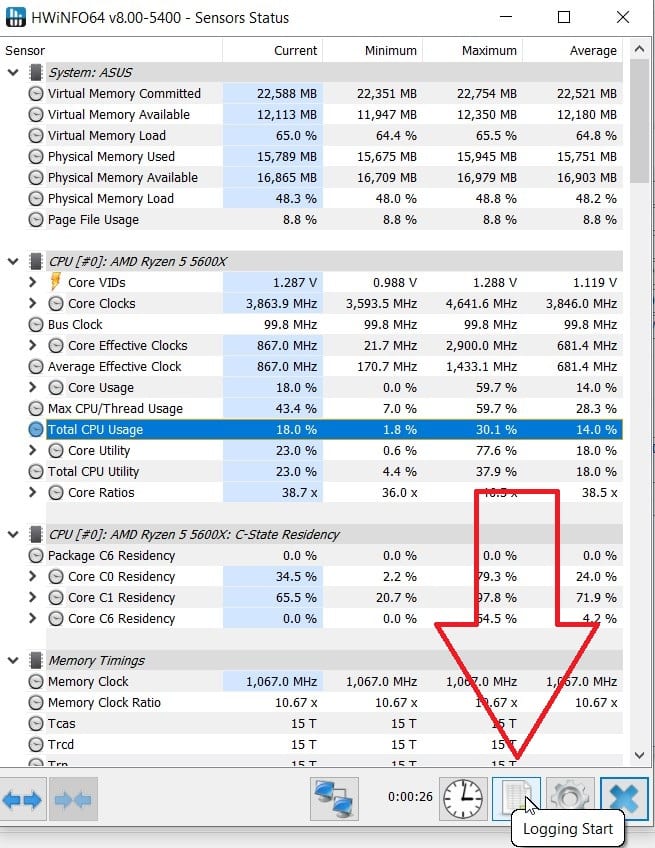
- For more details, click on the Start Logging button and save the CSV file at your desired location.
- Now, open the CSV file to see details of individual cores/threads.
Why is my CPU running at 100%?
Your CPU may be running at 100% due to multiple reasons, including a faulty hard drive, malware, or a resource-hungry software. While CPUs are designed to run safely at 100%, you should get rid of unnecessary applications that take a toll on the processor.
Is your CPU powerful enough?
Now, while high CPU usage can lead to performance issues, the problem can also be in your processor. If you’re always multitasking or are running resource-hungry software but have a weak CPU in your system, then you may want to consider upgrading your processor. Here are a few options that we think are worth getting.
-
High-end Intel processor
Intel Core i7 14700K
-
High-end AMD processor
Check the CPU usage using these 4 methods
-
Mid-range processor
AMD Ryzen 7 5800X3D
Conclusion
These were four methods that can help you check CPU usage instantly. You can either use the methods present in Windows to check it, or you can download a third-party software if you want more details. Either way, if you’re facing performance issues, then make sure to learn about how to lower CPU usage.


