
Here are 10 ways to make Spotify use less CPU


Table of Contents
If you want to know how to make Spotify use less CPU, then we’ve got you covered right here.
Spotify isn’t a resource-hungry application. However, at times, it can consume a lot of CPU resources. This can happen due to many reasons, and it can affect your processor’s performance. But why does a music streaming app like Spotify sometimes consume more processing power than necessary, and more importantly, what can you do about it?
Prime Day is finally here! Find all the biggest tech and PC deals below.
- Sapphire 11348-03-20G Pulse AMD Radeon™ RX 9070 XT Was $779 Now $739
- AMD Ryzen 7 7800X3D 8-Core, 16-Thread Desktop Processor Was $449 Now $341
- ASUS RTX™ 5060 OC Edition Graphics Card Was $379 Now $339
- LG 77-Inch Class OLED evo AI 4K C5 Series Smart TV Was $3,696 Now $2,796
- Intel® Core™ i7-14700K New Gaming Desktop Was $320.99 Now $274
- Lexar 2TB NM1090 w/HeatSink SSD PCIe Gen5x4 NVMe M.2 Was $281.97 Now $214.98
- Apple Watch Series 10 GPS + Cellular 42mm case Smartwatch Was $499.99 Now $379.99
- ASUS ROG Strix G16 (2025) 16" FHD, RTX 5060 gaming laptop Was $1,499.99 Now $1,274.99
- Apple iPad mini (A17 Pro): Apple Intelligence Was $499.99 Now $379.99
*Prices and savings subject to change. Click through to get the current prices.
This is where we come in. In this guide, we’ll walk you through how to reduce Spotify’s CPU usage using 10 methods.
Quick Answer
Disabling Hardware Acceleration, removing duplicate processes, disconnecting your Facebook account, clearing the app cache, and adjusting the sound quality can help reduce Spotify’s CPU usage.
How to fix Spotify high CPU usage issue
If Spotify is using more CPU resources than it should, you can tackle the issue by trying these methods.
Step
Turn off Hardware Acceleration
Hardware Acceleration is sometimes enabled by default, and this can put a load on the CPU. So, disable it and see if that changes anything.
- Launch Spotify on your PC or laptop.
- Click on your profile icon and then select Settings.

Spotify settings button - Scroll down and click on the green toggle button next to Hardware Acceleration to disable it. The toggle button will then become grey.

Hardware Acceleration toggle button

Step
Make sure there aren’t any duplicate processes
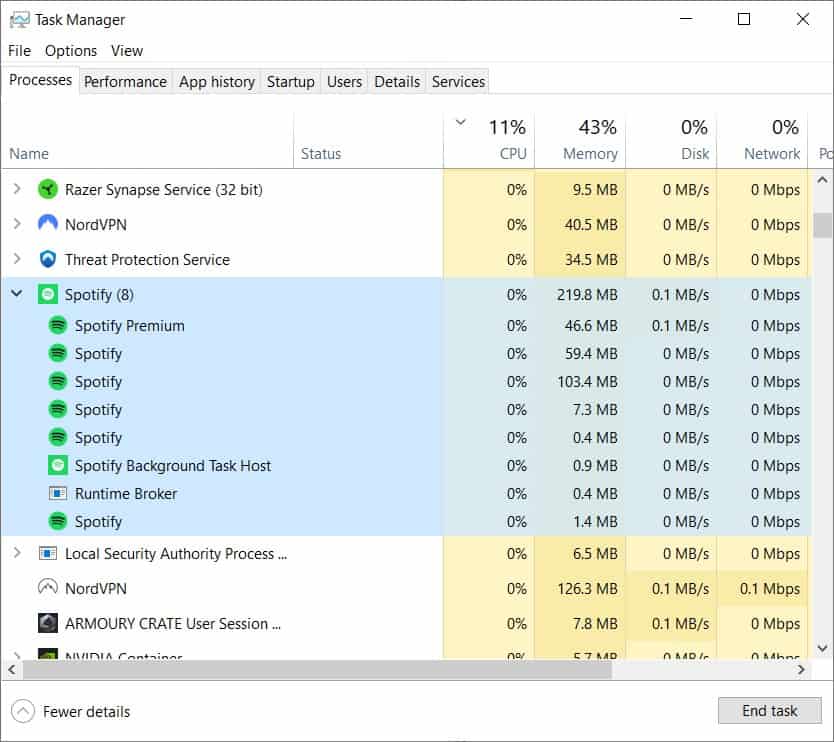
Sometimes, there can be more than one Spotify processes, which ends up using more CPU resources. You need to get rid of the unnecessary ones to reduce the CPU usage.
- Press the CTRL + SHIFT + ESC keys on your keyboard simultaneously to open the Task Manager.
- Go to the Processes tab.
- Go through the list and delete the duplicate Spotify processes.

Spotify processes in Task Manager
Step
Remove your Facebook account
If your Facebook account is linked to your Spotify account, it will make the application use more resources as Facebook will be tracking your activity, sharing new playlists on your profile and more. So, disconnect your Facebook account from the application to reduce the load from the CPU.
- Click on your Spotify profile icon and select Settings.
- Scroll down and go to Social.
- Now, click on ‘Disconnect from Facebook,’ after which it will change to ‘Connect with Facebook.’

Connect with Facebook option

Step
Clear the app cache
Spotify stores temporary files in the form of cache. These files help Spotify deliver a faster experience on slow networks. However, over time, cache can take up a lot of storage space and also put a load on the CPU. Thankfully, there’s an option to clear it.
- Go to Spotify’s settings.
- Scroll down and find Storage.
- Click on ‘Clear Cache’ and wait for the process to finish.

Clear Spotify cache button

Step
Go offline
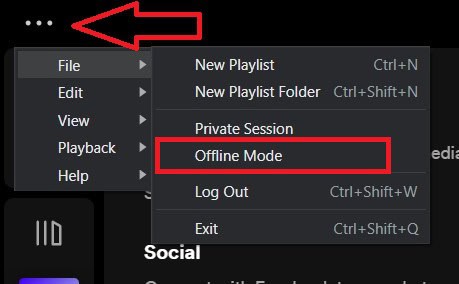
Spotify also has an offline mode, which allows you to listen to music without the internet. To go offline, follow these steps.
- Click on the three horizontal dots in the top left corner of the app.
- Click on File and select Offline Mode.

Spotify offline mode option
Before going offline, make sure you’ve downloaded all the songs which you’d like to listen to.
Step
Adjust the Sound Quality
Spotify lets you adjust the sound quality, and there are four options to choose from. Keeping the streaming quality set to Very High may consume more CPU resources, so you can try lowering it to see if that reduces the burden on the processor.
- Go to the Settings.
- Find Audio Quality.
- Click on the box next to Streaming quality.
- Select ‘Low.’

Spotify audio quality options

Once done, try playing music again and see if the CPU usage has been reduced. If it isn’t, feel free to take the audio quality back to whatever you prefer.
Step
Disable equalizer and crossfade
Some Spotify features also end up increasing the CPU usage, such as equalizer and crossfade. So, you need to disable them to check if they’re the reason behind the high CPU usage issue.
- Go to Settings.
- Scroll down to Playback.
- Disable both Crossfade and Equalizer from here.
Crossfade and Equalizer toggle buttons

Step
Use the Repair option
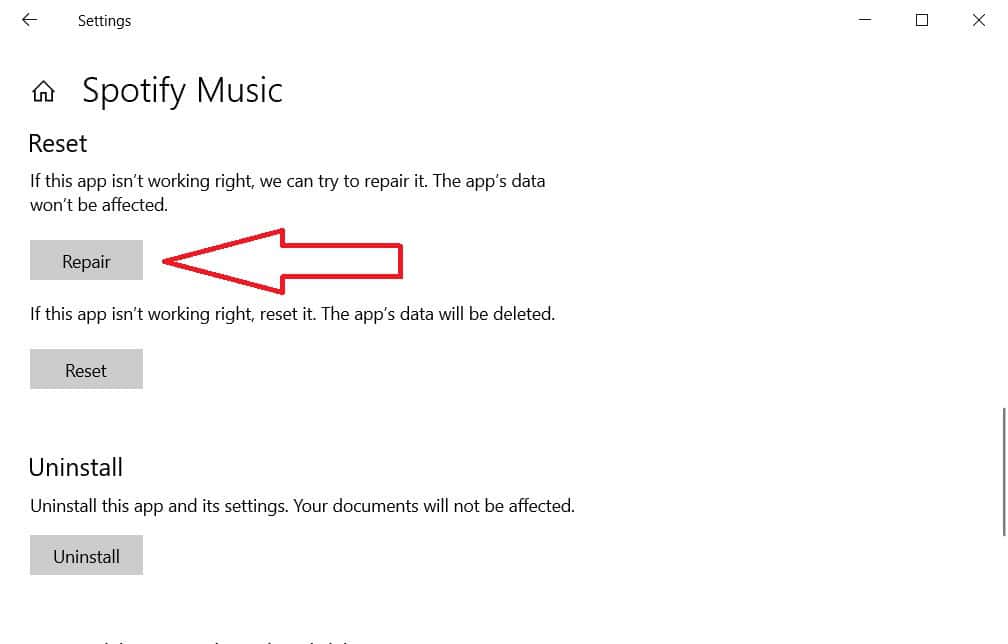
In some cases, Spotify can start using a lot of CPU resources if its files have become corrupt or if there’s a temporary bug or glitch in the application. In most cases, the issue can be fixed by repairing the application.
- Type ‘Apps and features’ in the Windows Search Bar and click on the first option that appears.
- Find Spotify.
- Click on it, and then click on Advanced options.

Spotify app advanced options - Scroll down and click on Repair.

Spotify app repair option

Step
Reinstall Spotify
If repairing the application has not done anything, the files may be beyond repair. In such a case, your only option is to delete the application and install it again.
Step
Subscribe to Spotify premium
Finally, if nothing seems to work, your last resort is to subscribe to Spotify premium. This is because, on the free version, you’ll see a lot of advertisements while listening to music. These advertisements can affect the performance, but you can become a premium member to make them go away.
Conclusion
This was everything you needed to know about how to make Spotify use less CPU. If none of the methods worked, then we suggest getting in touch with Spotify support for further assistance. Make sure to let them know about the methods you’ve already tried so they can suggest something else. In any case, make sure you learn different methods that can help reduce your CPU usage, as putting the processor under constant load can shorten its lifespan.
About the Author