
How to upgrade a graphics card – everything you need to know

Table of Contents
With Nvidia and AMD releasing GPUs almost every year, it’s important to know how to upgrade and replace your graphics cards. Here’s our easy step-by-step guide of how to upgrade a graphics card; where we walk you through how to remove your hardware safely and install a new card on your desktop.
To find out more about GPU optimization take a look at some of our other coverage on the topic. Here’s our guide on how to clean a GPU and how to underclock a GPU.
Prime Day is finally here! Find all the biggest tech and PC deals below.
- Sapphire 11348-03-20G Pulse AMD Radeon™ RX 9070 XT Was $779 Now $739
- AMD Ryzen 7 7800X3D 8-Core, 16-Thread Desktop Processor Was $449 Now $341
- ASUS RTX™ 5060 OC Edition Graphics Card Was $379 Now $339
- LG 77-Inch Class OLED evo AI 4K C5 Series Smart TV Was $3,696 Now $2,796
- Intel® Core™ i7-14700K New Gaming Desktop Was $320.99 Now $274
- Lexar 2TB NM1090 w/HeatSink SSD PCIe Gen5x4 NVMe M.2 Was $281.97 Now $214.98
- Apple Watch Series 10 GPS + Cellular 42mm case Smartwatch Was $499.99 Now $379.99
- ASUS ROG Strix G16 (2025) 16" FHD, RTX 5060 gaming laptop Was $1,499.99 Now $1,274.99
- Apple iPad mini (A17 Pro): Apple Intelligence Was $499.99 Now $379.99
*Prices and savings subject to change. Click through to get the current prices.
Before you switch to a newer GPU we recommend confirming a few things. Firstly, if you’re deciding to upgrade due to there being an issue with your desktop graphics, make sure to confirm it’s an issue with the GPU before the issue before you purchase any new hardware. Additionally, before upgrading your GPU it’s important to determine the best graphics cards for your processor and operating system. You’ll need a CPU that will take on the newer graphics power and avoid any bottleneck issues.
How to know your GPU is the problem
To determine if your GPU is the problem, monitor for specific signs such as graphical glitches, poor frame rates, crashes during graphics-intensive tasks, or the inability to run applications that require substantial graphical processing power.
Using diagnostic tools or software that can stress-test the GPU, like FurMark or 3DMark, can also help identify issues by pushing your graphics card to its limits under controlled conditions. Additionally, checking for overheating, ensuring drivers are up to date, and comparing performance against expected benchmarks for your GPU model can aid in diagnosing the issue.
If you want to find out more about GPU issues take a look at our comprehensive guide on how to tell if your GPU is failing.
Will the CPU be able to take the new GPU power?
Whether your CPU can handle a new, more powerful graphics card depends on the specific models and configurations of both the CPU and the GPU. A significant mismatch, where a very powerful GPU pairs with an older or less capable CPU, can lead to a bottleneck situation where the CPU cannot process data quickly enough for the GPU.
This can limit the performance gains from your new GPU. To prevent this, ensure your CPU is sufficiently powerful to complement your GPU upgrade. Checking compatibility and performance benchmarks online can help gauge whether your CPU and GPU will work well together.
If you need a hand picking the right GPU for your processor then check out some of our comprehensive buying guides, where we determine the best GPUs for your system, for example, here’s our best GPU for Intel Core i9-14900K.
Now you should be ready to start. Let’s jump right in!
Removing the old graphics card
Step
Disconnect power cables
With the computer turned off, locate any power cables connected to your existing graphics card. These can typically be found at the top or end of the card. Gently press down on the clip securing the cable connector and carefully disconnect each cable.
Step
Remove screws or bracket
Your graphics card will be attached to the case with screws or a bracket at the back of the case. Use a screwdriver to remove these screws or to release the bracket, ensuring you keep the screws safe for later use.
Step
Release PCIe slot lock
Most motherboards feature a PCIe slot lock at one end of the slot where the graphics card is installed. Carefully press down or slide the lock to release the card. Some locks are push-to-release, while others may slide or lift.
Step
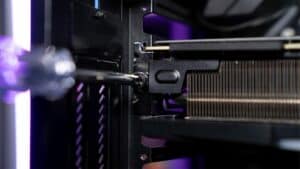
Carefully remove the card

Grip the graphics card by its edges and gently but firmly lift it straight out of the PCIe slot. Avoid touching any of the contacts or components on the card. If the card is stuck, gently wiggle it side to side while pulling up to release it.
Installing the new graphics card
Step
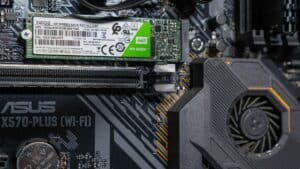
Check PCIe slot and insert new card
Ensure the PCIe slot where you intend to install the new card is clear of any debris or obstructions. Align the new graphics card with the slot, making sure the connectors are facing the correct direction.
Step
Firmly insert the card into the slot
Carefully insert the card into the PCIe slot, applying even pressure across the top until the card is fully seated. You should hear a click as the PCIe slot lock secures the card in place. and secure it with the screws.
Step
Connect power cables
Attach any required power cables to your new graphics card. These cables provide the additional power needed by high-performance cards. Ensure the connectors are securely attached.
Step
Close the case and power on
Once the new card is securely installed and all cables are connected, replace the side panel of your computer case. Reconnect the power and any external cables, then power on your computer.
Step
Install drivers
After powering on, install the necessary drivers for your new graphics card. You can download the latest drivers from the manufacturer’s website. Follow the installation instructions provided with the drivers to ensure optimal performance of your new card.
Do I need to uninstall old graphics drivers before installing a new card?
It’s recommended to uninstall old graphics drivers before installing a new card, especially if the new GPU is from a different retailer (e.g., switching from AMD Radeon to Nvidia GeForce or vice versa). Uninstalling the old drivers helps prevent potential software conflicts and ensures the best compatibility and performance from your new graphics card.
Do I need to update BIOS for the new GPU?
In most cases, you do not need to update the BIOS for a new GPU, especially if your motherboard is relatively recent. However, there are exceptions where a BIOS update might be necessary to ensure compatibility with newer graphics cards or to fix specific issues. It’s a good idea to check your motherboard manufacturer’s website for any advisories related to GPU compatibility and to ensure your system BIOS is up to date.
Wrapping up
Well there you have it, everything you need to know about upgrading your GPU. We’ve covered pinpointing an issue with your GPU, finding the right GPU for your processor, how to remove your current GPU, and how to install a new one. Follow these simple steps and you’ll have a new and improved system up and running in no time.
About the Author