Best Raspberry Pi 4 Cases in 2025

Reviewed By: Kevin Pocock
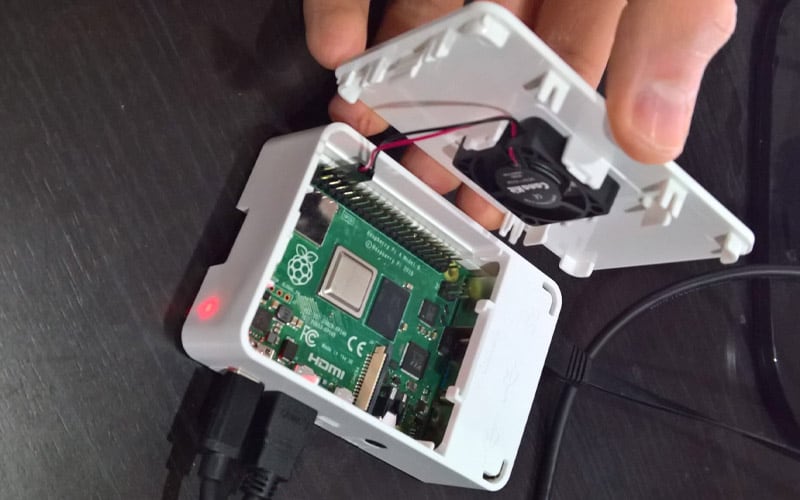
Table of Contents
The Raspberry Pi packs a punch despite its diminutive size. Not least the Raspberry Pi 4, which bundles in enough computing juice for all manner of inventive applications and projects as well as more typical usage such as media centers, NAS, and even retro game emulation systems. But what are the best Raspberry Pi 4 cases?
Although a Raspberry Pi can more than hold its own without a case, and in a way, a case-less Pi feels more attuned to the DIY ethos that courses through the single-board computer’s entire history, there’s logic in adding a protective outer layer to ward off dust, help keep temperatures down, and add some visual flair to what is a plain-looking circuit board. It’s, therefore, no surprise that one of the first purchases that accompany acquiring a Raspberry Pi is that of a case.
To aid your search for the right shell for your Pi 4 board, we’ve compiled a list of the best Pi 4 cases. While we are rather taken with our selection of cases, we understand that what’s seen as the ‘best’ morphs from person to person, especially when aesthetics are involved. As such, take our picks as recommendations to give you a gentle nudge in the right direction rather than an immutable verdict.
Products at a Glance

How we picked the best Raspberry Pi 4 cases
Raspberry Pi version compatibility, cooling, build quality, footprint, ease of assembly, and design – these are the factors that differentiate cases from one another. When trawling through what is an ever-swelling list of options, we used these to steer us toward the best Raspberry Pi cases.
While these factors are important, we’ve also thrown in cases that offer some of the most commonly requested features – and do so well – notably good cooling performance, plenty of ports for connectivity junkies, and value for money. We couldn’t highlight the best Raspberry Pi cases without at least one gaming-oriented pick, so you’ll find one of those too.
We’ve narrowed it down to five Raspberry Pi cases. You’ll find a quick review of each below that touches on why we think each is worthy of your hard-earned cash and a short ‘Things to Consider’ buying guide at the end.
Product Reviews
- Removable magnetic GPIO pins cover
- Heatsinks and fans incorporated into the case
- Two full-sized HDMI ports
- Clean back mounted ports
- Sleek aluminum design
- Pi can run very hot despite active and passive cooling
- Sketchy HDMI performance
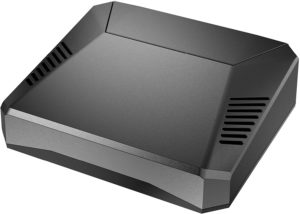
With a stylish, inconspicuous aluminum finish, the Argon ONE V2 aims to give your Raspberry Pi 4 a sleek home that wouldn’t be out of place in a lounge or living room, making it a top option for home theater and media station projects.
The Argon ONE V2 allows easy access to the Raspberry Pi 4’s GPIO pins thanks to a removable magnetic cover. Once removed, the pins are color-coded and labeled for easy identification, a nice touch for those juggling multiple HATs.
A printed circuit board that slots into the existing ports on the Pi routes audio and HDMI (even supersizing them to full-sized HDMI ports) to a back-mounted I/O that retains the position of the USB and Ethernet ports on the Pi. The arrangement does wonders to keep the case looking extremely clean and helps with cable management.
As for cooling, both active (30 mm programmable fan) and passive cooling (heat sink on the CPU and RAM) are integrated into the case itself, which simplifies assembly as you don’t have to apply individual heat sinks to components on the Pi board.
There’s a lot to like here, and we think this is the best Raspberry Pi 4 cases pick overall. But we can only recommend the Argon ONE V2 for casual projects that don’t ask too much of the Raspberry Pi, because though the heating solution design is excellent in practice the case struggles to keep temperatures in check under heavy loads.
Another issue we stumbled upon is the sensitivity of the HDMI ports. Any kind of movement tends to interrupt the signal. As such, we recommend only using these for permanently installed projects.
- NES-styled case
- Excellent cooling
- Front-mounted power and reset buttons
- I/O arrangement
- NES cartridge-style SSD housing
- No GPIO access
It’s no secret that one of the most popular usages for the Raspberry Pi 4 is as a retro gaming emulator. The Retroflag NESPi 4 Case taps into that to deliver a case with a form factor that will be all too familiar to gamers of a certain age, adopting the color scheme and design of the classic NES. Not just that, though, as it boasts good quality, solid construction, too.
Gimmicks aside, the Retroflag NESPi 4 also doubles as an excellent case for the Raspberry Pi 4, thanks to a great feature set that does well to incorporate functionality into the case’s NES inspiration. The main attraction is a NES cartridge that can house a 2.5-inch SSD and even slots into the case as would a genuine NES cartridge. It’s a great use of the available space and a clever way to expand the Raspberry Pi’s storage capabilities. Similarly, we’re big fans of the front-mounted power and reset buttons that feel surprisingly similar to those on the NES.
Installation isn’t as straightforward as some other cases but is well thought out. A cooling fan with a customized aluminum alloy cage mounts on top of the Pi, while two small copper heat sinks are attached to the CPU and RAM modules. Cooling performance is nothing short of excellent for emulation projects and pairs well with a spot of overclocking to boot.
As for I/O, the Retroflag NESPi 4 Case’s port extenders shift two of the Raspberry Pi 4’s USB ports to the front mimicking the positioning of the controller slots on the original NES, the Micro SD card slot to the side, and audio, micro HDMI, LAN, and USB Type-C power to the back.
The Retroflag NESPi 4 does stumble when it comes to GPIO pins access; it has none. The lack of access isn’t an issue whatsoever for retro emulation, which, let’s face it, is the target application for the case.
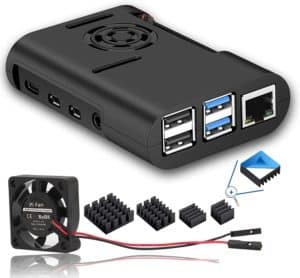
- Ease access to GPIO
- Small form factor
- Connectivity
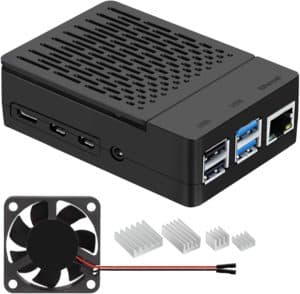
- Four heatsink and fan cooling
- Very affordable price point
- Loud fan
- Build quality fits the price tag
- No GPIO access slot cover
Priced at $10, the MazerPi Raspberry Pi 4 Case is among the cheapest Raspberry Pi 4 cases available. This low price does come at a cost to build quality and aesthetics, but the case makes up for it in droves when it comes to connectivity and accommodation for HAT add-ons. It’s a top choice for those on the hunt for a functional case to act as a centerpiece for more elaborate Raspberry Pi projects.
The MazerPi Raspberry Pi 4 Case delivers access to all the ports found on the Raspberry Pi 4, positioning them around the case as they appear on the Pi’s circuit board: four USB and LAN on the back, and audio, micro HDMI, and USB Type-C power on the right side. Additionally, the case features an open GPIO slot fitted on the left side, ideally placed to connect all manner of HAT add-ons. Confusingly, the GPIO slot doesn’t feature a cover, presumably a move to save costs.
On the cooling front, the MazerPi Raspberry Pi 4 Case pairs a 30 mm fan with four individual heat sinks that mount on the CPU, RAM, LAN, and USB modules. Vents on the front and top of the case allow for good heat dissipation. Cooling performance is superb, although the fan is noisy under heavy loads, contrary to MazerPi’s claim that it is ‘very quiet.’
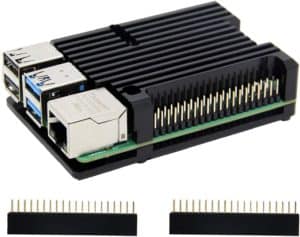
- Massive heat sink integrated into the case
- Aluminum alloy casing
- Silent cooling
- Easy GPIO access
- Form factor matches Raspberry Pi size
- Poor quality thermal pads
- GPIO extender required to use HATs
If you plan to get the most out of a Raspberry Pi 4 and cooling is of utmost importance, Geekworm Raspberry Pi 4 Armor Case is a top pick, and not just because it excels at dissipating heat, but also because of its affordable price point of around $13.
Rather than a case with a fan and a smattering of heat sinks, the Geekworm Raspberry Pi 4 Armor Case itself is a heat sink that sits atop the Raspberry Pi with an open design that promotes air circulation but also allows easy access to all the Pi’s ports and the GPIO pins without the use of any port extenders.
The heat sink is made of chunky finned aluminum alloy that conforms to the size of the Pi for a compact, ultra-thin form factor. It sits atop the crucial components of the board and comes packaged with a set of thermal pads that need placing before the heat sink is locked into place. A further sheet of aluminum alloy protects the underside of the Pi to protect the circuit board. Installation of all parts is near effortless, and although cooling is purely passive, performance is fantastic even under the heaviest loads and even when overclocking.
Although this wasn’t the case for us, we’ve heard reports of poor quality thermal pads that aren’t quite thick enough to offer a tight seal between the heat sink and components, notably the CPU. As such, we recommend buying the Geekworm Raspberry Pi 4 Armor Case from a reputable retailer like Amazon with a generous return policy should the problem arise.
One of the few issues we have with the Geekworm Raspberry Pi 4 Armor Case is that the GPIO, while accessible, is surrounded on three sides by the heat sink, which prohibits using HATs with chunky connectors. Fortunately, you can easily insert an extender to fix this.
- Low price
- 40 mm cooling fan and four heatsinks
- Simple, functional design
- Access to all ports
- No GPIO access
- Loud fan
- Case incompatible with some micro HDMI cables
Raspberry Pi computing is comparatively low cost compared to traditional PCs, and this also extends to cases, but even here, it’s possible to grab a bargain. Of all the budget Raspberry Pi cases we assessed, the iUniker Raspberry Pi 4 Case is the best of the bunch.
Costing just north of $10, the iUniker Raspberry Pi 4 Case proposes everything you need to get a Pi up and running. There’s a 40 mm cooling fan and four heatsinks (applied to the CPU, RAM, LAN, and USB), which keep temperatures in check, although the fan can hit some high decibel ranges at top speed. A simple, yet functional design that gathers together all the ports you’d ever need are positioned as they appear on the PI – four USB, Ethernet, audio, two micro HDMI, SD Card slot, and USB Type-C power.
Unfortunately, there’s no clear access to the GPIO making this an option for all-in-one solutions rather than complex HAT-based projects. The cover can be removed to access the GPIO pins, but, in our opinion doing so effectively cancels out the whole point of a protective case.
The iUniker Raspberry Pi 4 Case’s design also means the micro HDMI ports don’t protrude enough to allow for some HDMI cables to be inserted all the way. We recommend opting for HDMI cables with small connector housing if at all possible to avoid any problems.
Best Raspberry Pi 4 cases – things to consider
Raspberry Pi version
This may be a no-brainer for some, but still, it’s a point worth repeating: not all Raspberry Pi versions are compatible with all cases. Different formats of the same version (Pi 3 Model A+, B, B+, for example) further complicate matters. To that end, we recommend checking before buying that the case is indeed compatible with your particular Raspberry Pi version.
Countless cases are designed to house all current and past Raspberry Pi models, including the small form factor $4 Pico micro-controller and older first-gen Raspberry Pi 1 Model A+ and Model B+. As such, there’s no shortage of options, but simply a case of checking compatibility. Additionally, while single Pi cases should suit most, for those that want to stack boards, there are suitable cases out there that can accommodate multiple Pis, too.
In this guide, we’ve focused on cases that cater to the current-gen Raspberry Pi 4. There’s only one Raspberry Pi 4 (Model B) other than the standalone keyboard-integrated Raspberry Pi 400, which simplifies compatibility.
GPIO version
A row of pins mounted along the top edge of all Raspberry Pi boards since the Raspberry Pi 1 Model B+, the GPIO, or general-purpose input/output, is crucial to the Pi family’s acclaimed modularity and versatility. The GPIO allows users to hook up all manner of I/O and the hundreds of expansion boards (sensors, cameras, buzzers, motors, LEDs, etc.) to the board for a nearly limitless range of applications.
Many cases limit access to the GPIO, which can hamper the efforts of those that intend to work on more involved projects that incorporate HATs (Hardware Attached on Top – the name given to add-on boards), but may be entirely suitable for those looking for an all-in-one, enclosed case for home theater or gaming usage.
Cooling
Most cases include passive and active cooling solutions in one form or another, typically at least one 30 mm or 40 mm fan, vents to extract hot air, and heat sinks to dissipate heat. Heat sinks are either fitted onto the case itself, such as Geekworm Raspberry Pi 4 Armor Case, or included with the case for you to attach them to parts of the Raspberry Pi, usually the CPU, RAM, LAN, and USB. The Raspberry Pi can run hot, so we warn against buying cases with no cooling solutions.
Does Raspberry Pi 4 need a case?
Technically with the Raspberry Pi 4, like all the other Pi iterations, you don’t need to put it in a case for it to function. However, the sensible thing to do is insert your board into a case to protect it from damage as well as preventing any debris from getting in there and messing the internals up. Moreover, having a case for your Raspberry Pi 4 will enhance it that little bit further, potentially giving it easier to access ports and with some more complex cases, cooling options.
Is Raspberry Pi 4 better for RetroPie?
Many Raspberry Pi 4 owners like to relive classic titles of old by installing RetroPie onto their machine and slotting it into an old-school case but is it better than older Pi variants? Well, yes, in fact, the Raspberry Pi 4 is better for RetroPie than all previous models. This is due to more RAM being available as well as a new Raspian base. This has allowed for more stable emulation for more powerful consoles such as the N64 which tended to struggle on the Raspberry Pi 3 machines.
How do I install a Raspberry Pi 4 fan?
Contrary to the complex nature of building a fully-fledged PC, adding components to your Raspberry Pi 4 is a pretty simplistic process. This is the same if you want to add a fan to your Raspberry Pi 4, allowing for better cooling when under more intense stress.
If you are looking to install a Raspberry Pi 4 fan, open up your case and mount it onto it. Then, plug the red, black, and blue wires into the Pi’s GPIO header. Once complete switch on your Pi and check it spins up. It’s as simple as that!
Our Verdict
As one of the most visually appealing cases, the Argon ONE V2 is our top recommendation for those in the market for a Raspberry Pi case. Easy access to the GPIO, two full-sized HDMI ports, and a clean I/O arrangement on the back make it suitable for everything from media centers to more experimental projects that require add-ons.
With a design that channels the famed NES, the Retroflag NESPi 4 Case commands a spot in our list for that alone. The SSD cartridge and NES-style front buttons, alongside excellent cooling chops and overall good build quality, make it a prime candidate for a retro gaming emulation system.
Those tapping into the power of the Pi to bring creative projects that require plenty of connectivity to life shouldn’t overlook the MazerPi Raspberry Pi 4 Case. Our money is on the Geekworm Raspberry Pi 4 Armor Case for the best cooling performance. Finally, as a budget pick, we chose the simple, yet functional iUniker Raspberry Pi 4 Case.
About the Author