
Last Updated on
RetroPie is effectively a complete replacement of Raspberry OS (Raspbian), which focuses resources on providing you with the best retro gaming experience on a single board computer that isn’t the MiSTer. Building off the work of those behind RetroArch, RetroPie brings a wide range of emulators, but does limit some to single board computers (like the ROCK Pi) that run more traditional hardware. However, we’re not locked out of a lot, so just don’t expect to be running a PS2 emulator or having a good time digging for your Wii remotes.
Obviously, emulation is in a weird grey area legally, but as long as you already own the game and just want an easier way to play it, this is more than likely just preservation. Emulation is one of the only ways that preservation is actively happening in video games, as major companies have only recently begun to see it as a net positive and you can absolutely see this through the plenty of remakes and remasters that have clogged up release schedules since 2013.
Of course, this means we won’t be sharing with you links to acquire games. We know and you know that’s highly illegal.
A pretty famous example is Konami’s complete carelessness with the Silent Hill HD ports, as the studio that got them found out into development, that they were in fact working with a pre-release build that wasn’t finished. Konami had binned the original files after development is probably one of the biggest cases of short-sightedness in the industry, resulting in a Silent Hill game – known for its mysterious fog – to be completely fogless.
Flash an SD Card with RetroPie
A dead-simple step, but we’ll need to use a microSD card (preferably with plenty of space to store ROMs on!) and then format it to boot into RetroPie. What we’re doing is cutting the fat of the potential PC and turning this into a very small jukebox that you’ll turn on to play games. Some light Raspberry Pi stuff will carry over – the way we’ll be transferring games is over SSH – and the customization offered by RetroPie is pretty extensive the further you drill down into it.
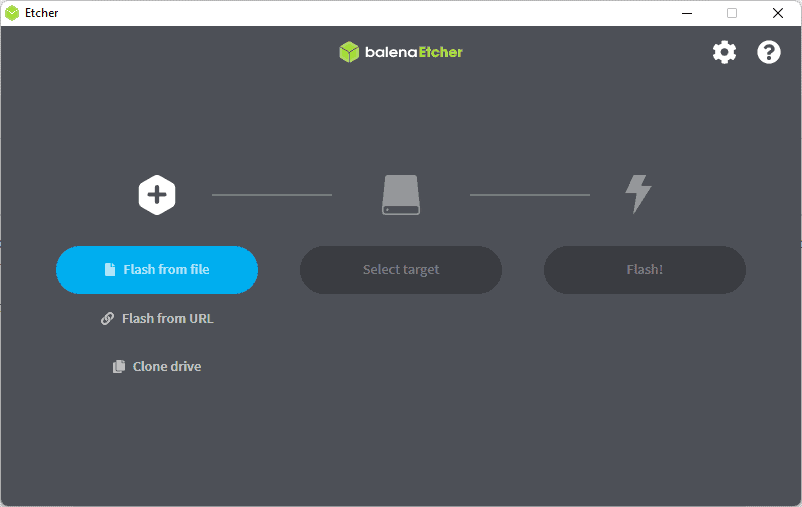
So start by heading to balenaEtcher, the software needed to graft RetroPie onto the SD Card. Once you’re done downloading and installing, be sure to format your SD Card to exFAT. If you want FAT32 you’ll need a sub-32GB MicroSD Card, but exFAT allows you to transfer larger file sizes.
Press Flash from File, then choose your SD Card (it should choose it automatically), and then once you hit Flash, just let it do its thing!
Once it’s completed, you can remove the SD card and pop it back into the Raspberry Pi.
Recommended SD Card
If you want any other recommendations, our Steam Deck SD card recommendations should line up naturally with your needs for the Raspberry Pi.
Load up RetroPie
RetroPie is very hands off with its installation process, as once you boot up the Pi with the SD card slotted in, it’ll simply do the heavy lifting of configuring itself for you. This includes most, if not all, emulators you might need and more. The only things you’ll have to do now is turn on SSH and get some ROMs onto the Pi itself!
When you load it up for the first time and it’s finished with the initial setup, you can connect a controller to one of the USB ports (and later set up Bluetooth) to map the controller’s buttons to how you see fit. This then does it across the board.
