
How to install & set up Windows 11 on Raspberry Pi 4

Reviewed By: Kevin Pocock
While there has been plenty of chatter around TPM 2.0 and CPU requirements for Windows 11, leaving owners of older generation PCs worried if they'll ever get their hands on those rounded corners, in a huge turn of events, you can, in fact, install Windows 11 on a tiny, low powered machine – the Raspberry Pi 4.
Why this is such a big deal is because Raspberry Pis in general are known for tinkering and those wanting to maybe emulate some old school games due to their inexpensive nature and time form factor. But now, with the ability to install and run the exciting new Windows update, it opens up an array of possibilities for Pi owners or for those who want a pocket-sized PC capable of an OS of this caliber.
Prime Day is finally here! Find all the biggest tech and PC deals below.
- Sapphire 11348-03-20G Pulse AMD Radeon™ RX 9070 XT Was $779 Now $739
- AMD Ryzen 7 7800X3D 8-Core, 16-Thread Desktop Processor Was $449 Now $341
- ASUS RTX™ 5060 OC Edition Graphics Card Was $379 Now $339
- LG 77-Inch Class OLED evo AI 4K C5 Series Smart TV Was $3,696 Now $2,796
- Intel® Core™ i7-14700K New Gaming Desktop Was $320.99 Now $274
- Lexar 2TB NM1090 w/HeatSink SSD PCIe Gen5x4 NVMe M.2 Was $281.97 Now $214.98
- Apple Watch Series 10 GPS + Cellular 42mm case Smartwatch Was $499.99 Now $379.99
- ASUS ROG Strix G16 (2025) 16" FHD, RTX 5060 gaming laptop Was $1,499.99 Now $1,274.99
- Apple iPad mini (A17 Pro): Apple Intelligence Was $499.99 Now $379.99
*Prices and savings subject to change. Click through to get the current prices.
With this guide, we'll be taking you through all the necessary steps for how to install Windows 11 on Raspberry Pi 4 as well as how to get it set up too so you can experience the fancy new features Microsoft has in store.
How to install Windows 11 on Raspberry Pi 4
Now, let's not beat around the bush, there are a bunch of steps that you're going to need to follow to get Windows 11 up and running on your Raspberry Pi 4 but don't be overwhelmed. If you closely follow the instructions below, you should be able to get Windows 11 up and running no problem and even if you make mistakes, you can revert them and start over.
One caveat we do have to state is that the Windows 11 build used for the Pi install is not an official product from Microsoft due to the image creation process to get it working on the system. This means that installing the OS is at your own risk so proceed with caution.
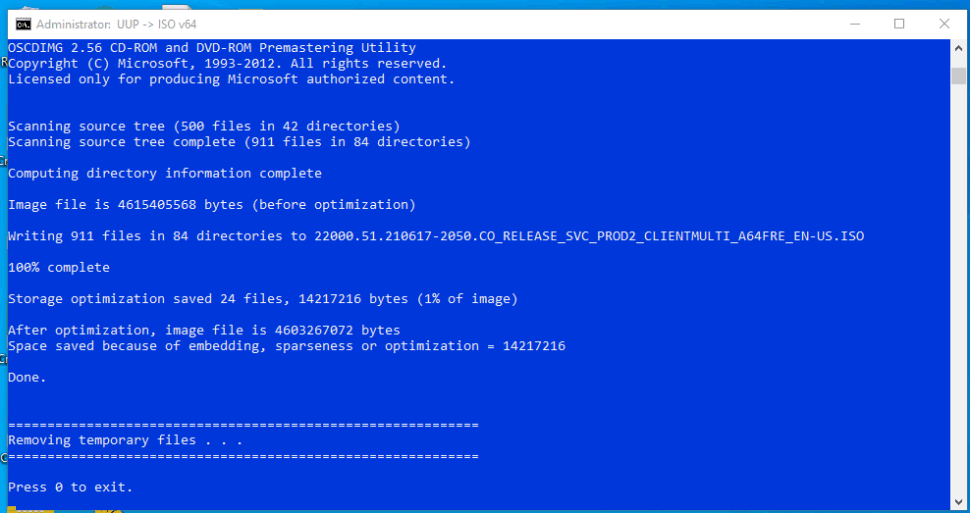
Allow the process to complete and press 0 to exit.
Insert your storage device into the PC.
Download the Windows on Raspberry Imager tool to create a compatible image.

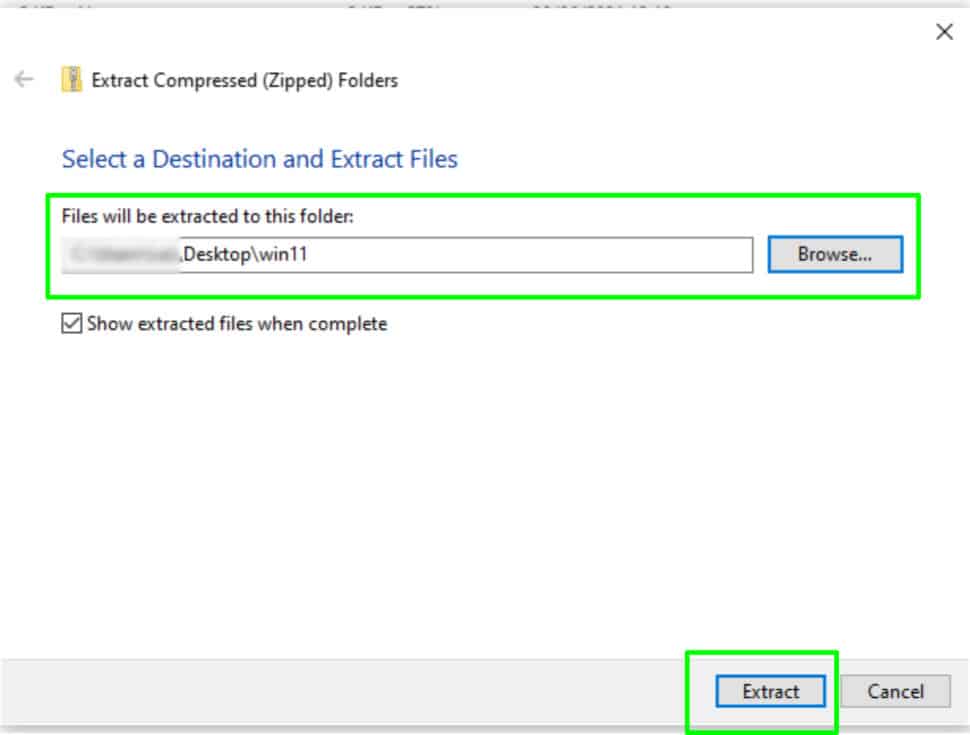
Extract the downloaded ZIP folder to the “win11” folder you created earlier.
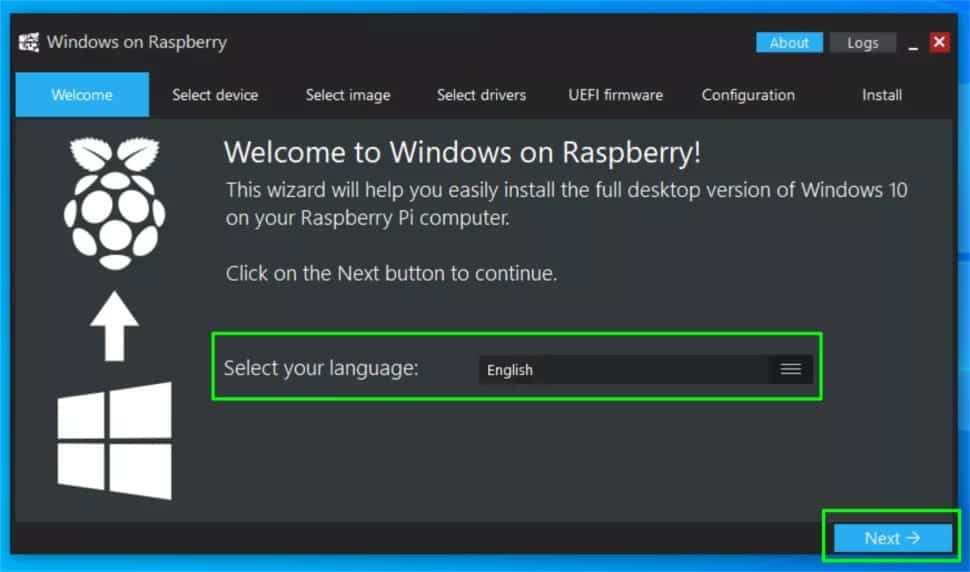
Open the Windows on Raspberry tool.
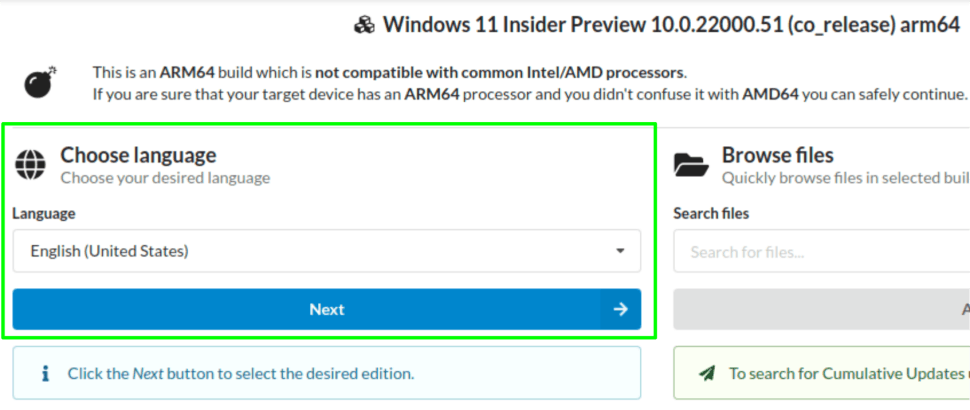
Choose your preferred language. Click “Next”.
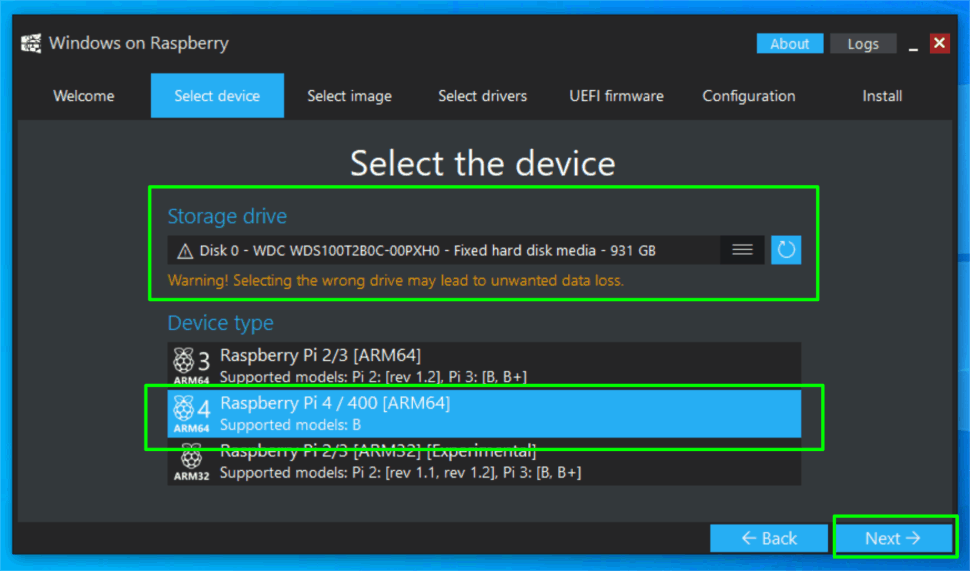
Choose your storage device and set the Pi device to Raspberry Pi 4.
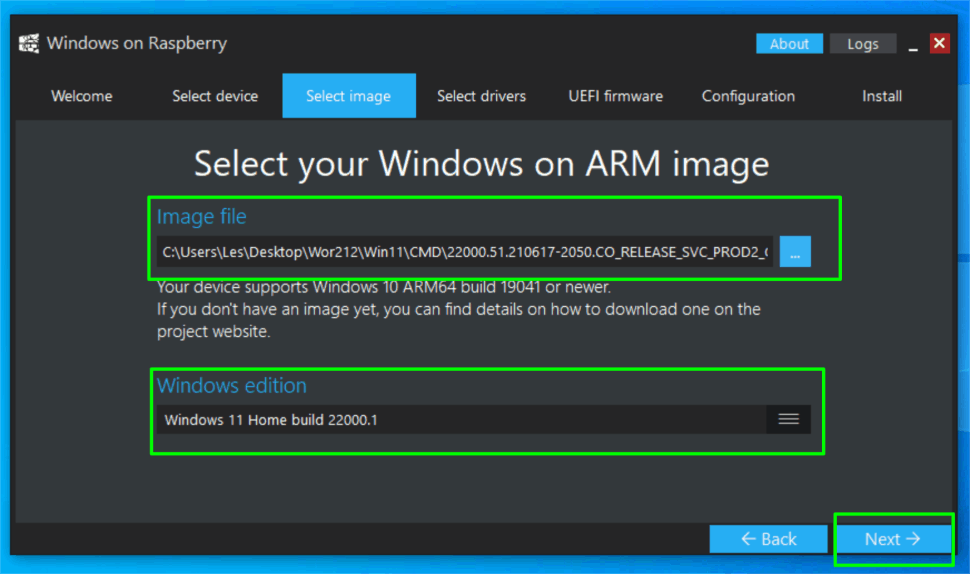
Browse for your created Windows 11 Pi image. Hit “Next”.
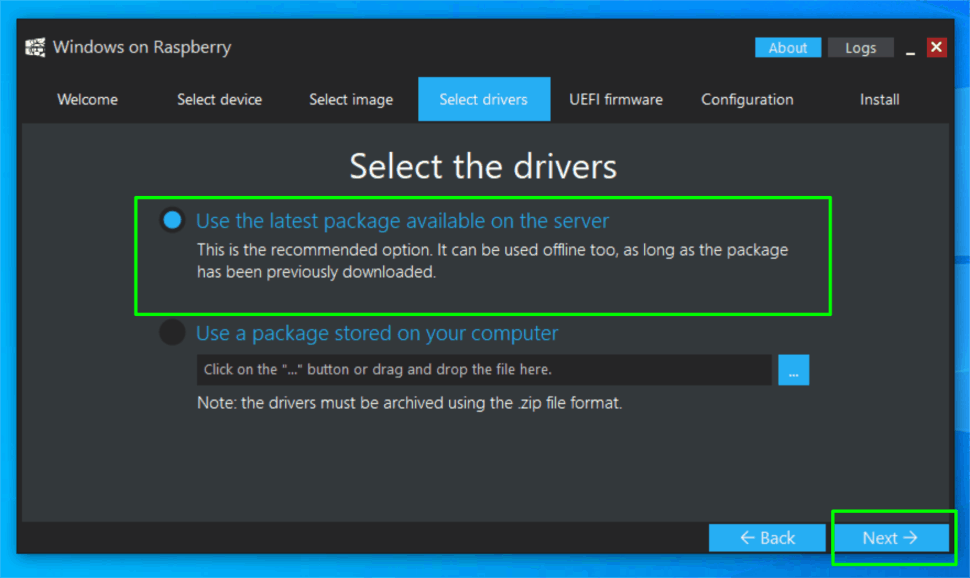
Select the “Use the latest driver package on the server” option. Click “Next”.
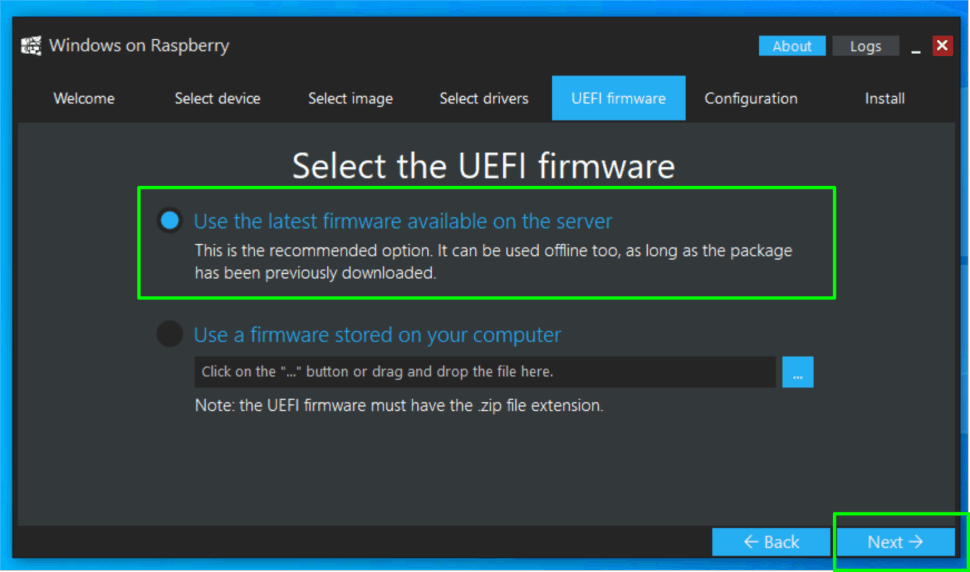
Choose the “Use the latest UEFI firmware available on the server” option. Press “Next”.
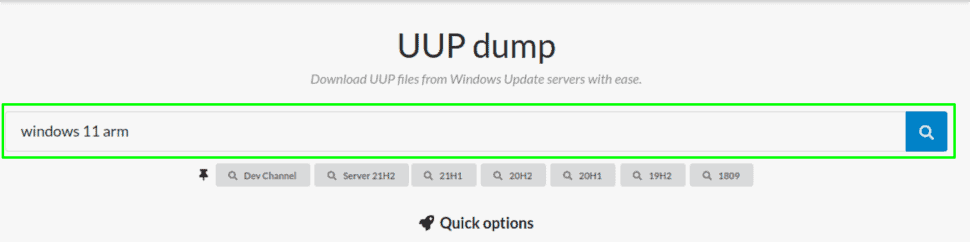
Search for “Windows 11 Arm” on the site UUDump.
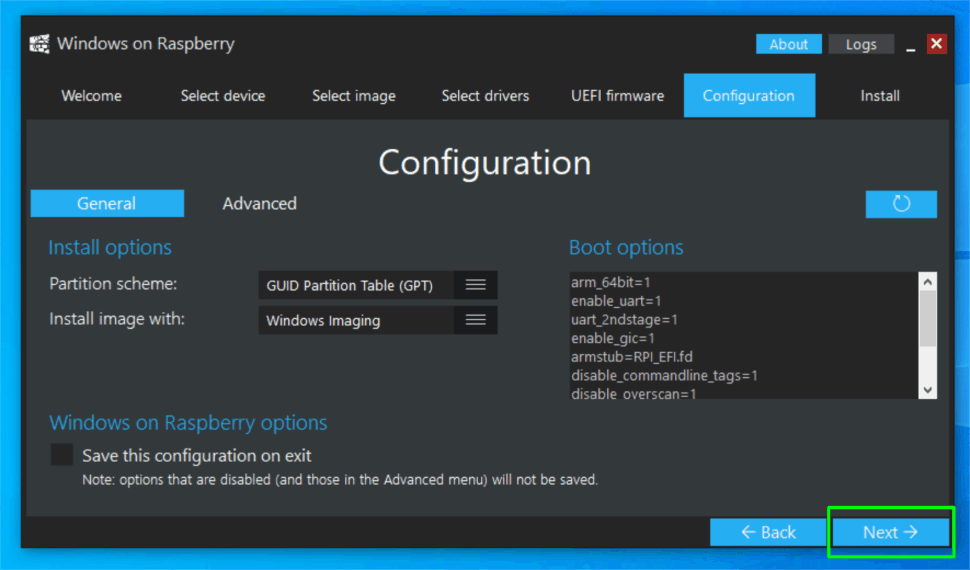
A configuration screen will appear. You don't need to change anything here, just hit “Next”.
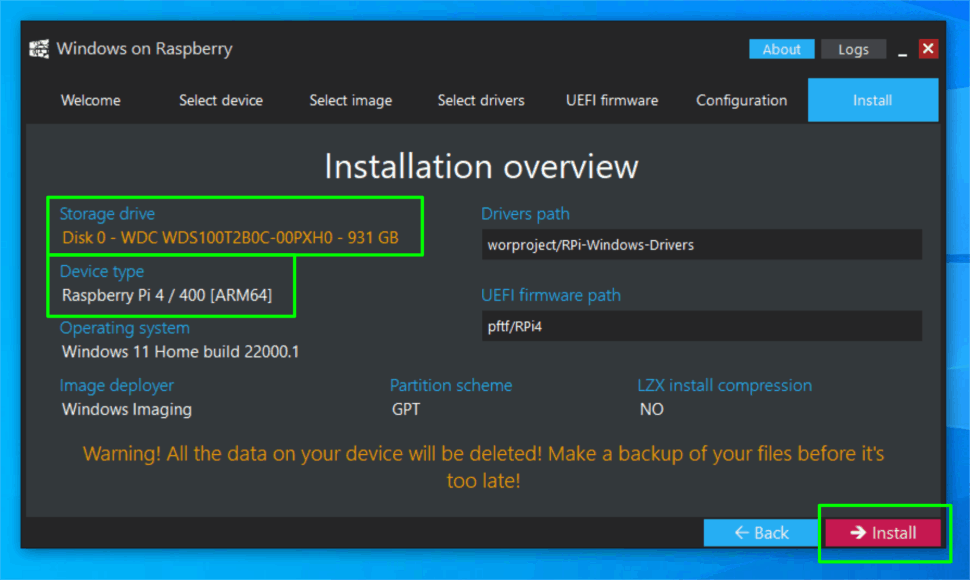
You should now see an installation overview. Check everything is correct and click “Install”.
The installation process will now take place. Once completed, eject your storage choice, connect it to your Pi 4 and boot up.
Windows 11 should be installed on your Raspberry Pi 4. Now, let's get to setting that new OS up.
How to set up Windows 11 on Raspberry Pi 4
Now that you've got Windows 11 installed on your Raspberry Pi, you're also going to have to do a few more tweaks to get the OS set up on your mini PC. Let's get into how to set up Windows 11 on Raspberry Pi 4.
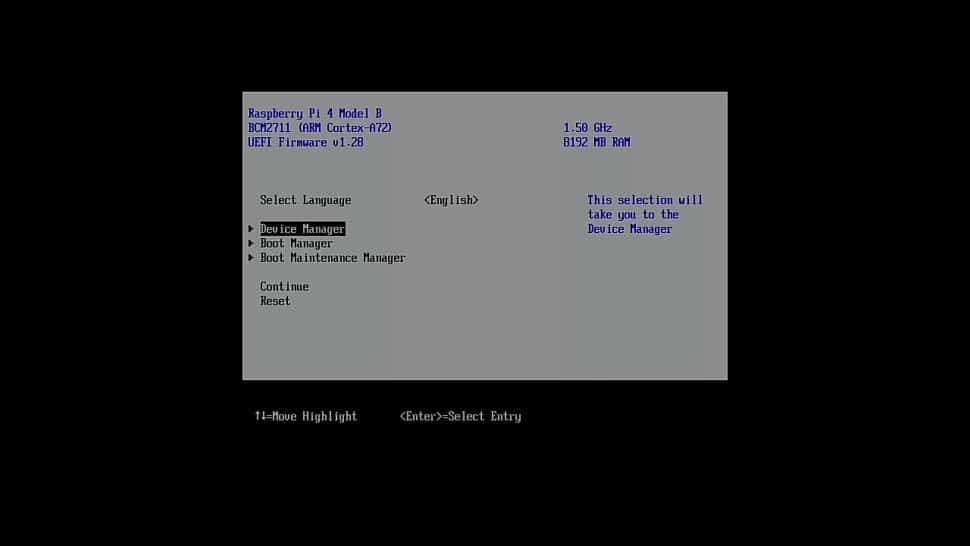
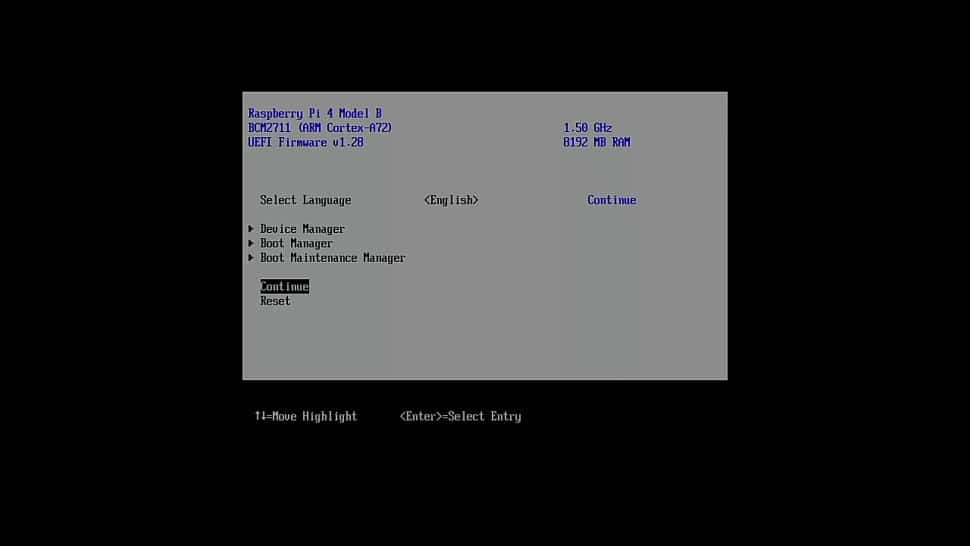
When booting your Raspberry Pi 4 up, press “ESC” to enter setup.

Select the “Device Manager” option and press “Enter”.
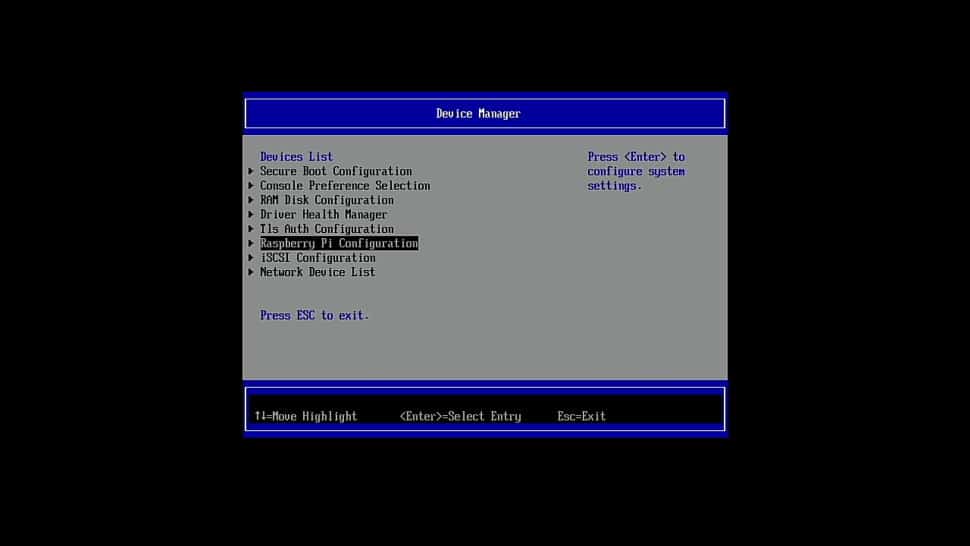
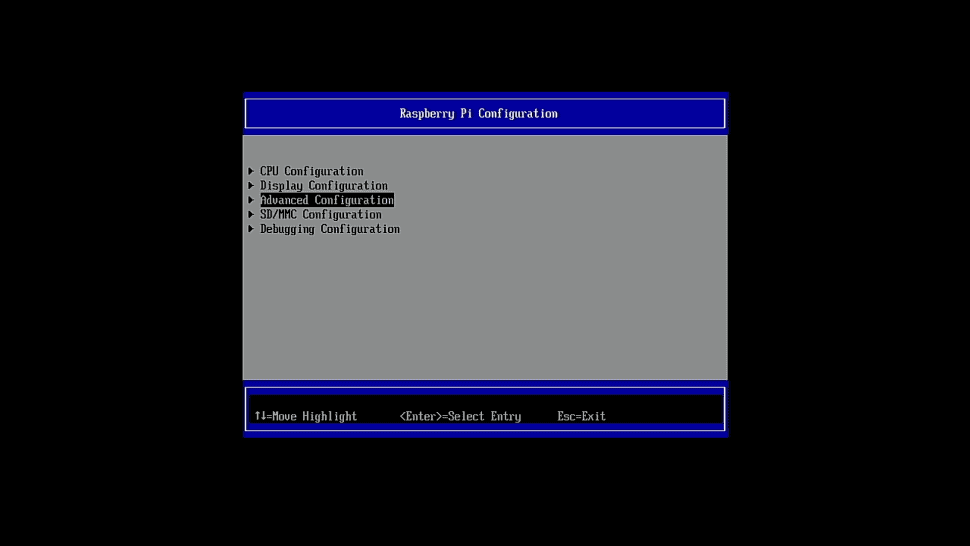
Choose the “Raspberry Pi Configuration” selection.
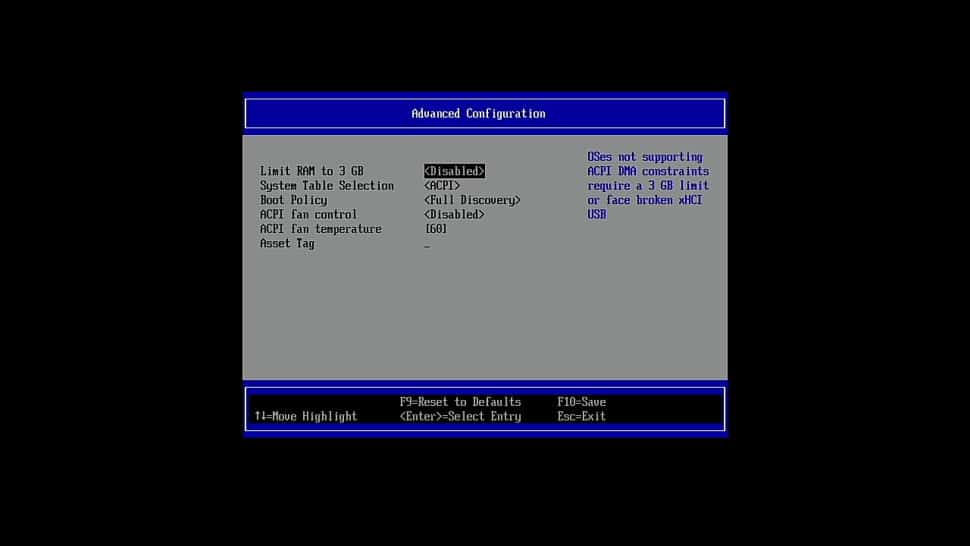
Within “Raspberry Pi Configuration”, select “Advanced Configuration”.
Remove the RAM limit by changing the “Limit RAM to 3 GB” to “Disabled”. Save this option by pressing “F10” then exit.
Choose the latest Windows 11 build for “arm64”.

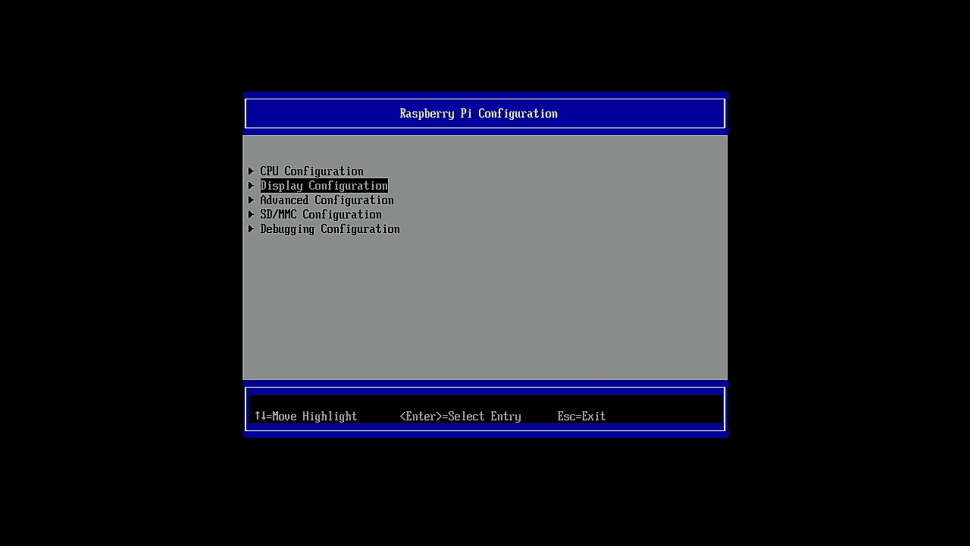
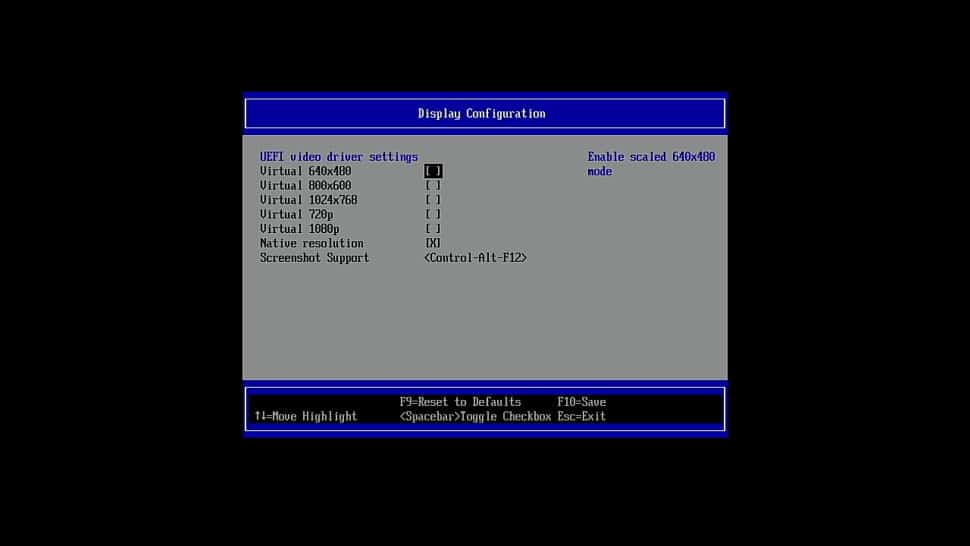
Next, enter “Display Configuration” by selecting that option.
Set your desired resolution. Save by pressing “F10” and exit.
Exit to the initial setup menu and hit “Continue”.
And there we have it, you should have not only installed Windows 11 on your Raspberry Pi 4, you should also have it all set up correctly. You can now take advantage of the new features in the new Windows OS in all that Pi compact form factor we all know and love.
Choose the language you'd like the Windows 11 installation to be assigned to.
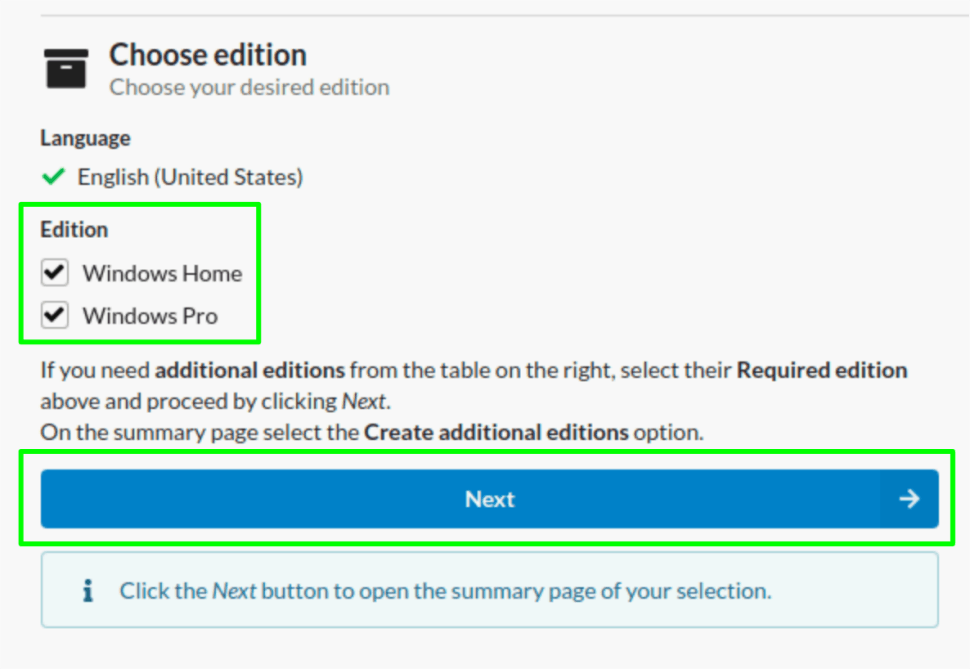
Opt for your preferred Windows 11 version. In our case, we chose both the Home and Pro versions. Hit ‘Next'.
Select the “Download and convert to ISO” download method and press “Create download package”.

Once the file is downloaded, extract it to your desktop, naming it “win11”.
Open your “win11” folder and double click on uup_download_windows.cmd.
When the security prompt is triggered click “More info”, “Run anyway” and then allow the app to make changes to your PC.
About the Author