
How to make a welcome channel on Discord – our step-by-step guide

Table of Contents
If you have created a new server on Discord and are wondering how to make a welcome channel, then we have you covered right here.
Much like the name suggests, a welcome channel welcomes new users, gives them an idea about how the server works, and also makes them aware of guidelines. While these are some standard ideas, you can customize the welcome channel along with the message as per your requirements.
Prime Day is finally here! Find all the biggest tech and PC deals below.
- Sapphire 11348-03-20G Pulse AMD Radeon™ RX 9070 XT Was $779 Now $739
- AMD Ryzen 7 7800X3D 8-Core, 16-Thread Desktop Processor Was $449 Now $341
- ASUS RTX™ 5060 OC Edition Graphics Card Was $379 Now $339
- LG 77-Inch Class OLED evo AI 4K C5 Series Smart TV Was $3,696 Now $2,796
- Intel® Core™ i7-14700K New Gaming Desktop Was $320.99 Now $274
- Lexar 2TB NM1090 w/HeatSink SSD PCIe Gen5x4 NVMe M.2 Was $281.97 Now $214.98
- Apple Watch Series 10 GPS + Cellular 42mm case Smartwatch Was $499.99 Now $379.99
- ASUS ROG Strix G16 (2025) 16" FHD, RTX 5060 gaming laptop Was $1,499.99 Now $1,274.99
- Apple iPad mini (A17 Pro): Apple Intelligence Was $499.99 Now $379.99
*Prices and savings subject to change. Click through to get the current prices.
Creating a welcome channel on Discord is not at all a difficult task, but it does have about a dozen steps. All you need to do is create a new channel, adjust a few settings, add a bot, and set up the bot to welcome new members who join the channel.
To give you better clarity, we have put together a step-by-step guide on creating a welcome channel with images.
Quick Answer
To make a welcome channel for your Discord server, here's what to do –
Create a new channel > Move the welcome channel under ‘voice channels' > Set the permissions > Add the Carl bot > Turn on the ‘welcome' plugin > Set a welcome message > Adjust other settings
Please find more details on each step in our guide below.
How to make a welcome channel on Discord
For this guide, we will be using the Carl bot for the welcome channel. However, you can choose to integrate any other third-party bots of your choice. To learn how to add bots, you can refer to our guide on how to add bots to Discord.
With that being said, let's get started.
Step
Add a new channel
To start with, you have to create a new channel within your server. To do this, head over to your server and click on the ‘+' sign next to the ‘Text Channels.' You can also right-click your mouse and select the ‘Create Channel' option. If you already have a channel, you can follow from step 3.
We're assuming that you already have a Discord server. If you want to set up a new server, you can check out our guide on how to create a new Discord server.
Step
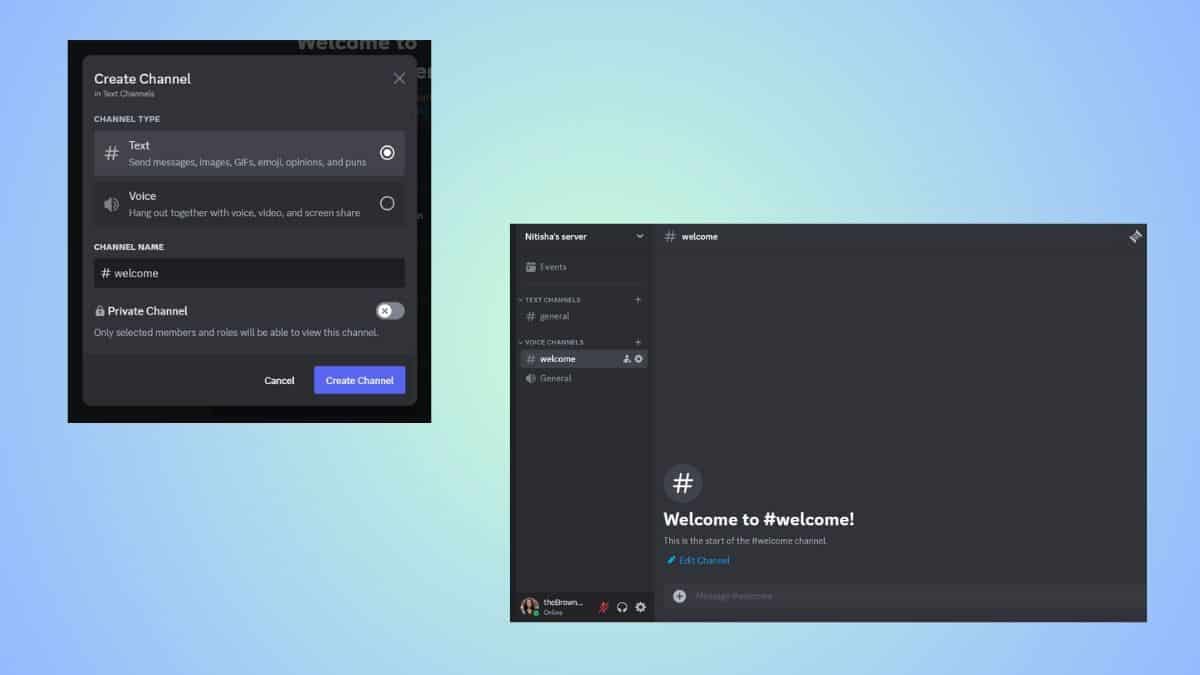
Name the new channel
Now, you will be prompted to name the channel, add an icon, and invite people to join. You can choose to skip some of these steps for now. Once you have named the channel and saved the settings, we will head over to more advanced settings.
Step
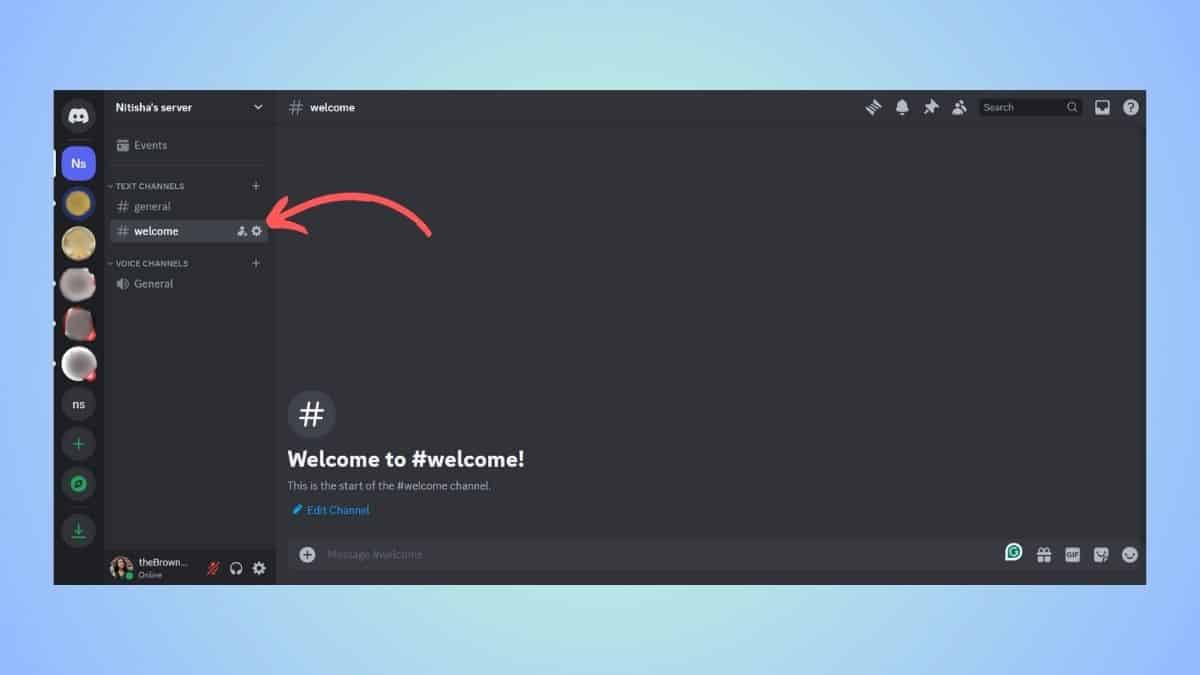
Move the welcome channel under ‘voice channels'
To sync the channels in your server, we will be moving the welcome channel under the voice channel section. To do this, simply drag the channel name on the server dashboard and drop it under ‘voice channels.'
Step
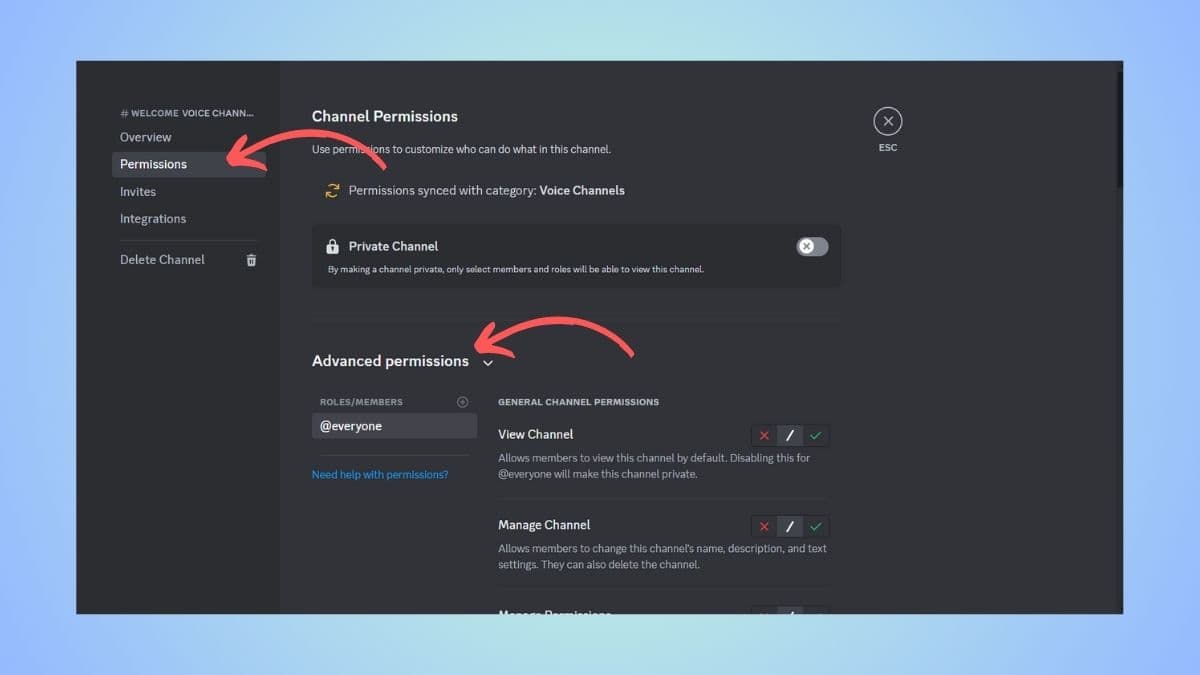
Set the permissions
Next, you will have to set up the right permissions so the new members added to the server will see the welcome message. To do this, click on ‘Edit Channel' > Permissions > Advanced Permissions.
Here's what you need to do –
- Set the roles/members to ‘@everyone'
- Disable the ‘Send Messages' option, so members won't be able to send messages to the welcome channel and clutter it
- Enable ‘Read Message History'
- Save these settings and head back to the welcome channel
Step
Add Carl bot
Now, we will be adding Carl Bot to the newly created welcome channel.
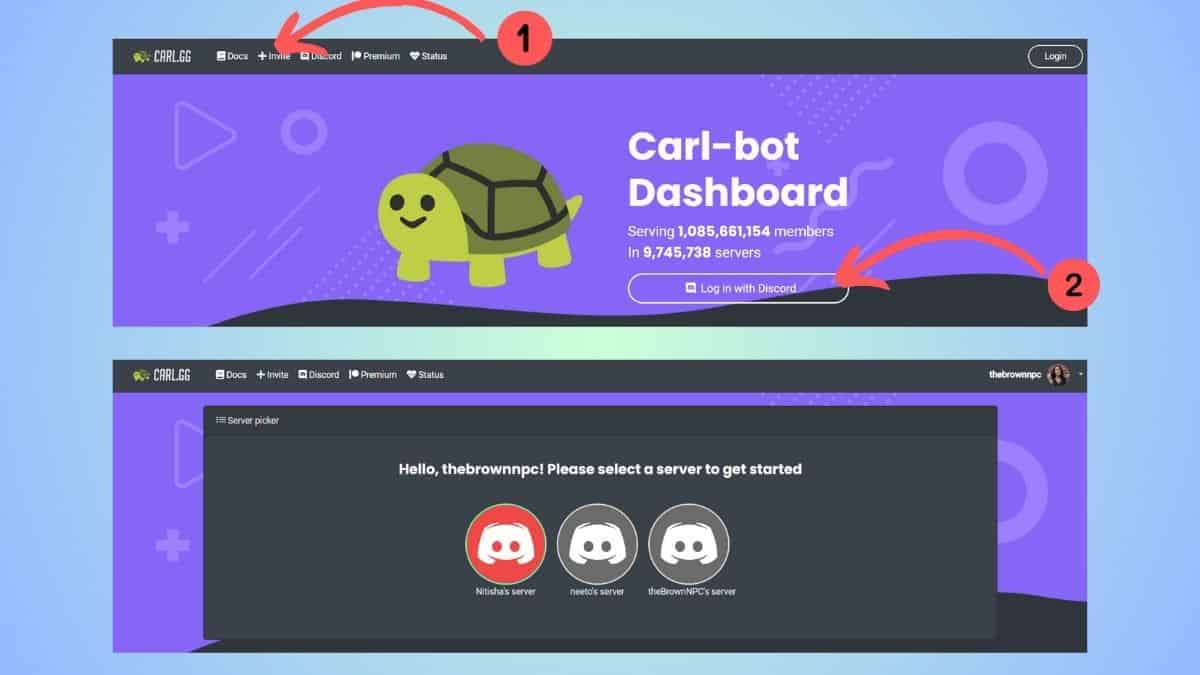
- Head over to the official Carl bot website
- On the homepage, click on the ‘+ Invite' button on the top right corner. Authorize the invite, and you should see the bot on your server.
- Then, head back to Carl bot website and click on ‘Login'
- Enter your details and select a server that you want to add the welcome bot to
Step
Setup the ‘welcome' plugin
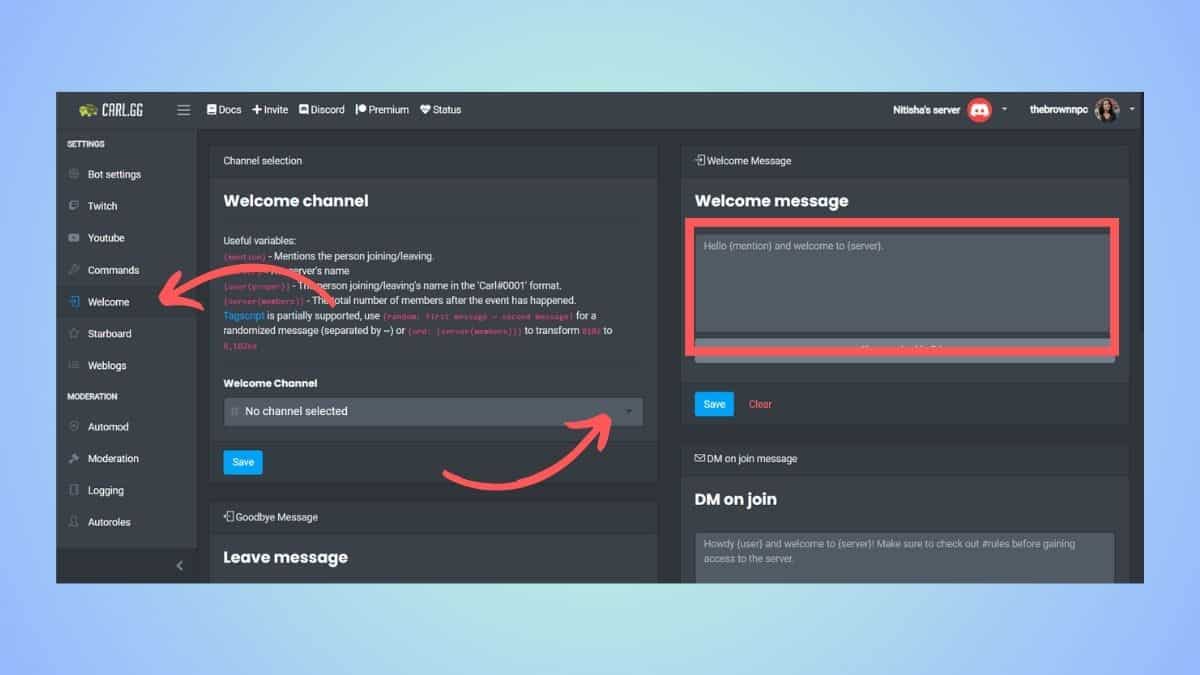
Next, you have to head over to the Carl bot website again. On the Dashboard, under ‘Settings,' click on the ‘Welcome' option.
Here, you have to set up the welcome channel.
- Select the welcome channel and save it
- Type the welcome message under ‘Welcome Message'
- Then, if you want, you can also automate a private message for joiners under ‘DM on Join'
- You can also set up a ‘Leave message' and a ‘Ban message'
When you're done, save the settings.
Frequently Asked Questions
What are the best welcome bots for Discord?
Aside from Carl bot, you can try other welcome bots like MEE6, Tatsumaki, Ostra, Welcomer, CommunityOne, and more. You can add these bots, customize the welcome settings, and get started.
How do you delete a welcome channel on Discord?
To delete a welcome channel, simply go back into your server's dashboard > Click on “Channels,” > Choose “Delete Channel,” > confirm by clicking “Confirm.”
Conclusion
To sum up, creating a new welcome channel for your servers involves two steps – creating a welcome channel on Discord and adding and setting up a bot. You can follow our guide for both parts and get your welcome channel up and running in no time.
About the Author