
How to check what GPU you have using 3 methods

Reviewed By: Kevin Pocock

Table of Contents
Were you wondering how to check what GPU you have? If you said yes, you've come to the right place.
Being aware of what GPU is installed in your laptop or gaming rig can help you identify product-specific issues and streamline driver updates. However, you can open a laptop and look at the GPU like you would on a PC.
Prime Day is finally here! Find all the biggest tech and PC deals below.
- Sapphire 11348-03-20G Pulse AMD Radeon™ RX 9070 XT Was $779 Now $739
- AMD Ryzen 7 7800X3D 8-Core, 16-Thread Desktop Processor Was $449 Now $341
- ASUS RTX™ 5060 OC Edition Graphics Card Was $379 Now $339
- LG 77-Inch Class OLED evo AI 4K C5 Series Smart TV Was $3,696 Now $2,796
- Intel® Core™ i7-14700K New Gaming Desktop Was $320.99 Now $274
- Lexar 2TB NM1090 w/HeatSink SSD PCIe Gen5x4 NVMe M.2 Was $281.97 Now $214.98
- Apple Watch Series 10 GPS + Cellular 42mm case Smartwatch Was $499.99 Now $379.99
- ASUS ROG Strix G16 (2025) 16" FHD, RTX 5060 gaming laptop Was $1,499.99 Now $1,274.99
- Apple iPad mini (A17 Pro): Apple Intelligence Was $499.99 Now $379.99
*Prices and savings subject to change. Click through to get the current prices.
To that end, we've put together this quick guide that will take you through different methods of finding out which GPU you've got. So, without further ado, let's get right into it.
Quick Answer
Press “CRTL+SHIFT+ESC” to open the Task Manager. Then, Open the “Performance” tab, Click on “GPU,” and check the GPU’s name in the top right corner.
Here's how you can check what GPU you have
There are multiple methods to find out what GPU is installed in your system, and we've listed them below.
Method
Using the task manager
The most simple way to check for your GPU is through the Task Manager. Here's how to do it.
- Press “Windows Key + Q,” type “Task Manager,” and hit Enter. You can also right-click on the taskbar and click on “Task Manager.”

- This should open the Task Manager window.
- Navigate to the “Performance” tab, which should be the second one at the top.

- If you have a laptop, this will show you “GPU 0” and “GPU 1”. The first is your integrated GPU (iGPU), and the second is your discrete GPU (dGPU).
- Click on them to see their name in the top right corner.


Method
Using the device manager
The device manager can show you all the details about your setup's hardware, including which GPU you have. Here is how to do it.
- Press “Windows Key + Q,” type “Device Manager,” and hit Enter.
- This will open the Device Manager window.

- Navigate to “Display adapters” and click on it to expand it.
- This will show you the name of your GPU.


Method
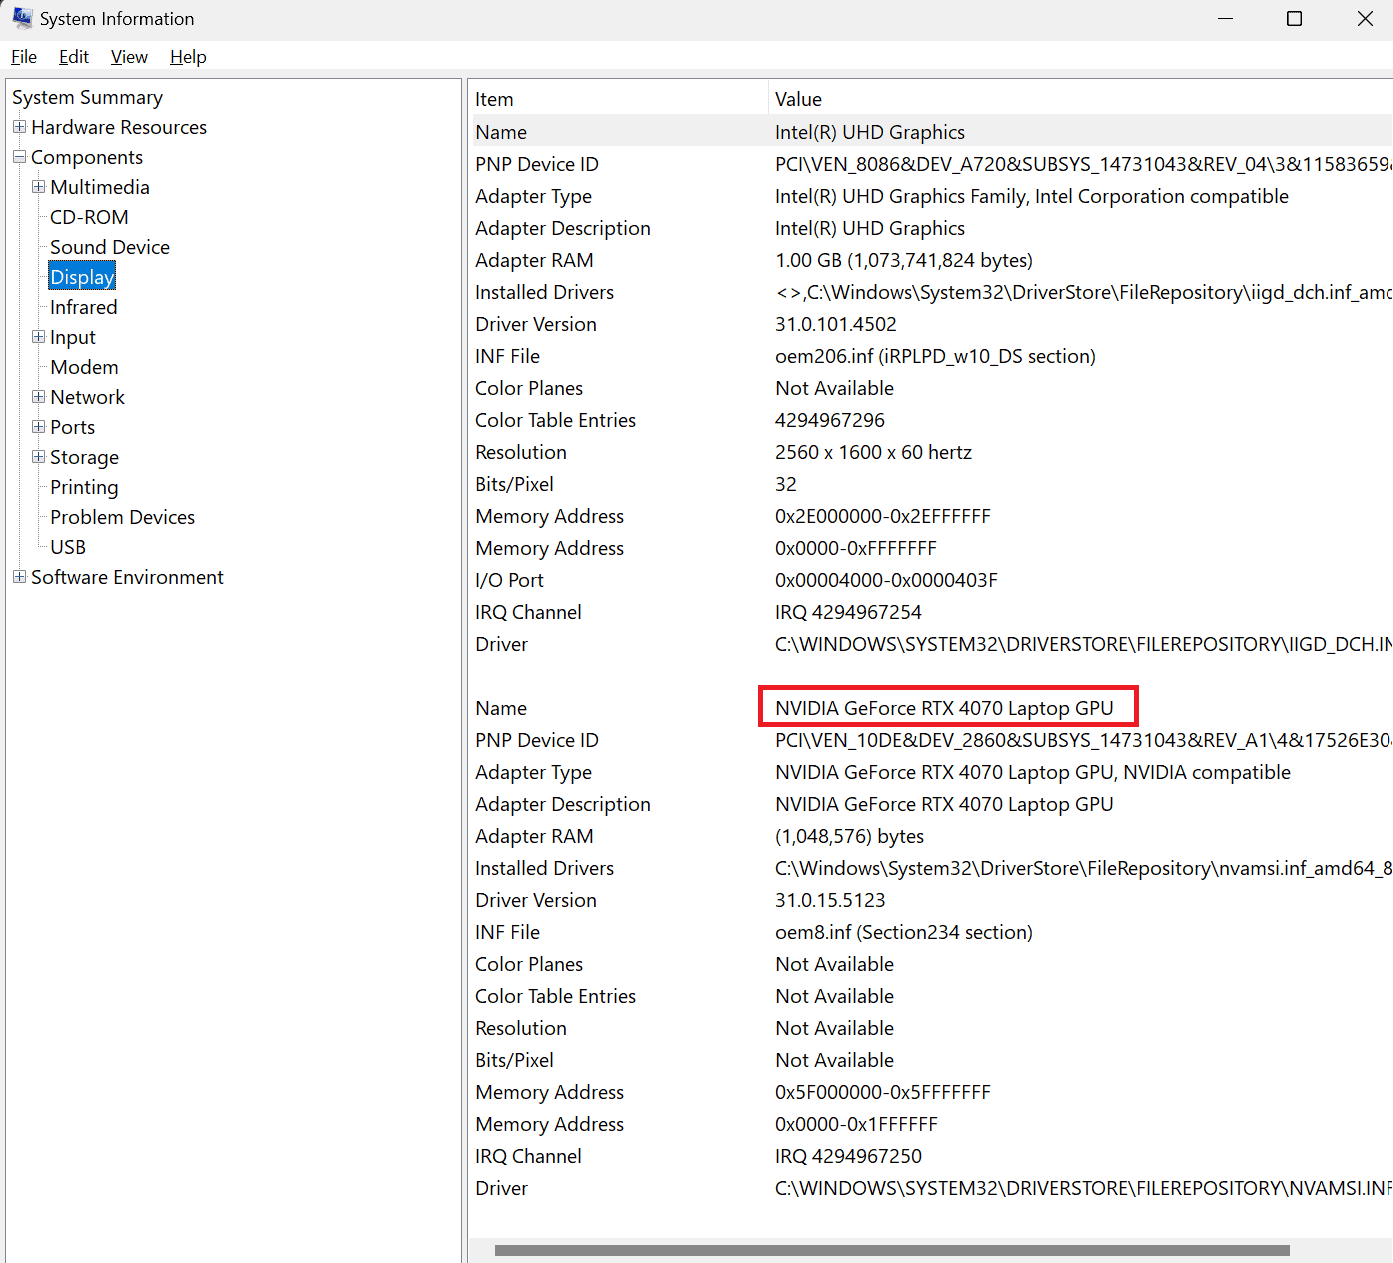
Using System Information
- Press “Windows Key + Q,” type “System Information,” and hit Enter.
- There should be three options on the right-hand side: Hardware Resources, Components, and Software Environment.
- Click on “Components” to expand it.

- Select “Display.”
- There should be two sections on a laptop. The top section will include information about the iGPU, and the second section will include information about the dGPU. The GPU’s name will be listed beside “Name.”


Is it possible to check my GPU without opening the case?
It is possible to check your GPU without opening the case, and the most straightforward way to do it is via the Task Manager. Open the Task Manager by pressing “CRTL+SHIFT+ESC,” opening the “Performance” tab, and under the GPU section, its name will be in the top right corner.
Wrapping up
With this, we've reached the end of our journey. Hopefully, you can now easily check which GPU you've got and keep its drivers and other software up to date. If you're interested in exploring other GPU-related queries, we've also covered how to tell if a GPU is failing and how to lower GPU temperature.
We've also reviewed various GPUs in-house, and if you're looking to upgrade your GPU, we recommend considering these options.
About the Author