How to lower your GPU temperature and keep it cool using 9 methods

Table of Contents
If you were wondering how to lower your GPU temperature, you've come to the right place.
Any component overheating can be concerning, especially if it’s your GPU or CPU. A GPU overheating means you can run into stuttering issues while gaming and lowered overall performance. On top of that, running at high temperatures over a long time can also reduce the lifespan of the GPU. That said, there are some steps you can take to lower your GPU temperature, and this is where we come in.
We've put together this guide that will take you through these different methods step-by-step so that you can quickly cool down your GPU.
What you'll need
For some methods, you’ll need proper tools to get the job done right. We’ve listed some of them below.
Here's how to cool down your GPU
Keeping your GPU cool is crucial to maintaining optimal performance and keeping it running for a long time. Follow the methods below to control your GPU's overheating issues.
Method
Improve case airflow
Poor cable management can restrict airflow, resulting in overheating issues for various components, including the GPU. An easy fix for this is to reroute the wires in your system and ensure they aren't cluttered and blocking the fans. Consider using cable ties or clips for better cable management.
On top of that, also look at how the fans are installed. For example, if there is a lack of fans pulling air into the casing, your GPU will overheat. Changing the fan direction can fix this but you'll need to look at all the fans and change their positions for optimal airflow.
After that, if your GPU is still overheating, upgrading your PC case might be worth the investment. To that end, we've got your back with our best airflow PC case guide.
Method
Clean dust from components
Dust buildup is one of the leading causes of PC overheating issues, and cleaning your GPU is a good place to start. Here is how you can do it.
- Turn off the PC and unplug the power cable from the wall socket.
- Using a screwdriver or in case of knurled screws, your hands loosen the screws and slide off the side panel.
- Take your PC case outside, blow away the dust buildup using a compressed air canister, and use a soft brush to remove tough dust particles.
- Establish a regular cleaning routine, such as once every few months, to prevent dust buildup, which can impair cooling efficiency. Keeping the external environment clean also helps reduce internal dust accumulation.
Always hold the PC case, CPU, and GPU fans while cleaning with compressed as they can get damaged if they rotate more than their given RPM.
Method
Adjust fan speed
Depending on the type of fan, you can increase its speed via a remote control or software. Unfortunately, if you have Molex fans, their speed can't be changed.
You can use third-party software like MSI Afterburner to access your GPU's fan curve and adjust it accordingly. How this works is that you've got the fan speed and the corresponding temperature. So, if you set the fans to rotate at 5400 RPM at 55°C, they'll shift to that speed as soon as the temperature is detected.
Using this software or SpeedFan, you can also change the speed of case fans for maximum airflow. However, if changing the fan speed doesn't work, it might be time to swap them out for more powerful ones, and we've got you covered there as well. Check out our best 140mm case fans guide for the top picks.
Method
Reapply thermal paste
This step requires some technical expertise, and as a disclaimer, you should know that opening your GPU might void its warranty.
- Take out your GPU from the casing by removing the screws from the bracket and disconnecting the power cables.
- Remove the screws holding the cooler. The cooler is the part with the fans.
- Be careful during the process, and don't rush or forcibly pull apart anything.
- Disconnect the fan from the board and clean the cooler using compressed air.
- Wipe off the old thermal paste from the GPU core and the heatsink contact patch.
- Apply the new thermal paste.
- Connect the fan and place the cooler on top of the board. Take your time and make sure that the alignment is right.
- Tighten the two parts together with screws and mount the GPU on the motherboard.
After this, launch a game or perform any other demanding task, such as rendering, and see how the GPU performs and notice its temperature. If you're interested in checking out thermal paste options, our best thermal paste guide has the top picks available on the market today.
Method
Use a GPU cooler
A GPU cooler can help lower the temperature during idle and high loads. While it might cost you extra, it should be worth the investment if it keeps your GPU running longer.
- Look for a compatible cooler depending on your GPU brand and model
- Follow the manufacturer's instructions to carefully replace the GPU's existing cooler with the new one. This might involve applying new thermal paste and securely attaching the cooler.
If you encounter any challenges during the process, there are many tutorials and forums that can help.
Method
Undervolt the GPU
Many think that undervolting also decreases the GPU's performance, but if you strike the right balance, you can maintain its performance, lower its temperature, and reduce its power draw.
- Install software like MSI Afterburner.
- Use this tuning software to adjust the voltage settings of your GPU. Ensure it's compatible with your specific GPU model.
- Lower the GPU voltage incrementally.
- Keep an eye on the performance and stability. Avoid drastic changes that might cause instability.
- Conduct stress tests after adjustments. We recommend you check out our GPU stress testing guide for in-depth instructions.
- If the GPU performs well and remains stable, further decrease the voltage and stress test it again.
- Do this till you encounter stability issues and revert to the last stable settings.
Method
Change GPU orientation
If your GPU is overheating, it might be due to your small casing and the cramped components. In this case, changing the GPU orientation might bring its temperature down.
- First, check if your casing is compatible with a vertical mounting bracket. If it is, look for a kit that supports your GPU.
- Remove the GPU and the old bracket.
- Following the instructions on the vertical mounting kit manual, install it accordingly.
- Seat the GPU on the verticle mount.
- Connect a riser cable to the GPU and connect the power cable to it.
Fire up your PC, play games, do some editing, and check how the GPU is doing with the new orientation, and whether the temperatures have come down.
Method
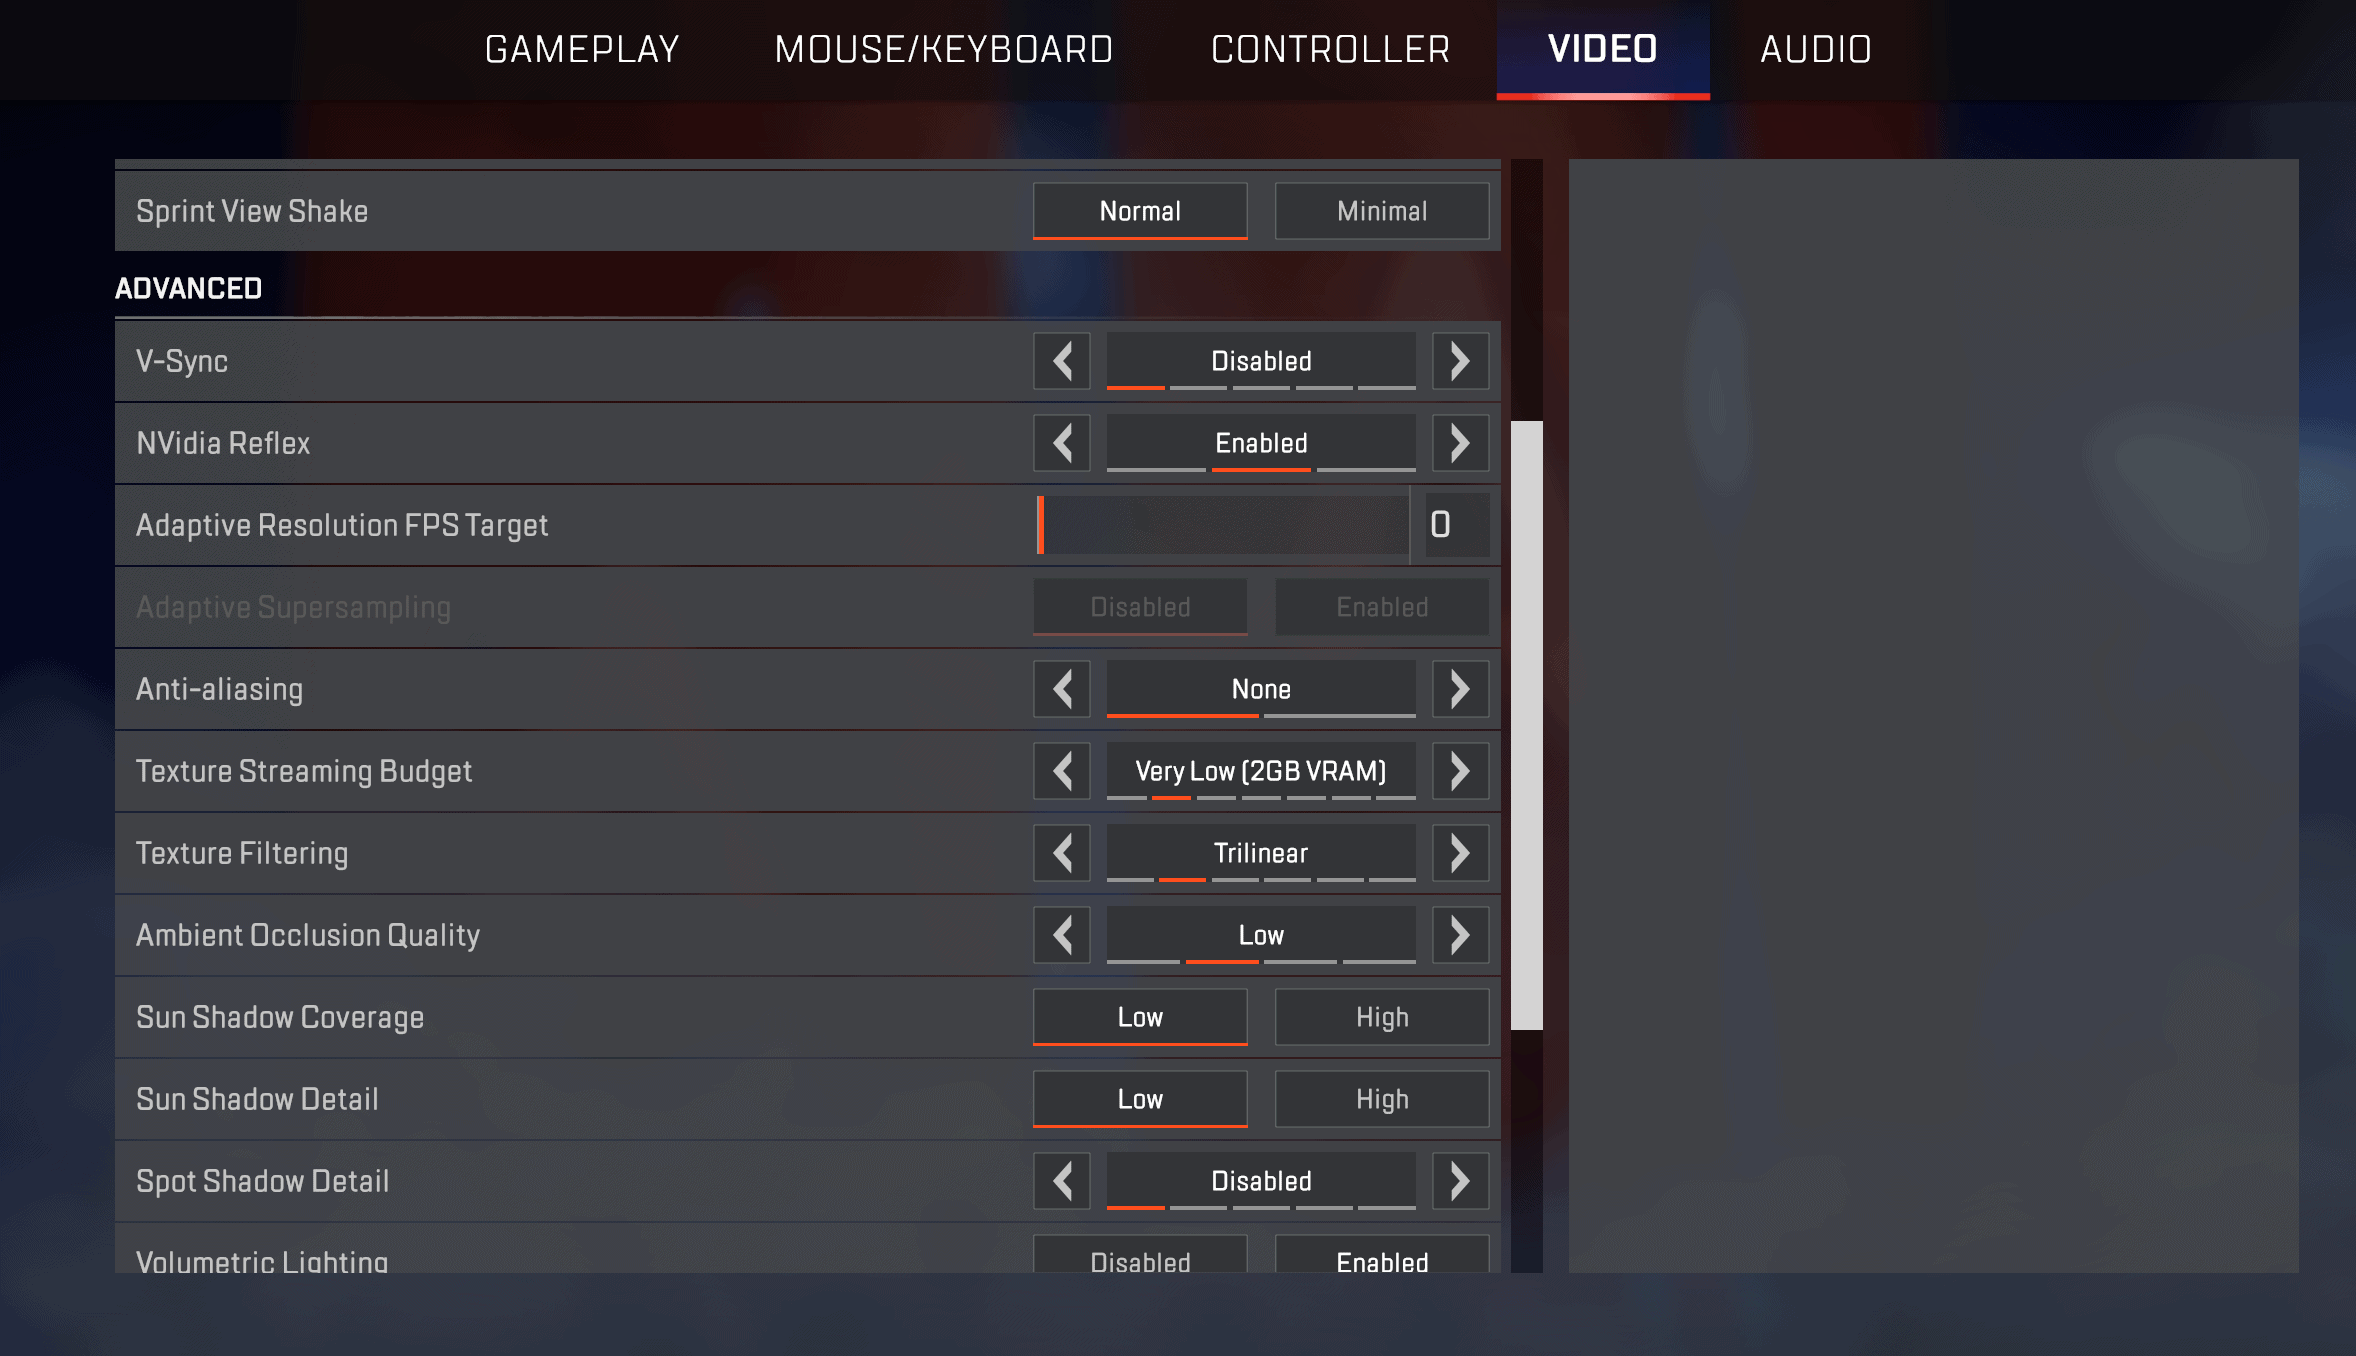
Turn down in-game settings
The higher your in-game graphics are, the harder your GPU has to work to render those graphics. Kicking them down a notch could take some pressure off the GPU and bring the temperature down. Here is how you can do it.
- Launch the game
- Navigate to in-game settings
- Go to the graphics or video tab
- Lower the resolution and other visual settings, such as explosion effects and texture detail.

- Try playing the game now, monitor the temperature with the Nvidia in-game overlay, or use CPU-Z.
Method
Revert GPU to pre-overclock settings
If your GPU is overclocked, that might be the reason for its high temperature. That said, this doesn't require a long fix; you only need to revert the changes to default, and the overheating issue should stop.
Method
Lower ambient temperature
Your ambient temperature plays a great part in the running temperature of your components, such as the GPU and CPU. So, if you're living in a hot region, the base temperature of your GPU will be high compared to someone living in a cold area. That said, you can turn on the AC to lower your room's temperature while playing games or doing resource-intensive tasks. This should help cool your GPU.
Is 90c too hot for GPU?
A GPU temperature of 90°C is generally considered above maximum for most graphics cards under normal operating conditions. While many modern GPUs can technically handle temperatures up to around 90°C, consistently operating at such high temperatures can increase the risk of thermal throttling, where the GPU reduces its performance to cool down.
How hot can a GPU run safely?
The safe operating temperature generally falls between 65°C and 85°C under load. Most GPUs are designed to handle temperatures up to 85°C without any immediate risk of crashes. However, it is preferable to keep the temp below 80°C to ensure safe and stable operation.
Wrapping up
Hopefully, now you know how to lower your GPU temperature and keep it running optimally without compromising performance due to overheating. While it can be very concerning, overheating issues have relatively easy fixes, and as you can see, most of them don't even require purchasing anything extra. With that, we wish you luck with your gaming sessions and a long life for your GPU.
About the Author