
Raspberry Pi 500 labeled the “perfect recording studio computer” on a budget

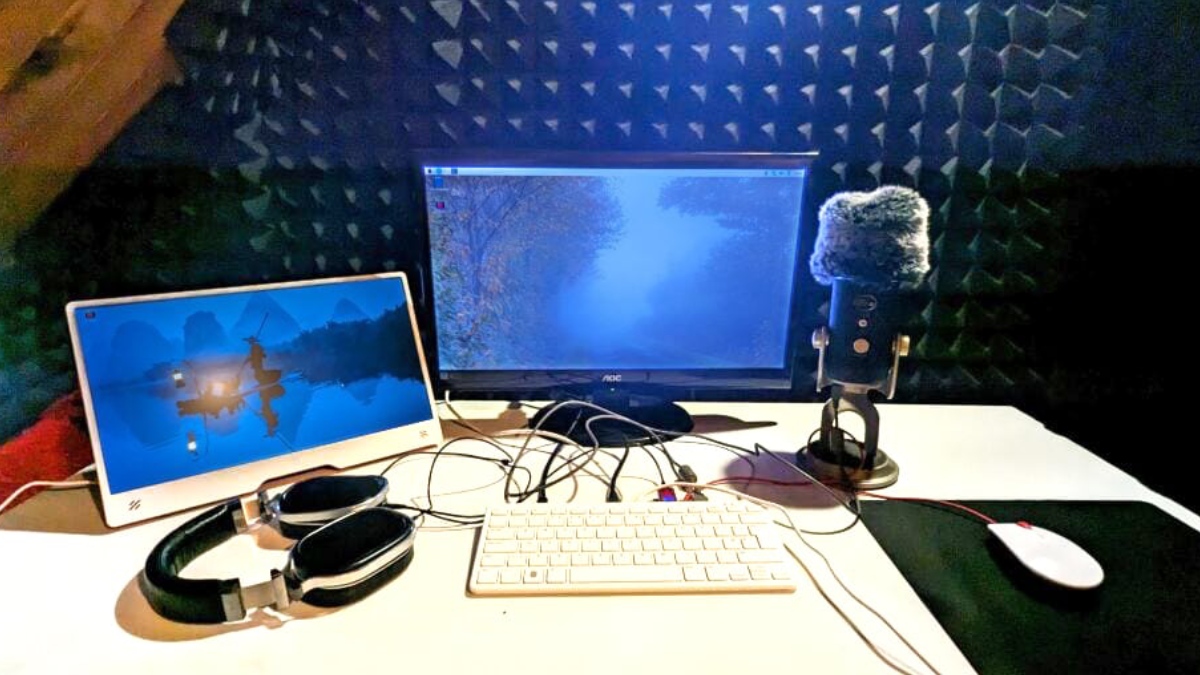
Table of Contents
You don't need expensive equipment and a complicated setup to have your own recording studio. With some acoustic foam and a Raspberry Pi, it’s possible to create a budget-friendly recording studio at home.
As podcasts and lengthy YouTube videos have become more popular, more people have been searching for ways to improve the sound quality. This can be an intimidating process, and professional-grade equipment is expensive and complex. However, there is an easier and cheaper way that involves the humble Raspberry Pi.
Prime Day is finally here! Find all the biggest tech and PC deals below.
- Sapphire 11348-03-20G Pulse AMD Radeon™ RX 9070 XT Was $779 Now $739
- AMD Ryzen 7 7800X3D 8-Core, 16-Thread Desktop Processor Was $449 Now $341
- ASUS RTX™ 5060 OC Edition Graphics Card Was $379 Now $339
- LG 77-Inch Class OLED evo AI 4K C5 Series Smart TV Was $3,696 Now $2,796
- Intel® Core™ i7-14700K New Gaming Desktop Was $320.99 Now $274
- Lexar 2TB NM1090 w/HeatSink SSD PCIe Gen5x4 NVMe M.2 Was $281.97 Now $214.98
- Apple Watch Series 10 GPS + Cellular 42mm case Smartwatch Was $499.99 Now $379.99
- ASUS ROG Strix G16 (2025) 16" FHD, RTX 5060 gaming laptop Was $1,499.99 Now $1,274.99
- Apple iPad mini (A17 Pro): Apple Intelligence Was $499.99 Now $379.99
*Prices and savings subject to change. Click through to get the current prices.
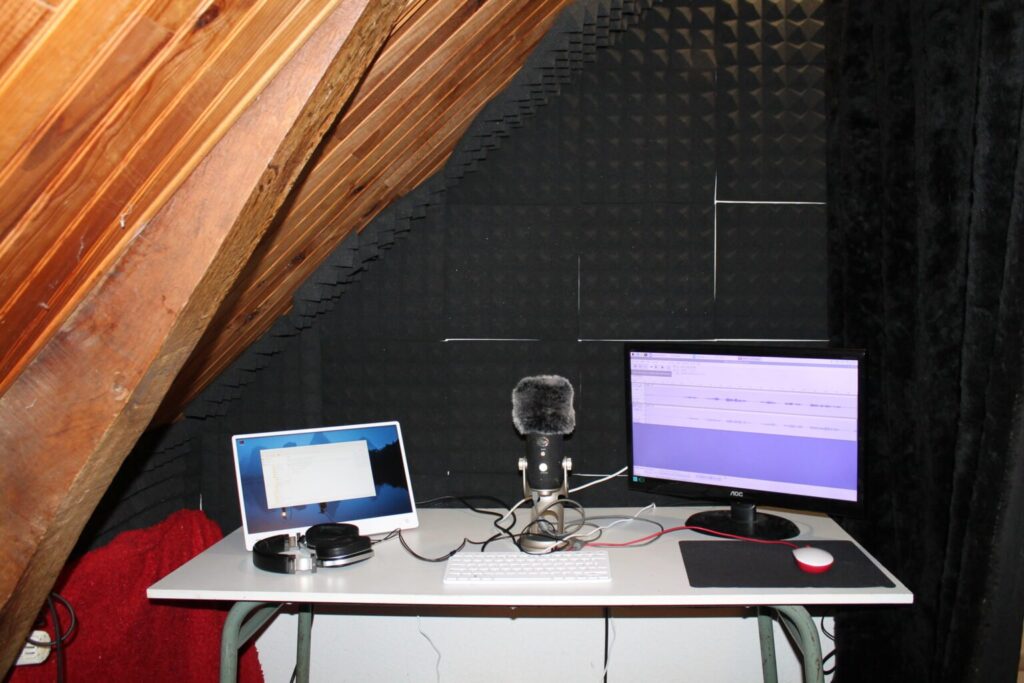
The Raspberry Pi has become beloved by hobbyists due to its small size and versatility. Though it is commonly used to run retro emulation machines or other small electronics projects, it turns out that the Raspberry Pi can be repurposed into a decent computer for a home recording studio, especially when paired with the official Raspberry Pi monitor, which launched alongside the Pi 500 in December last year.
If you have a garage, walk-in wardrobe, or box room, then it can be turned into a recording studio. Raspberry Pi magazine recently released the first part of a guide on how to set up a small studio suitable for vocal or simple instrument recording.
A small space and a lot of acoustic foam
A typical set-up would involve a microphone, keyboard, mouse, headphones, a small monitor, and a lot of acoustic foam. Thankfully, acoustic foam is not expensive, and for those on a very tight budget, there are even cheaper alternatives like foam floor mats or thick blankets.
The guide goes into detail on how to effectively apply soundproofing for the space, along with tips on mounting acoustic foam and how to build a ‘bass trap' for use with instruments. The article specifies that it costs less than £50 to build an acceptable recording set-up, not including the price of the electronics.
Details on exactly how to use the electronics to set up your now safely sound-proofed space are set to be published next week. Worth keeping an eye out for if you are an aspiring musician or podcaster.
About the Author