
How to find last column with data in Excel – 4 simple methods


Table of Contents
Can’t figure out how to find the last column with data in Excel? Well, you’ve landed on the right page.
Looking for the last piece of data in your Excel sheet can be a drag, especially with a lot of information to sift through. But don’t worry; there are some quick shortcuts and tricks that can help you find the end line without the hassle.
Prime Day may have closed its doors, but that hasn't stopped great deals from landing on the web's biggest online retailer. Here are all the best last chance savings from this year's Prime event.
- Sapphire Pulse AMD Radeon™ RX 9070 XT Was $779 Now $719
- AMD Ryzen 7 7800X3D Processor Was $449 Now $341
- Skytech King 95 Ryzen 7 9800X3D gaming PC Was $2,899 Now $2,599
- LG 77-Inch Class OLED C5 TV Was $3,696 Now $2,996
- AOC Laptop Computer 16GB RAM 512GB SSD Was $360.99 Now $306.84
- Lexar 2TB NM1090 w/HeatSink SSD Was $281.97 Now $214.98
- Apple Watch Series 10 GPS+ Smartwatch Was $499.99 Now $379.99
- AMD Ryzen 9 5950X processor Was $3199.99 Now $279.99
- Garmin vívoactive 5 Smartwatch Was $299.99 Now $190
*Prices and savings subject to change. Click through to get the current prices.
In this guide, we’ll walk you through these tricks so you get the work done quickly. So, without any further ado, let’s dive in!
How you can find the last column with data in Excel
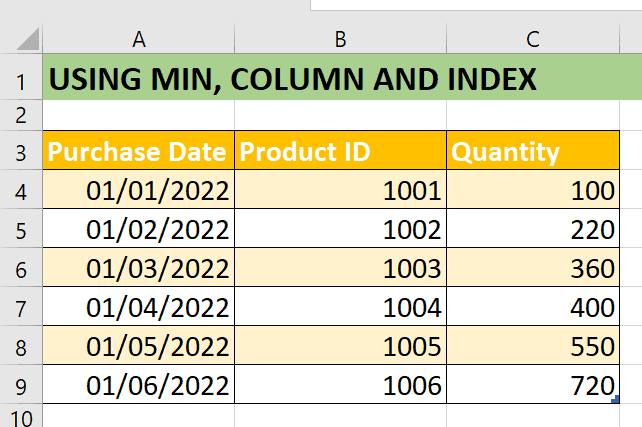
We’ll practice with a simple dataset that’s all about order details. This dataset includes columns for Purchase Date, Product ID, and Quantity. Let's have a look at it.
Method 1: Find the end of your data with MIN, COLUMN, and INDEX
You can combine the MIN function with the COLUMN and COLUMNS functions to figure out the number of the last column that has data. Then, with that number, you can use the INDEX function to quickly jump to the last column and see the data there.
You can also pair the MIN function with the COLUMN and COLUMNS functions to determine the number for the last column. Once you have this number, you can locate the data in it using the INDEX function.
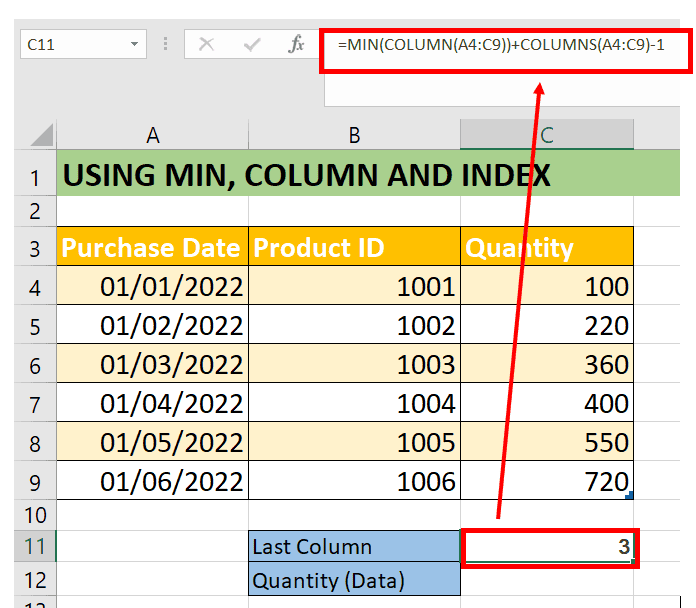
- First, click on cell C11.
- Next, enter the formula either directly into cell C11 or in the Formula Bar.
=MIN(COLUMN(A4:C9))+COLUMNS(A4:C9)-1
- Press enter, and you will see the last column number
Let’s break it down.
- COLUMN(A4:C9) returns an array of column numbers for the range A4:C9. For your Excel sheet, this would be {1, 2, 3}, since A, B, and C are the 1st, 2nd, and 3rd columns, respectively.
- COLUMNS(A4:C9) returns the number of columns in the range A4:C9, which is 3.
- MIN(COLUMN(B4:D9)) returns the smallest number from the array {1, 2, 3}, which is 1.
- Adding these together, which is 1 plus 3 equals 4.
- Subtracting 1 from the total: The formula subtracts 1 to adjust for the count starting at 1 instead of 0, ending with 3.
This result is intended to represent the last column number within the range.
To extract the data from the last column of our dataset using the correct formula, here’s the process step-by-step:
- Start by selecting cell C12. This is where we want the result to be shown.
- Next, type the formula into the Formula Bar or directly into cell C12.
=INDEX(A4:C9, 6,C11 )
- Press Enter, and the formula will display the data from the ‘Quantity’ column that corresponds to the sixth row within the range A4:C9.
The row number 6 is used because we want the data from the sixth row of the dataset.
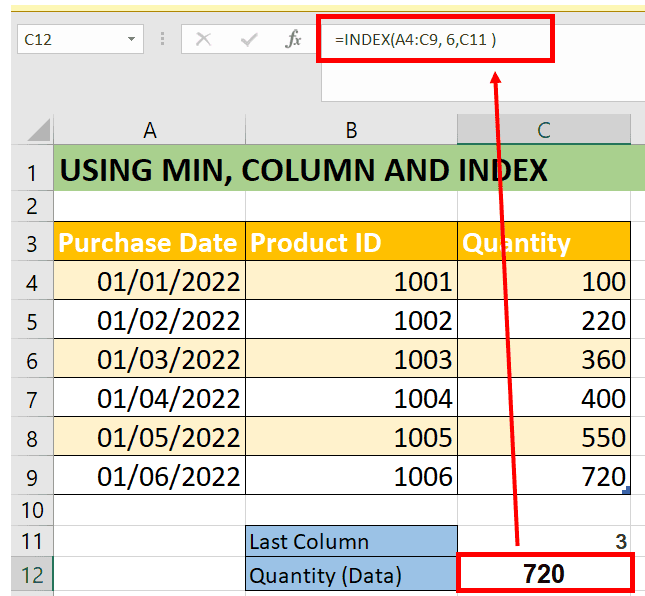
The =INDEX(A4:C9, 6, C11) formula looks at the cells from A4 to D9, finds the 6th row and the 3rd column within that range, and then gives you the data from that spot, which is the quantity ‘720’ from your last order.
Method 2: Find the data in the last column with the INDEX, ROWS, COLUMN
- Decide where you want the result to appear. In the case of our given dataset and notebook, select cell C11.
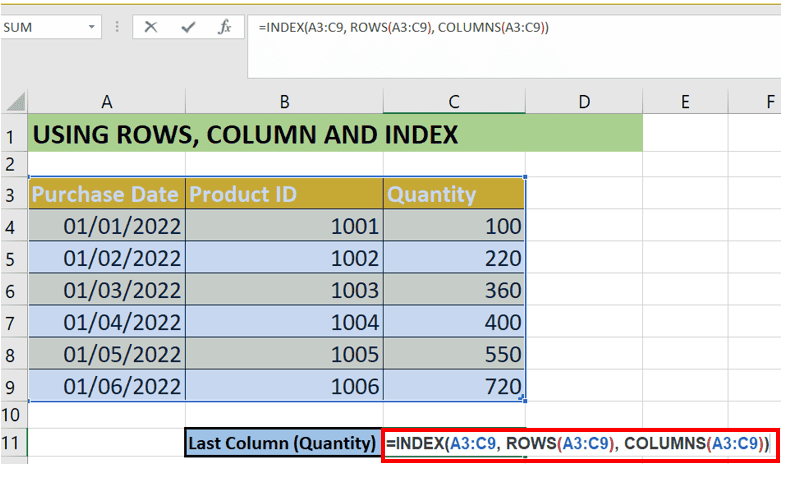
- Click on cell F4, then type the formula :
=INDEX(A3:C9, ROWS(A3:C9), COLUMNS(A3:C9))
Now, let’s break down the formula.
- The INDEX function returns the value at a given position in a range or array. The syntax is
- INDEX(array, row_num, column_num).
- The ROWS function returns the number of rows in a range. In ROWS(A3:C9), it counts how many rows are in the range A3:C9. Since the range is from row 3 to row 9, it returns 7.
- The COLUMNS function returns the number of columns in a range. COLUMNS(A3:C9) counts the columns from A to C, so it returns 3.
When you combine these functions in the INDEX formula, it effectively asks for:
- The value in the 7th row of the range A3:C9 (because there are 7 rows in total).
- In the 3rd column of the range A3:C9 (because there are 3 columns in total).
So, the INDEX function will return the value in cell C9, which is the bottom-right corner of the range – in this case, the quantity ‘720’ from the ‘Quantity’ column.

Method 3: Extract the Last Column Data with INDEX & COLUMNS
By using the INDEX function and the COLUMNS function together, you can find the last column with data. These functions are available in all versions of Excel.
- Choose the cell where you want to display the result of the last column’s data. In our example, we have selected cell E4.
- Click on cell E4 and type the formula, or you can write in the formula bar too:
=INDEX(A4:C9, 0, COLUMNS(A4:C9))
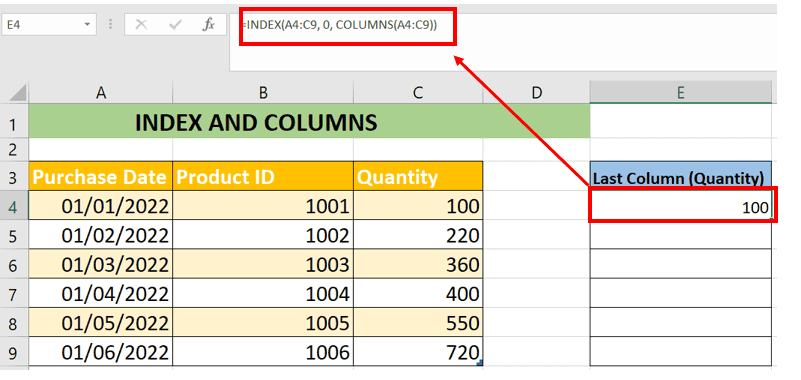
- A4:C9 is the range you’re working with, which includes all of your data.
- 0 is the row number that tells Excel you want all the rows in the specified column.
- COLUMNS(A4:C9) calculates the number of columns in your range. Since your range is from column A to C, it will return 3, which corresponds to the ‘Quantity’ column, the last column in your range.
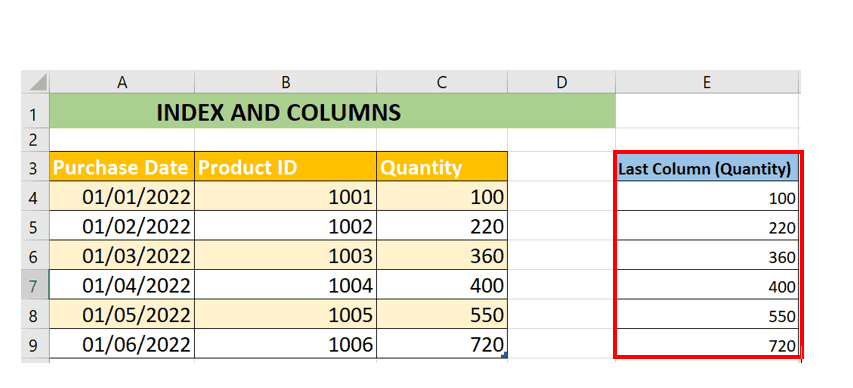
You can then click and drag down the column to get the remaining values for the column.
Method 4: Use VBA to locate the last data column in Excel
If you’re looking to quickly find the last column that contains data, VBA is a great tool to use. Let's look at the solution step by step:
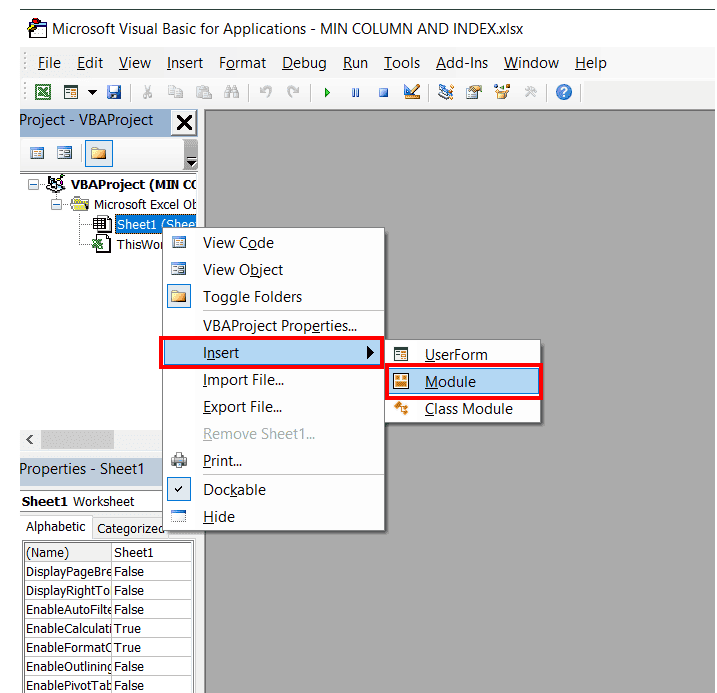
- Press ALT + F11 to open the Excel VBA Editor.
- In the VBA Editor, right-click on any of the items listed under “VBAProject” (usually your workbook name). Select Insert > Module from the context menu to insert a new module.
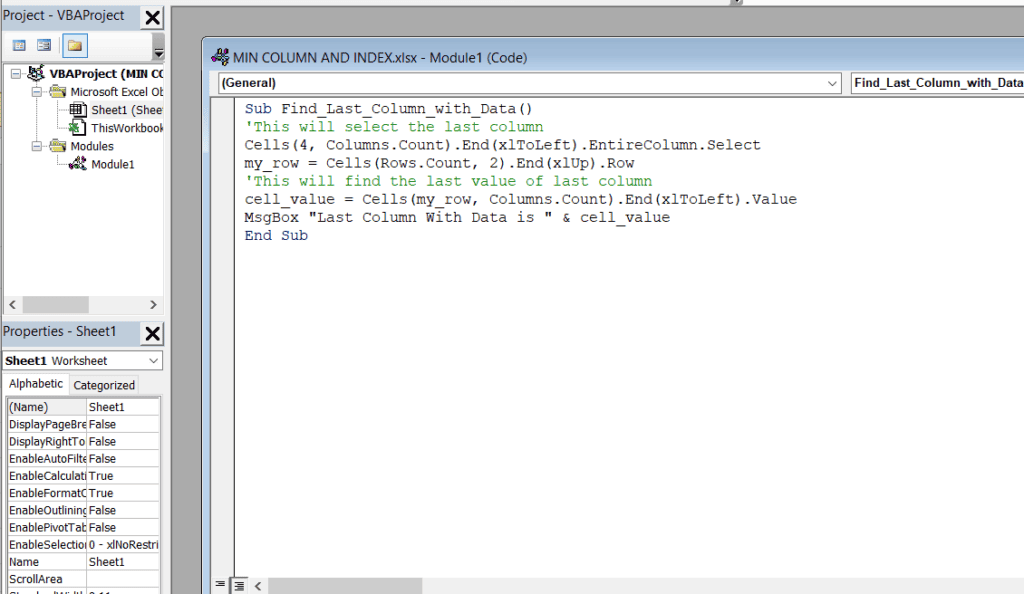
- In the newly created module, paste the following VBA code:
Sub Find_Last_Column_with_Data()
‘This will select the last column
Cells(4, Columns.Count).End(xlToLeft).EntireColumn.Select
my_row = Cells(Rows.Count, 2).End(xlUp).Row
‘This will find the last value of last column
cell_value = Cells(my_row, Columns.Count).End(xlToLeft).Value
MsgBox “Last Column With Data is ” & cell_value
End Sub
Let’s see what the code does:
- Begin the Subroutine: The code starts with Sub Find_Last_Column_with_Data(), which declares the start of a subroutine named Find_Last_Column_with_Data.
- Select the Last Column: Cells(4, Columns.Count).End(xlToLeft).EntireColumn.Select is the line that selects the entire last column that contains data, starting from the 4th row.
- Determine the Last Row with Data: my_row = Cells(Rows.Count, 2).End(xlUp).Row finds the last row with data in column 2 (which corresponds to column ‘B’ in Excel) and stores this row number in the variable my_row.
- Retrieve the Last Data Value in the Last Column: cell_value = Cells(my_row, Columns.Count).End(xlToLeft).Value goes to the last row identified by my_row, then looks leftwards from the last column to find the last cell with data in that row, storing the value in the variable cell_value.
- Display the Result: Finally, MsgBox “Last Column With Data is ” & cell_value uses a message box to display the value found in the last populated cell in the last column with data.
After understanding the code, follow these steps.
- Close the VBA editor.
- Now, in the main sheet
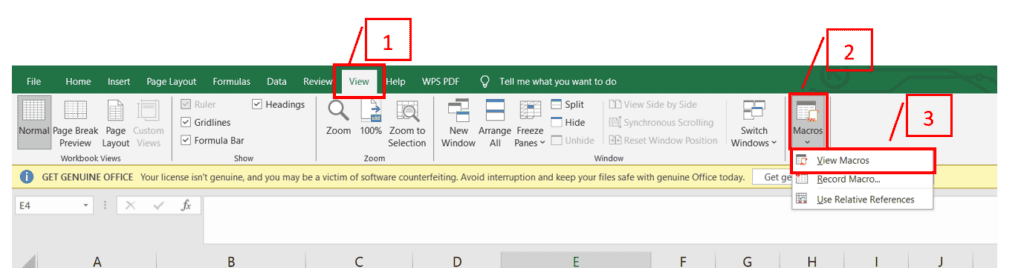
- Open the View tab >> from Macros >> select View Macros.
- A message box will appear on your screen.
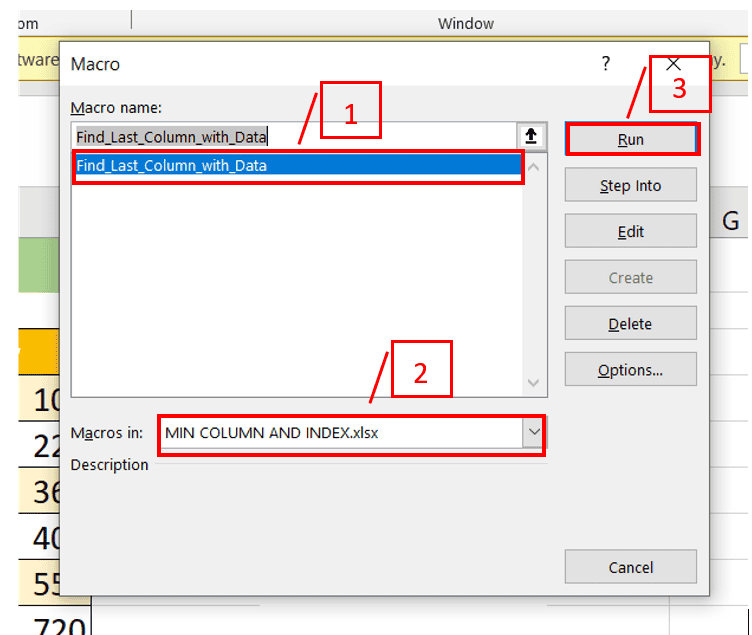
- From the list of macro names, choose Find_Last_Column_with_Data and make sure you’ve selected the correct workbook where the macro is located.
- After selecting it, click ‘Run’ to execute the macro.
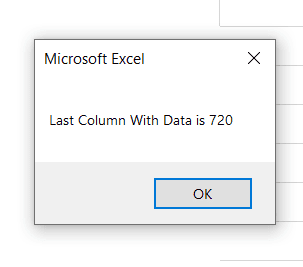
Consequently, the value from the last filled column will be displayed in a pop-up message box.
Conclusion
Finding the last column with data in Excel doesn’t have to be a tedious task. Whether you prefer using Excel’s built-in functions like MIN, COLUMN, and INDEX, or diving into VBA for a more automated approach, each method offers a straightforward way to quickly identify the end of your data. By following the simple steps outlined for each technique, you can efficiently navigate through your datasets, saving time and enhancing your productivity.
Learn more about Excel through these in-depth guides:
About the Author