How to Change Primary Monitor in Windows 11

Table of Contents
Getting your monitors set up is an easy fare, but those less technically savvy might find themselves lost in the midst of yet another redesign by Microsoft of the Windows Settings app.
Replacing Control Panel at this point, the Settings app functions and has most things set in the same place as the previous OS, but it can still feel like a mess overall.
Once you’re there, a multiple monitor workflow is a cinch and you’ll be up and running in no time, including deciding which monitor you want to use as your primary.
How to Change Primary Monitor in Windows 11
So, you want to change your primary monitor in Windows 11 but you don’t know the steps due to the changes in the new OS. Don’t fret, these are all the steps you need to take to get it done so you can get your battle station up and running exactly the way you like it.
Get into Settings
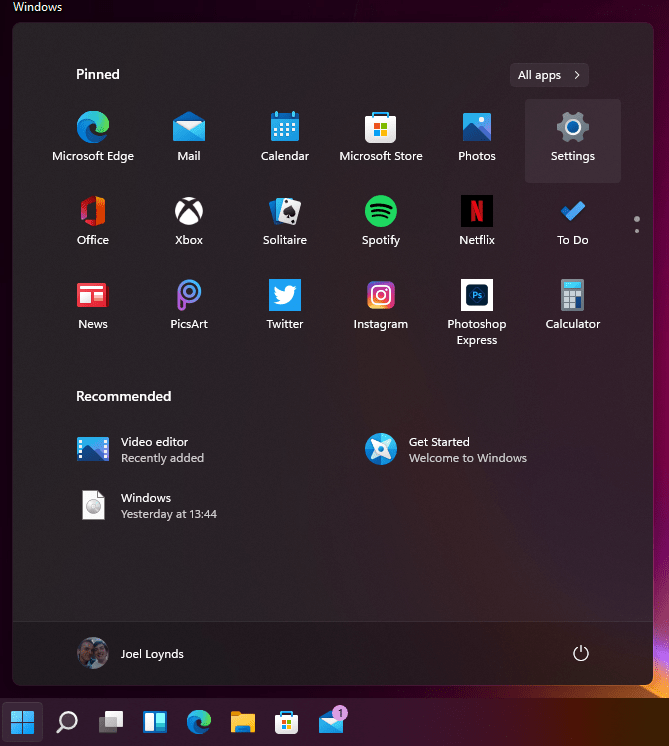
First head into your settings menu. You can get here via the start menu and then settings in the new pop-up window.
However, next to it is the search icon, which will let you type in “Change primary display” to get straight into the right settings page without the need to navigate through everything.
The search bar tactic also works in Windows 10, letting you skip over a lot of bad organization by Microsoft in the settings menu.
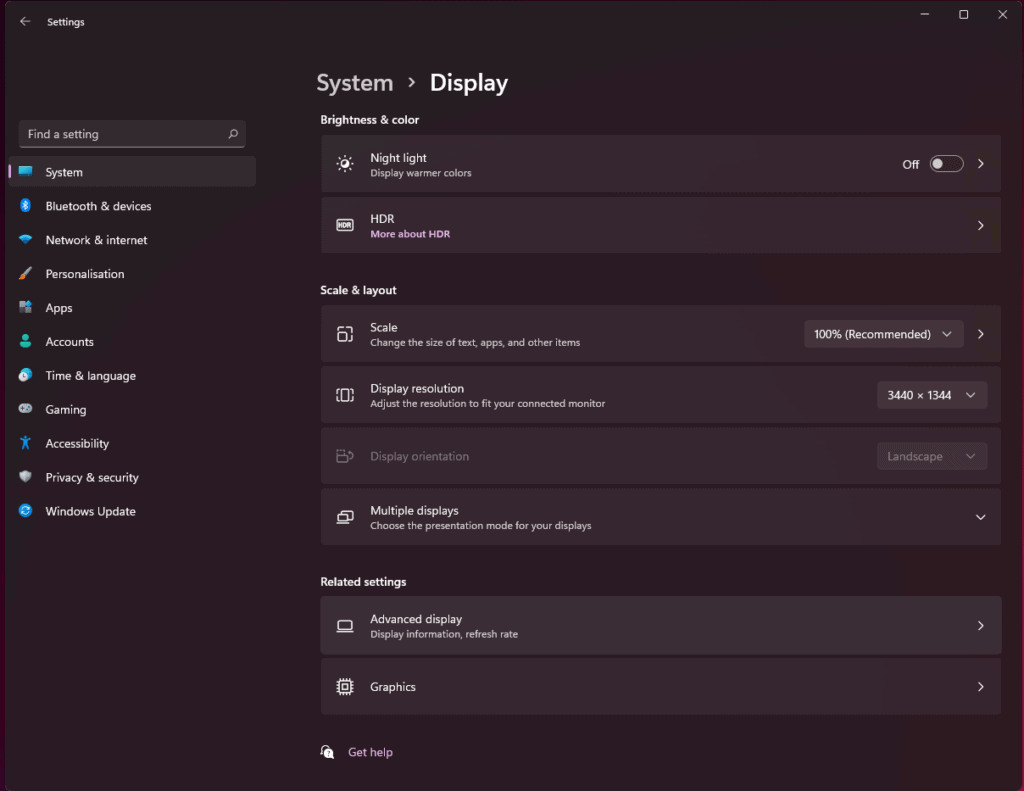
Display Options
Now you need to click on Multiple Monitors.
This setting will be greyed out if the PC cannot find the monitor you want to change to the new primary one.
If you’re having problems with the PC identifying the monitor, you’ll need to do a little troubleshooting.
Troubleshoot
First, let’s actually check we’re plugged into the right port. It’s daft, but more often than not people who are setting up multiple monitors will forget to plug them into the graphics card and into the motherboard instead. Windows will let you run two different brands GPUs at once – onboard Intel and NVIDIA for example – if you alter the BIOS, but that’s for another time.
For now, unplug the device from the motherboard and into the GPU. Most GPUs don’t actually have two HDMI cables, so you might need to fit in with either a USB-C cable (in the slot intended for VR) or a Display Port cable.
If you’re still having issues after doing this, try pressing the Windows Key + P. This will bring up the monitor quick settings, which might have it set to show only one screen at a time.
Still not working? Try another cable before we move on. Simple solutions for the most irritating problems.
The last main solution is to update your drivers on both the graphics card and if you’re using the onboard card included with Intel-based motherboards, you’ll want to head to Device Manager (Search > Device Manager).
At the top of the list is your PC, right-click and have it scan for any changes. The next step is to update the drivers. If you’re on NVIDIA, you can do this through the GeForce Experience, while AMD has its own software for managing this for you.
If you want to do it through Device Manager, right-click on the device and press Update Driver.
Monitor Menu
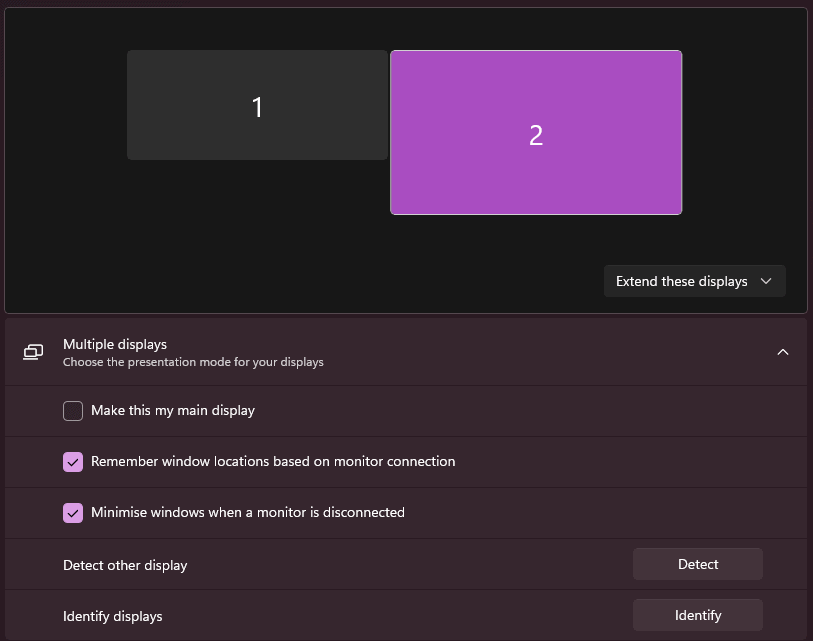
Now that you’re in the menu, it’ll display your two or more monitors, with a rough estimate of their size and position in relation to how you’ll move your mouse between the two. Here you can not only drag the icons around if you move your monitors but do what we came here for:
Changing the primary monitor.
Click the icon for which monitor you want your main display to be and from here on out, everything will almost always load up on that screen first.
Helpful Additon in Windows 11
The new thing with Windows 11 is that it’ll attempt to remember where different program windows were if you happen to disconnect a monitor. This is great news for laptop owners who move from a dock or wired connection to another place, as when you come back to the setup, you’ll immediately be back where you were without the hassle of having to reorganise yourself for five minutes after Windows has played 52-card-pick-up with your desktop.


