How To Add A Page On Google Docs

Table of Contents
When you are creating and editing a lengthy document on Google Docs, you may find yourself making several adjustments and it can get quite confusing when so much information is on one page.
At some point, you may just want to add a new page simply to create some distance between two lines of thought and give your mind some clarity to process various ideas and pieces of data.
A new page could also form a space that you want to keep open and you may want to fill it in later with more information.
Using Google Docs is similar to creating a document on Microsoft Word and uses very much the same functionality.
That can mean changing the text font, adding page numbers, altering the margins, inserting a table of contents, drawing a chart, and adding a new page.
Learning how to add a page on Google Docs can save you from having to press the Enter key several times as the cursor makes its way down the page. In this guide, we will look at inserting a page break to add a page on Google Doc.
How To Add A Page To A Google Doc
Learn how to add a page on Google Docs:
Step
Open Google Doc
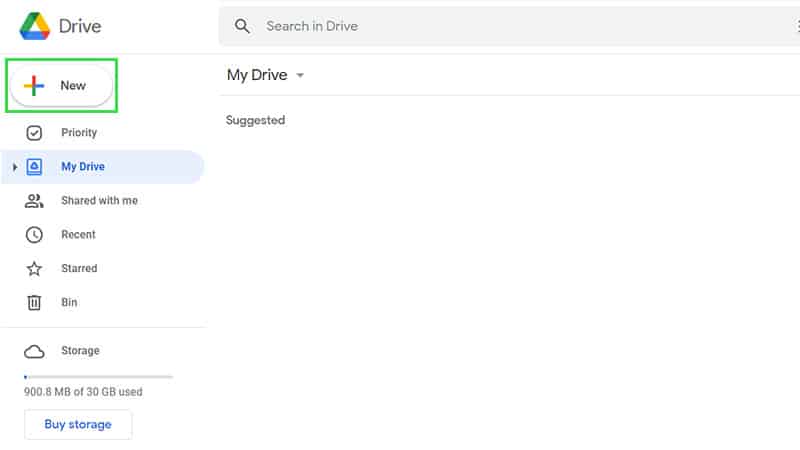
Open a Google Doc by logging into your Google Drive and either double-clicking on an existing document or clicking on the ‘New' icon to open up a new document.
Step
Open A New Document
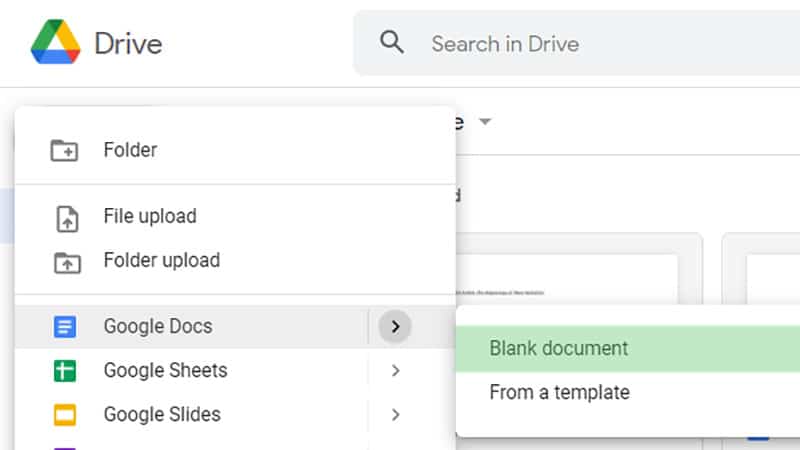
To open a new document, click on Google Docs then select ‘Blank document'
Step
Insert New Page
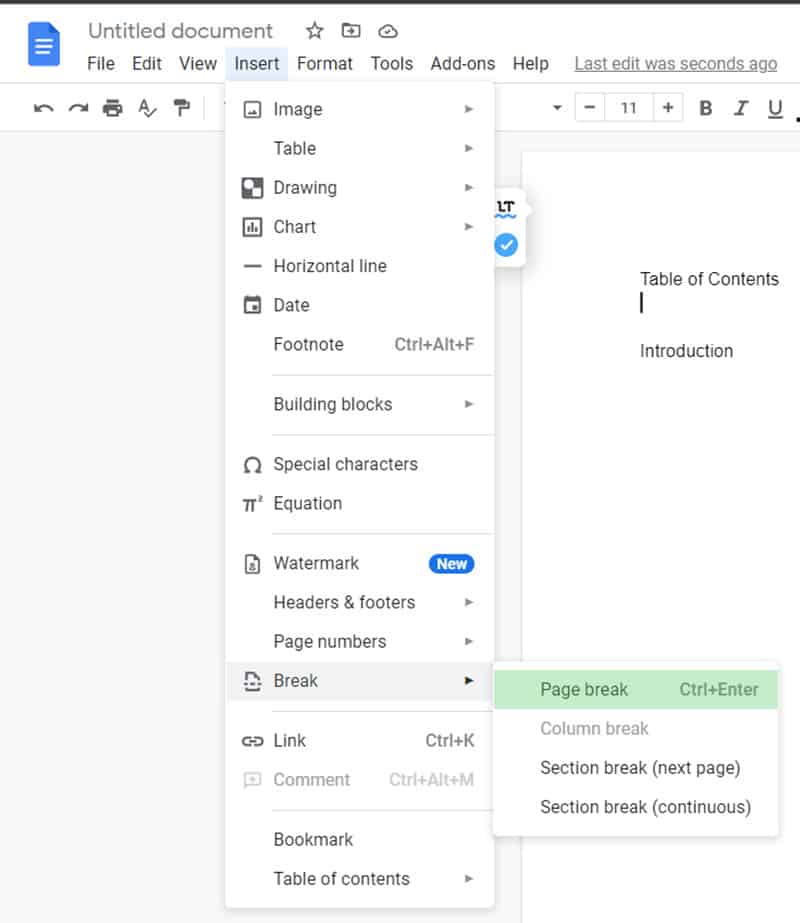
In this document, a new page will be created after the Table of Contents so the Introduction is on a separate page. Click on ‘Insert' then ‘Break' and ‘Page Break' to insert the new page.
Step
Keyboard Shortcut
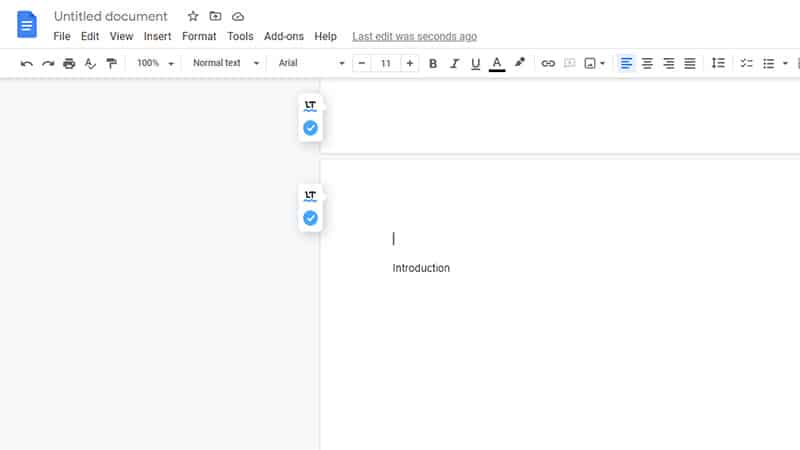
You should also note that there is a keyboard shortcut that you can try by holding the Control key (Ctrl) and Enter. Once you have either used the keyboard shortcut or the option via the drop down menus, the new page will appear.
How To Delete A Blank Page In Your Google Doc
You may suddenly realize that you have too many pages or that adding your new page was simply a mistake. That can be relatively simple to amend and just as adding a new page only needs a keyboard shortcut, you only need to click one button to remove your new page.
Move your cursor to where the new page was added and click the Backspace key, this will remove the page break.
How To Add Page Numbers On A Google Doc
You may want to keep track of all your new pages so adding page numbers is an effective and easy way of doing that. Just like adding a new page, it is really easy to add page numbers.
Step
Insert Page Numbers
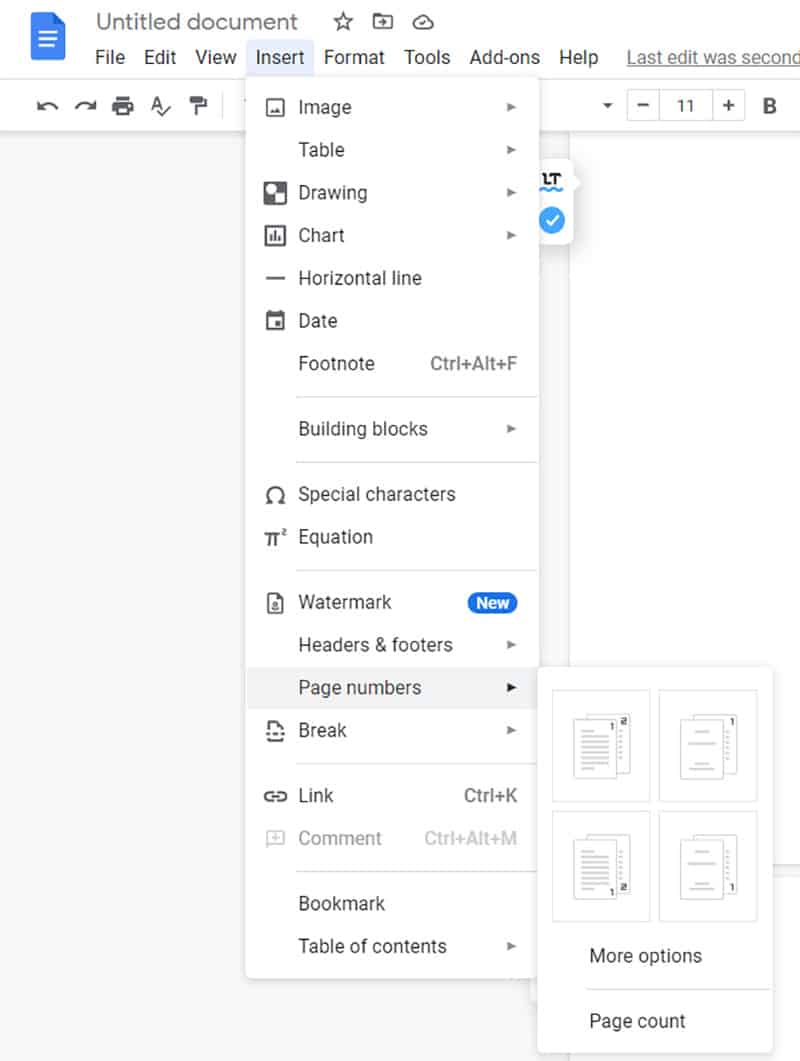
Simply use the ‘Insert' menu again and select ‘Page numbers'.
Step
Page Numbers
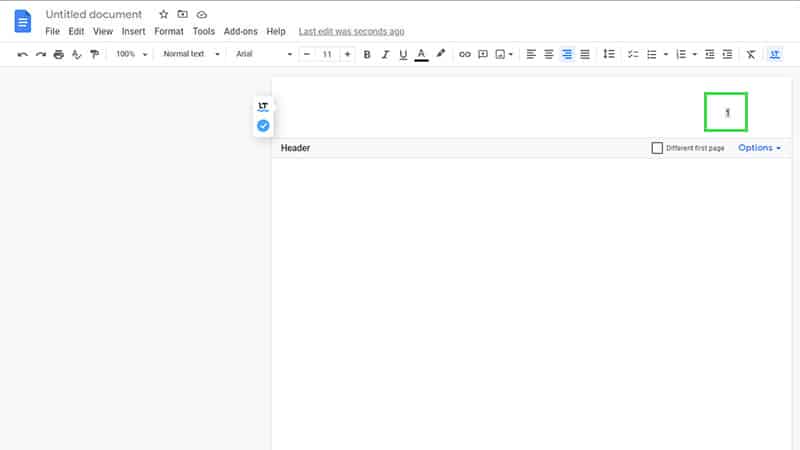
You will also notice that the option allows you to choose where the page numbers go. In this case, we will have them on the top-right-hand corner of the page.
Final Thoughts
Arguably, the easiest part of writing a document is entering all the information.
The harder element is ensuring that the document is organized enough so that it proves easy for anyone to read. That can be made straightforward by inserting new pages to separate sections which can be a welcome relief to any reader.
You do not have to fit everything on a single page so feel free to give it some space with a new page, you only need a keyboard shortcut for it.
