How To Change Margins In Google Docs

Table of Contents
Google Docs are used by writers across the world. They can be easily created and edited online, making them a great tool for students and professionals alike.
Most people find them fairly straightforward to use. However, there is one thing that many people don't know about: how to change margins on Google Docs.
You may want to adjust the margins if you desire a different aesthetic for the document. You can make your margins wider or narrower, depending on what you prefer. This article will show you how to do this.
Method 1
The first method of changing margins involves using the “File” menu. The formatting menu allows you to change the margins of your documents.
It also lets you add borders, headers, footers, and other elements to your document. Here are the instructions:
Step
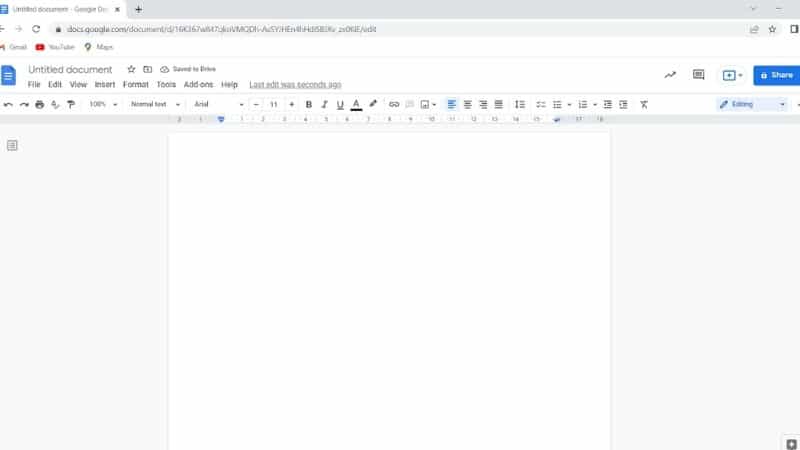
Open Google Docs
Ensure that you have Google Docs open on your screen. This may require you to log in.
Find the document that you wish to alter. This may be a preexisting document or a blank one.
Step
Click File
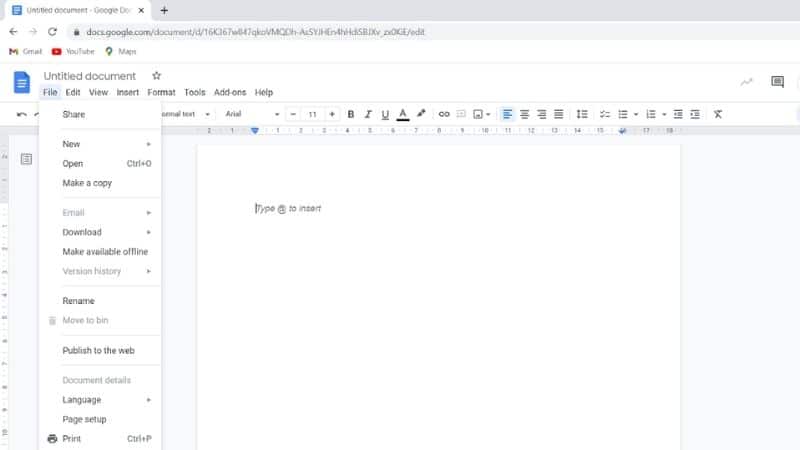
In the top left corner, click “File.” This will trigger the File drop-down menu to appear.
Step
Select Page Setup
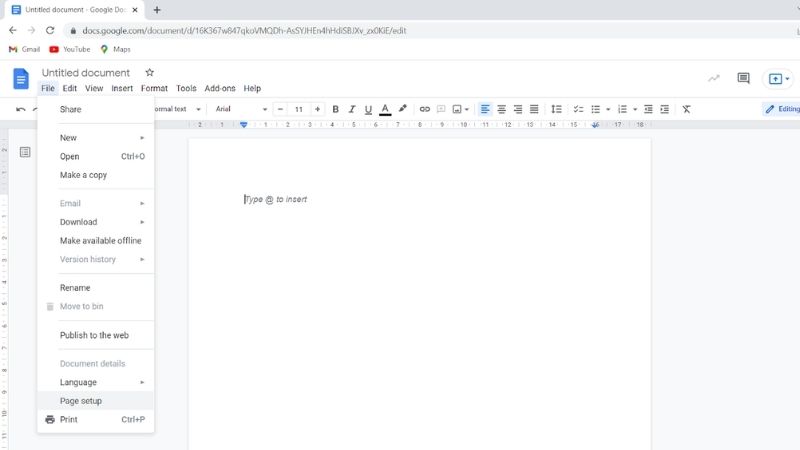
From this menu, select “Page Setup.”
Step
Adjust Margin
When you click on this option, you will be presented with a number of customization options regarding the format of the page. One of these options is for the size of the margins.
You can adjust the measurements of the margin in inches. There are 4 different parts of the default margin that you can alter, namely the top, bottom, left, and right.
For instance, if you wanted to make the left margin bigger, you could increase the measurement to 1 inch.
Step
Click Ok
Change these numbers according to your desires. Once you are happy with the numbers, click “OK.” This will adjust the margin size automatically.
If you are unsatisfied with them, you can repeat the steps above and change the measurements until they are perfect. Alternatively, you can use this second method:
Method 2
If you didn’t like the sound of this method, fear not. You can instead try this one. It works by utilizing the ruler function found in Google Docs. To do this, simply:
Step
Open Google Doc
As before, open a Google document.
Step
Vertical Ruler
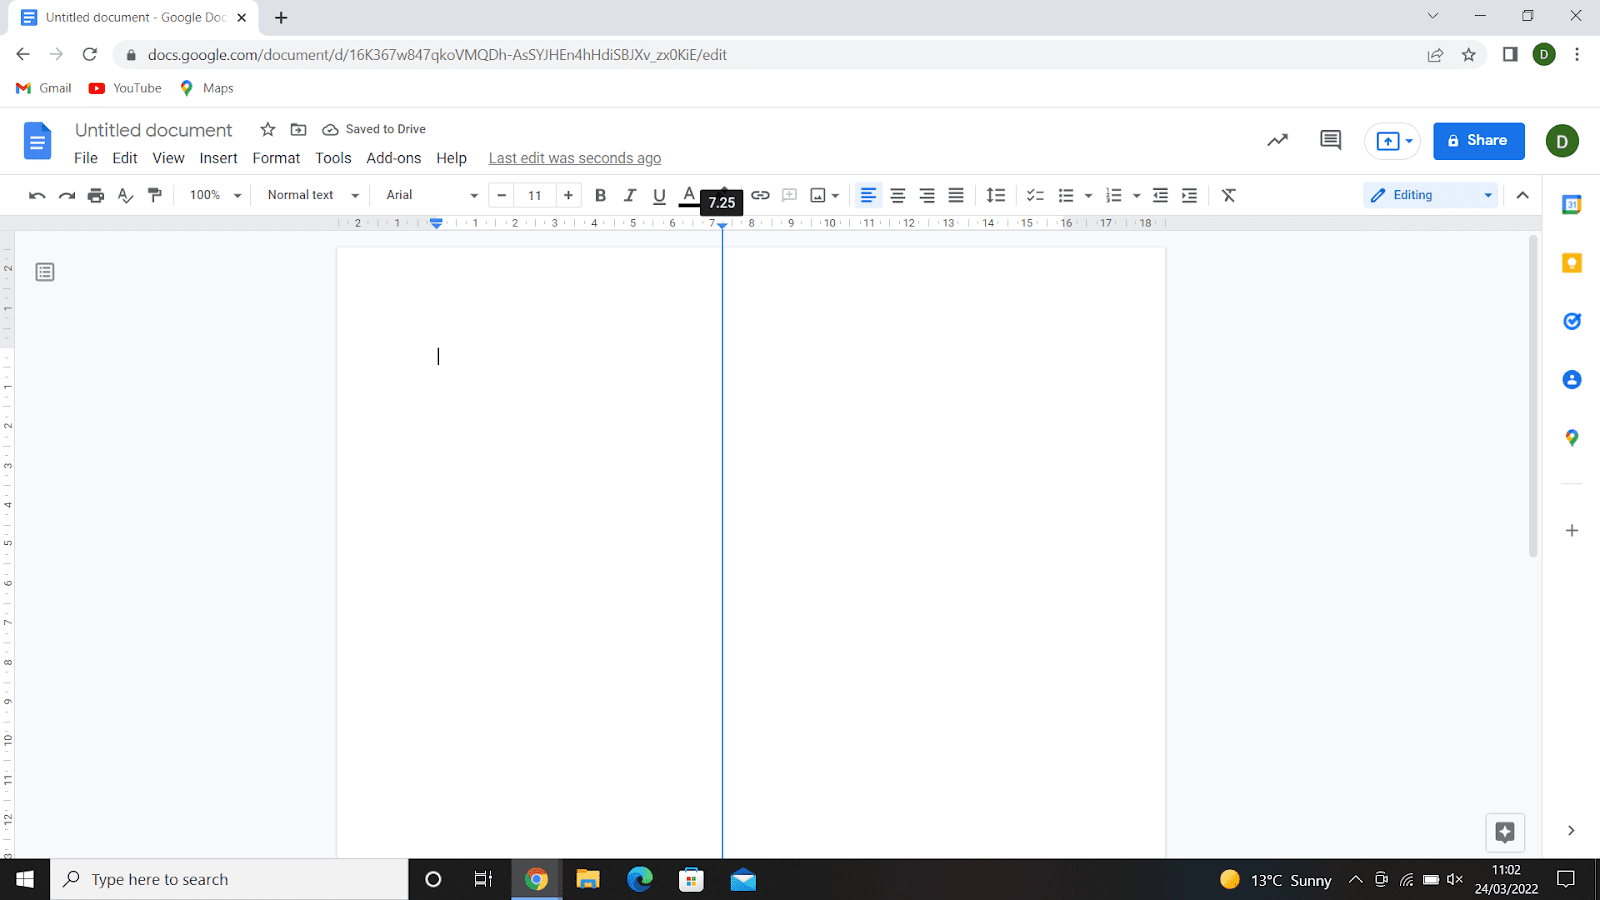
Across the top of the screen, you will see a thin line with numbers going across it. This is called the vertical ruler. Locate this ruler.
Step
Adjust The Margins
To adjust the margins, simply pull the blue triangle across the screen. To do this, click on the triangle and begin pulling with the mouse. The left margin has a triangle with a blue rectangle above it.
Meanwhile, the right margin simply has a triangle. Pulling these ruler markers will alter the margins of the entire document.
Step
Experiment With The Ruler
If you are disappointed by the margin size, you can simply click on these triangles again to adjust them. Experiment with the ruler until you have found the perfect margin size.
Frequently Asked Questions
Can I Keep The Margins In Place With Google Docs?
Often known as locking, Google Docs does not currently have a specific tool for this. On the other hand, you can stop someone else from messing with your margins by altering the document’s editing permission. This will mean that other people can only view the document and will not have the ability to edit it.
What Happens When I Change The Margins?
To maintain consistency throughout your document, the margins will remain unchanged unless you reorder the paragraphs within the document.
The amount of space that text, graphs, or images can take up on a document will be increased or decreased depending on whether you increased or decreased the size of the margins on Google Docs.
Final Thoughts
As you can see, there are many ways to manipulate margins within Google Docs. Hopefully, this guide helped you out! While it may seem somewhat daunting at first, changing the margins on Google Docs can be incredibly simple.
Plus, it opens a lot of opportunities in terms of formatting the document.


