How To Do Hanging Indent On Google Docs

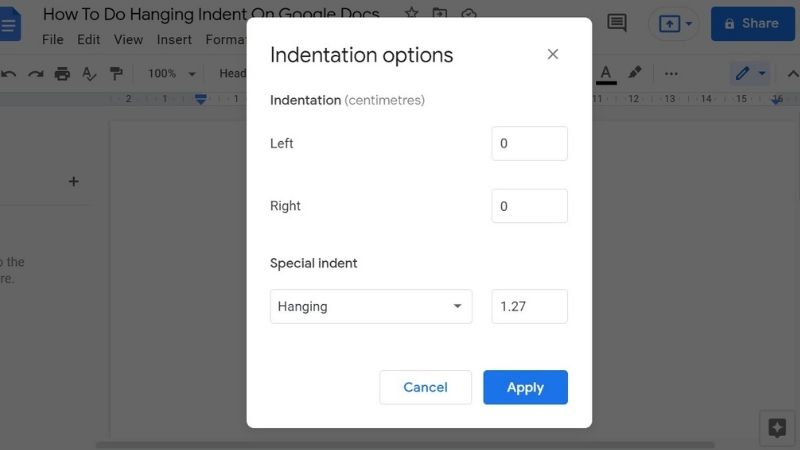
Table of Contents
Sometimes, when typing in a Google doc, you may find that you need to create a hanging indent. For example, you may need one to present a bibliography after a researched piece.
But how do you actually do it? There is no ‘hanging indent’ button in the menu, so how do you make it work? Let’s take a look together!
What Is A Hanging Indent?
The term ‘hanging indent' refers to a system in many word-processing programs that automatically creates indentations. Upon creating a hanging indent, the first line will be close to the margin, and then every line after that will be indented.
How Do You Do A Hanging Indent On Google Docs?
There are a few steps you need to take in order to create a hanging indent in google docs.
Step
Click On Format
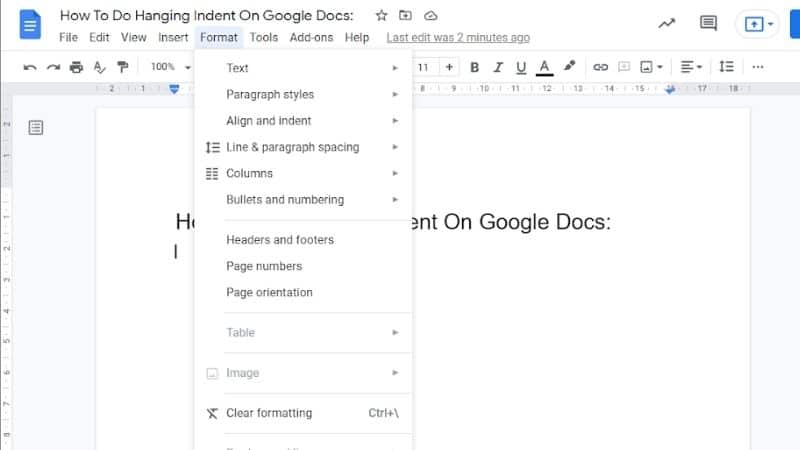
To start, select the line that you want to create a hanging indent with. Once you have done that, click on the ‘Format’ button at the top of the document. One of the options under the ‘Format’ button is ‘Align & Indent’. Hover the mouse over that button.
Step
Indentation Options
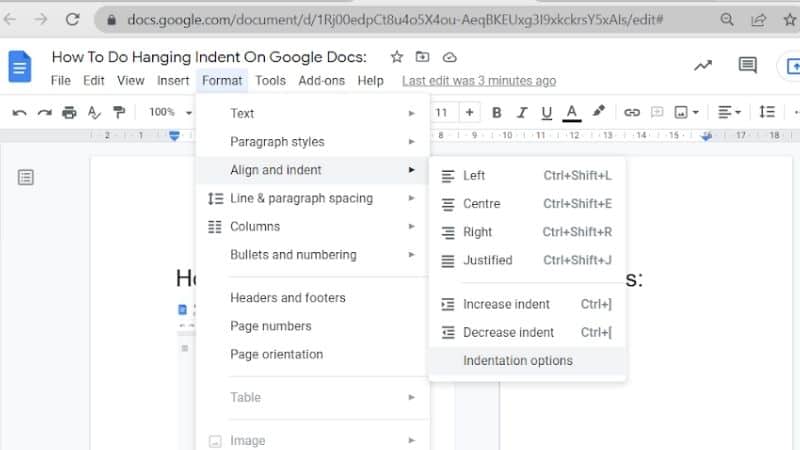
Once you hover over the ‘Align & Indent’ button, you will then be met with a number of extra options. Move your mouse down the list until you find the ‘Indentation options’ button. Click this button, and you will then be met with a new menu screen.
Step
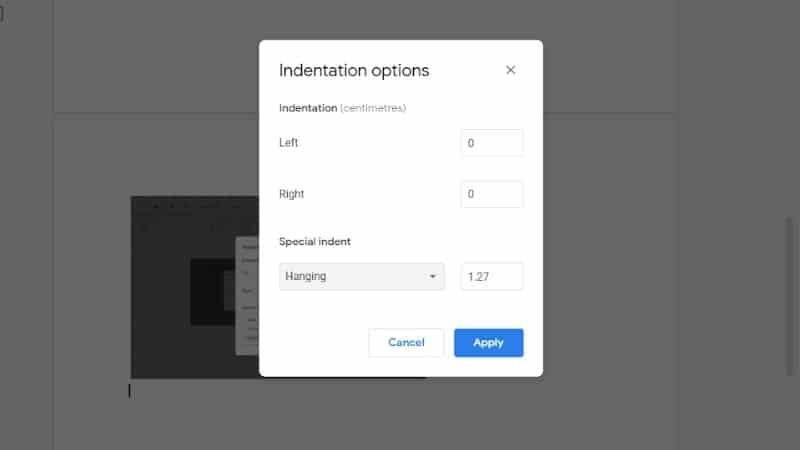
Special Indent
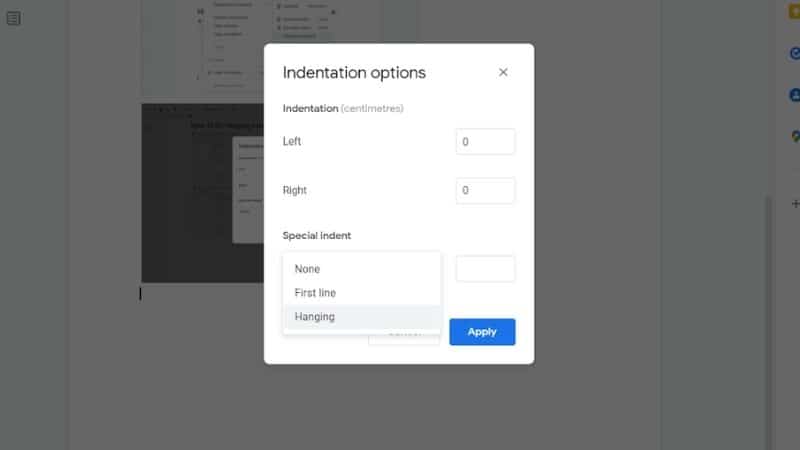
Within this new menu screen, you will see the option marked as ‘Special indent’. Click on the box beneath this, and this will bring up a drop-down menu which you can then use to select hanging indents. Click on the ‘Hanging indents’ option.
Step
Press Apply
Once you have done that, simply press the blue ‘Apply’ button to put your changes into action.
Once you have done this, your new hanging indent will have been put into action. When you reach the end of one line, the indentation will automatically set in, and the next line will start at a set point beyond the margin of the document.
Can You Change How Far The Hanging Indent Goes?
Yes. If you have a specific preference for how far the indent pushes into the document, you can change this on a whim at any time.
Step
Indentation Options
Simply head back to the ‘Indentation Options’ menu via the ‘Format’ button
Step
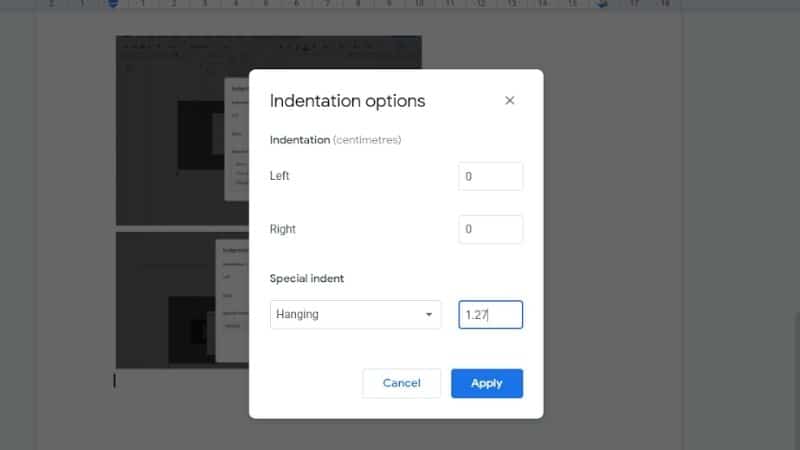
Select Hanging Indent
Once there, select the hanging indent, and via the small text box on the right-hand side of the drop-down menu, type in the distance from the margin that you want your indent to be. By default, this is set at 1.27.
When Should You Use Hanging Indentations?
One great use for hanging indentations is in citing sources for research within essays or research papers. Using hanging indentations makes it much easier to read through a list of sources to find something useful.
Frequently Asked Questions
How Do You Indent On Google Docs App?
You can create indentations on the google docs app by placing your cursor onto the line you want to indent and then tapping the ‘A’ button at the top of the toolbar. Scroll down to the ‘Paragraph’ section, and then tap on the right-indent option.
What Is The Difference Between Left Indent And Hanging Indent?
Left indent, unlike a hanging indent, forces all lines in a paragraph into the indented position. A hanging indent, on the other hand, causes every line, except for the first line, to be indented.
Is Tab Equal To 5 Spaces?
Yes. The ‘tab’ button on your keyboard will create an indentation in any document that is equal in size to five presses of the space bar.
Conclusion
As you can see, though the option may be hidden away, creating hanging indents in Google docs is not too difficult, and just requires a few clicks through some various menus.
You can also edit the finer details of the hanging indentations so that you can achieve very specific results. This allows you to edit your hanging indentations exactly as you see fit to create beautiful documents.
About the Author