

Last Updated on
Google Sheets is a spreadsheet software that allows you to create and edit spreadsheets. The program has become very popular because of its simplicity and ease of use. In addition, it offers features such as charts, graphs, and formulas.
You can easily share your spreadsheet with other people or even collaborate with them. This feature makes Google Sheets a great tool for creating presentations, reports, and financial statements.
You can also lock cells to ensure that the data cannot be tampered with. Let’s take a look at how to do this so that you can learn a crucial skill when it comes to Google Sheets.
Locking Specific Cells
To lock specific cells in a sheet, follow these steps:
Step
Open The Spreadsheet
Open the spreadsheet that you want to lock cells in.
Step
Right-Click On The Cell That You Want To Lock
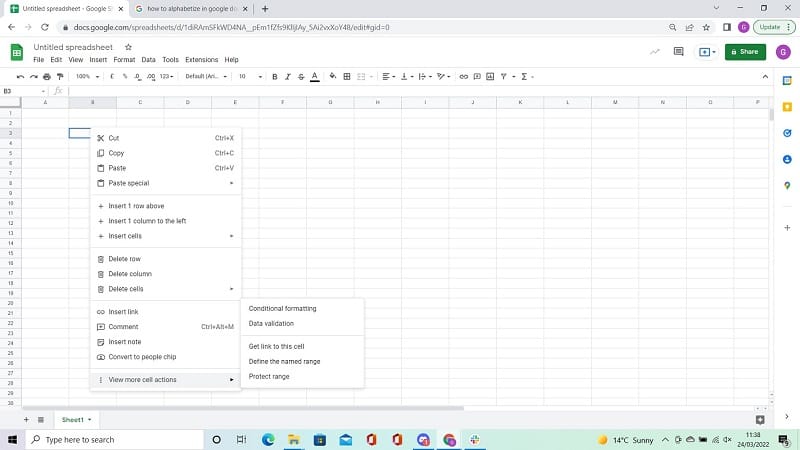
Right-click on the cell that you want to lock. From the drop-down menu, pick View More Cell Actions.
Step
Now Choose Protect Range
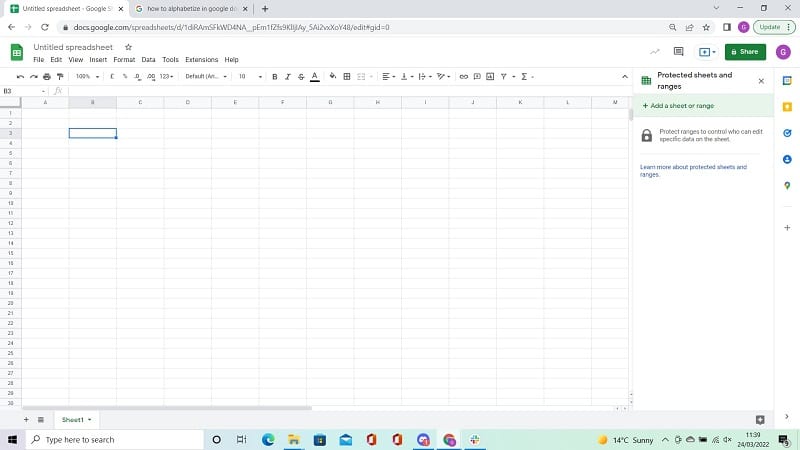
Now choose Protect Range. A new window should pop up on the right-hand side of your screen, like below.
Step
Click The Add A Sheet Or Range Button
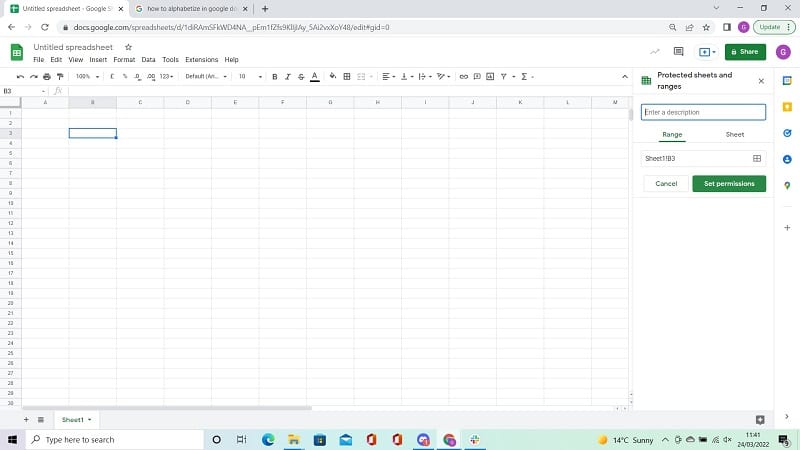
Click the Add A Sheet Or Range button on this new pop up. Here you can add a description for the cell you’re going to lock. This is optional, but might be helpful if you are going to need to remember important details about it.
Step
Locking Cells
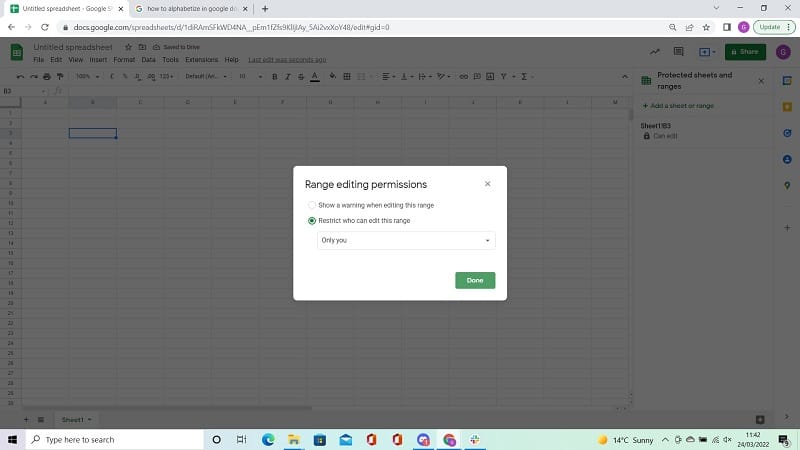
In the Range page you will be able to see the cell’s reference. If you want to lock more than one cell, you can change this here to include more than one cell. Now click on Set Permissions to lock the cell.
Step
Choose Who Can Edit The Range
Choose whether you want to allow more people to edit this range or whether you are the only person able to do this. Restricting it to you will ensure that no one tampers with your locked cells, while allowing other people to alter them could be more beneficial on collaborative projects.
Unlocking A Cell In Google Sheets
If you have locked a cell in Google Sheets, then you’ll know exactly what I mean when I say that unlocking a cell isn’t quite as easy as locking it. You’ll need to go through some extra steps to unlock a cell. Follow these simple instructions to unlock a cell in Google Sheets.
Step
Open The Google Sheet
Open the Google Sheet where you locked the cell.
Step
Select The Data Button
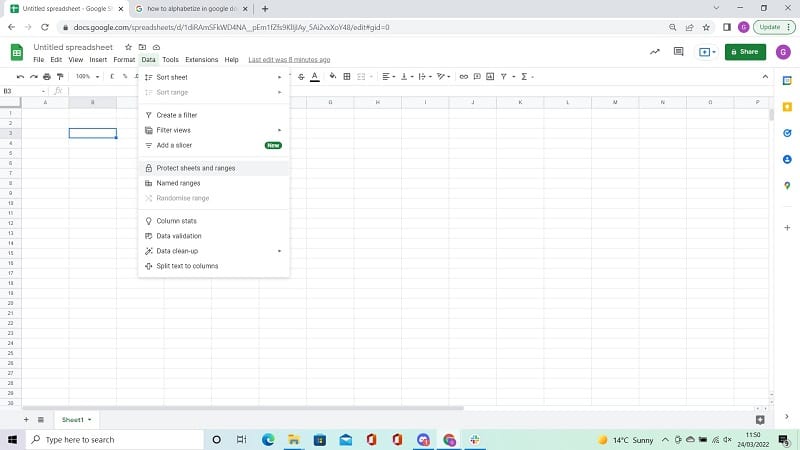
Select the Data button from the toolbar to find the drop-down menu.
Step
Click Protect Sheets And Ranges
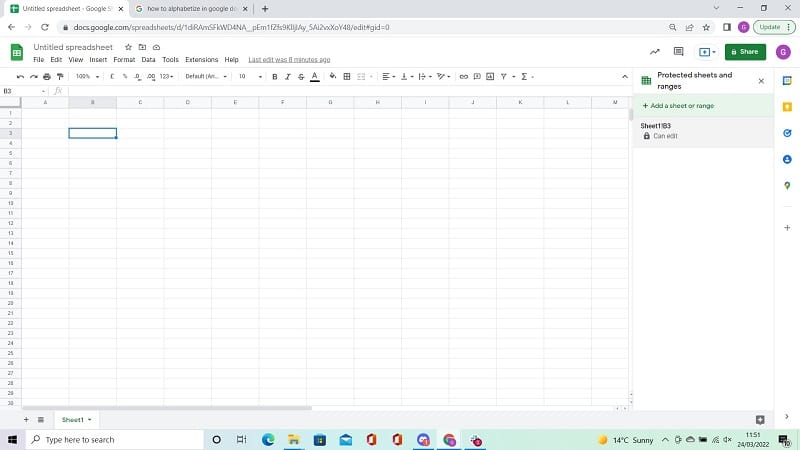
Click Protect Sheets And Ranges, and this will open a popup menu on the right-hand side of your screen.
Step
Choose The Cell
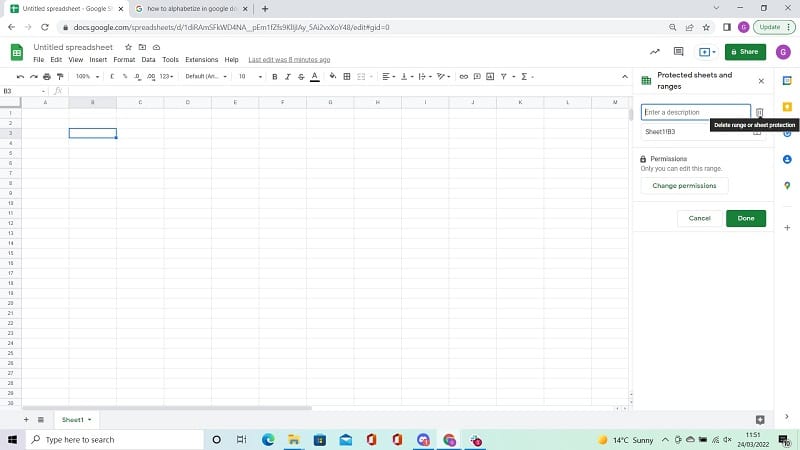
Choose the cell that you want to unlock.
Step
Click The Delete Widget
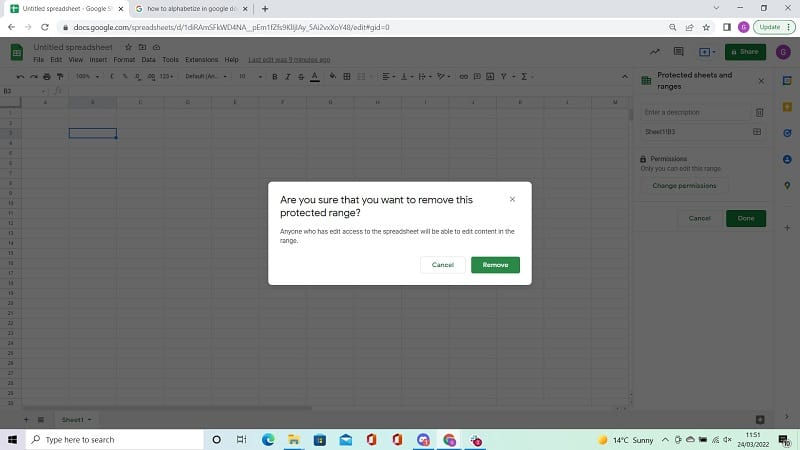
Now click the Delete widget which is next to the Description box. Click Remove and that’s it – you’re done!
Final words
Google Sheets is a fantastic bit of software that lets you collaborate on data with others online. if you’re doing this, locking cells is a vital function of the software. Hopefully, we’ve answered all the questions you had on the subject.
