How to transfer data from iPhone to iPhone

Reviewed By: Kevin Pocock
Table of Contents
If you’ve been an iPhone user for a while and are now looking to upgrade or even downgrade to another model, it’s likely that you’re trying to find a way to transfer your data.
Apple provides a number of options for users to choose from in order to make the data transfer from iPhone to iPhone as simple as possible. We’ll go over each method in detail in this article.
How can I transfer data from iPhone to iPhone?
There are three basic ways to transfer data between iPhones:
- Quick Start
- iCloud
- Transferring via computer: PC or Mac
Quick Start Method
Step
Get ready
Bring your old iPhone and new iPhone together. After that, ensure Bluetooth is turned on on the old iPhone.
Step
To get to the Quick Start screen, follow the steps
Turn your new iPhone on then follow the instructions until you get to the Quick Start screen. At the same time, a setup screen will appear on your old phone. Just make sure it’s unlocked.
Step
Scan the image shown on new iPhone
Next, your new iPhone should display an image or animation. Scan the image with your old iPhone and tap on Continue.
Step
Tap on Transfer from iPhone
After that, you should follow the instructions provided on your brand-new iPhone. Remember to keep your iPhones close!
Select Transfer from iPhone instead of Download from iCloud when you get to the Transfer Your Data step. Data transfer will then start. Now, wait for the data and settings to be transferred between the two linked iPhones.
After the process is complete, all your contacts, photos, settings, and other data have moved to your new iPhone.
iCloud Method
This is for iOS 11 or later versions only.
Step
Go to iCloud on your phone
On your old iPhone, open the Settings app, select your Apple ID profile at the top, and tap iCloud.

Step
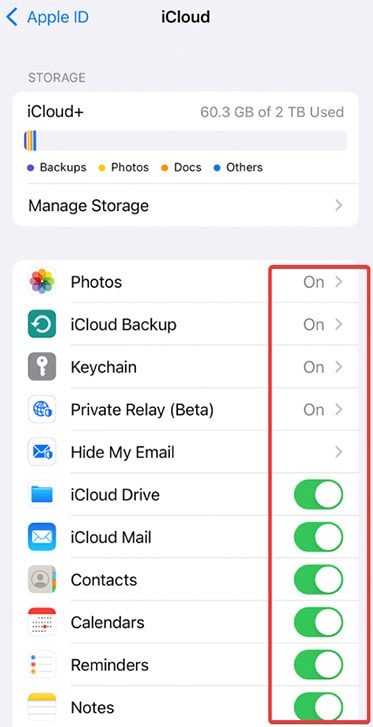
Select what you want to backup to iCloud
Then, choose which applications would you like to backup information on iCloud by going through the list of apps. Depending on the available choice, tap or toggle to ON or OFF.
Step
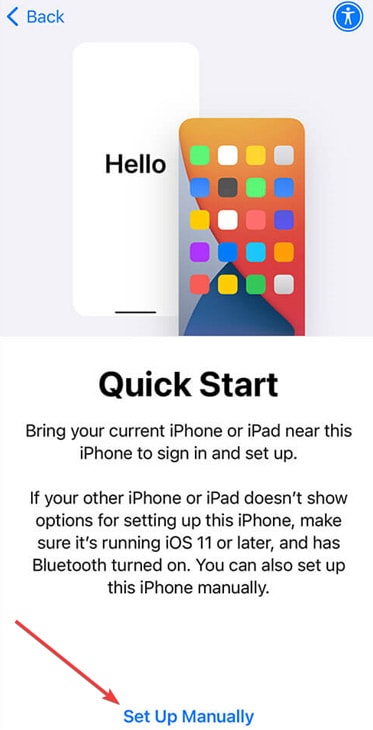
Tap on Set Up Manually
When your new iPhone boots up, select your language and region, then press Set Up Manually on the Quick Start menu.
Step
Select your Wi-Fi
After choosing a Wi-Fi network, press Next and wait for a few minutes.
Step
Choose Restore from iCloud Backup
Next, select Restore from iCloud Backup on the Apps & Data screen. The steps that follow are similar to Quick Start steps.
Step
Select the latest iCloud Backup
Choose the most recent iCloud Backup after signing in with your iCloud Apple ID. The data will be transferred to the new iPhone.
You can set your phone to Backup the files to iCloud automatically. Find iCloud Backup in the settings and turn it on.
Note: Free iCloud accounts are limited to 5GB of storage. Tap Manage Storage if you’d want more space. Once you’ve selected Change Storage Plan, you may pay for 50GB, 200GB, or 2TB of storage.
Using the technique described at the bottom of the article, you may increase the storage limit without cost.
If you wish to back up your entire iPhone to iCloud, you will need to increase the space you use.
Transferring via a Windows PC
Step
Access iTunes
First, download and install iTunes on your PC if you haven’t already. Then, connect your old iPhone to a PC with a lightning cable.
Step
Backup your phone to a PC
After that, launch iTunes after installation, then select Summary from the left-hand menu. Select This Computer under Backups, then click Back Up Now.

Step
Select Set Up Manually
When you boot your new iPhone, follow the instructions to get to the Set Up Manually on the Quick Start section. Then, tap on it.

Step
Select Restore from Mac or PC
Now, follow the on-screen instructions until you reach the Restore from Mac or PC option on the Apps & Data page. To finish the procedure, keep following the on-screen directions.
Transferring via a Mac
Step
Open the Finder
Then, open the Finder and choose your iPhone from the left-sidebar menu.
Step
Select Backup iPhone to Mac
Click Back up all of the data on your iPhone to this Mac and choose Back Up Now.
Step
Tap on Set Up Manually and proceed
Select Set Up Manually from the Quick Start menu that displays when you boot up a new iPhone. When you get to the Apps & Data page, follow the on-screen directions until you press Restore from Mac or PC.
How to activate extra storage in iCloud
Step
Tap on Transfer or Reset iPhone
To make the procedure as simple as possible, Apple has introduced the “Prepare for New iPhone” option that offers free temporary storage space in iCloud for 21 days.
To accept this offer, select General from Settings. Next, scroll to the screen’s bottom and select Transfer or Reset iPhone.
Step
Select Get Started under the Prepare for New iPhone option
At the top of the screen, you’ll find the Prepare for New iPhone option. Select Get Started.
Tap Continue to activate the extra storage.
Finally, if you feel that 21 days is insufficient, an option is available to ask for an additional 21 days.
Transfer all your data to your new iPhone!
Android to iPhone transferring methods can become complicated and hard to follow, but iOS has set things simple.
iCloud storage backup is the easiest way to keep a bank full of data ready to be transferred to another iPhone, and other Apple products can access that.
The methods mentioned above can take a few minutes to hours based on your network speed or your PC’s data transfer capabilities. You can also activate the automatic backup feature to save time for future transfers.
About the Author