How To Delete A Page In Word

Table of Contents
Microsoft Word can be a very useful tool for drafting documents, completing assignments, and creating new pieces of work.
While on the whole, Word is a fairly simple program to run, there are often recollections of things going wrong – and this includes realizing that you suddenly have a huge, random blank page in the center of your document.
As anyone who is well versed in the world of Microsoft Word will be well aware, this is not a program that adapts well to change.
On the contrary, the majority of us are likely to have been faced with the entire structure and format of the document being lost forever simply by pressing the Enter key – the damage that could be done from trying to delete a whole page is too hard to think about.
Fortunately, there are steps that you can take to eliminate this erroneous page once and for all, and restore your document to its former glory – all with minimal stress. Keen to learn more? Then read on for everything you need to know.
Top Methods To Remove An Unwanted Page in Word
In an ideal world, the easiest solution would be the most effective, and this is the first thing to try. To remove the blank page from your Word document, go to the page that you want to delete, and click as close to its bottom as you can.
Then, press your backspace key continuously until the page disappears.
If that fails, there is another option available to you before you tear your hair out:
Step
View Tab
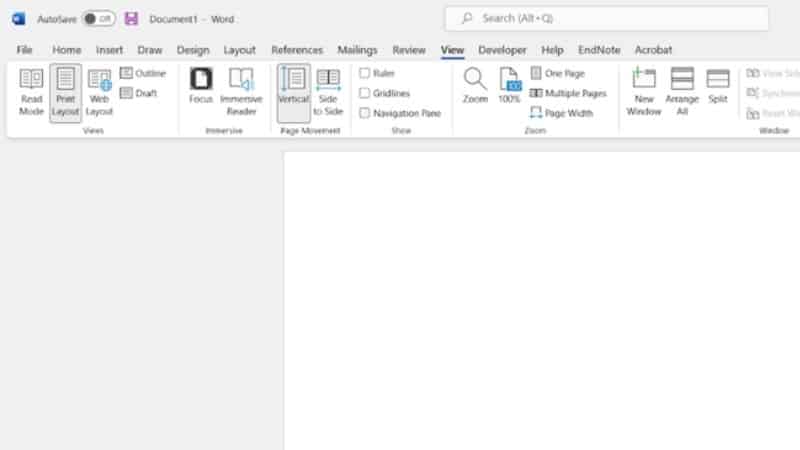
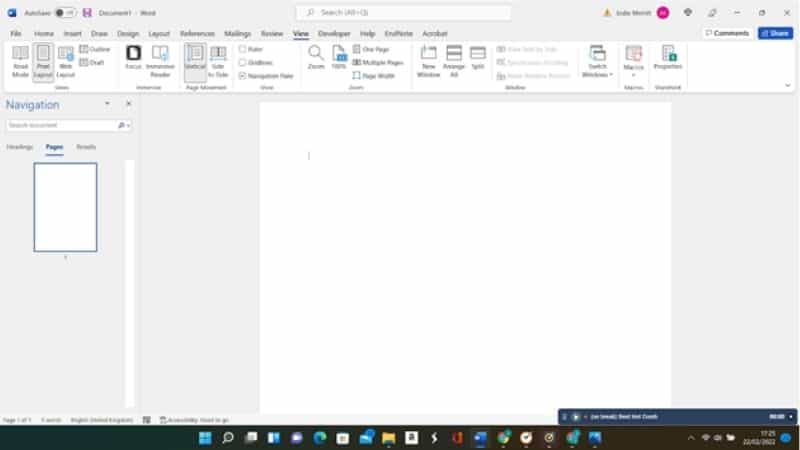
Click the “View” tab from the Ribbon and check the box titled “Navigation Pane” in the “Show” section – this will bring the aforementioned Navigation Pane up for easy access.
Step
Press Delete
Once you have this in front of you, you can click on Pages, and click the “blank page” thumbnail, located in the panel on the left.
Now, press the Delete key until the offending page is removed – this should not impact the overall layout and format of the document.
Step
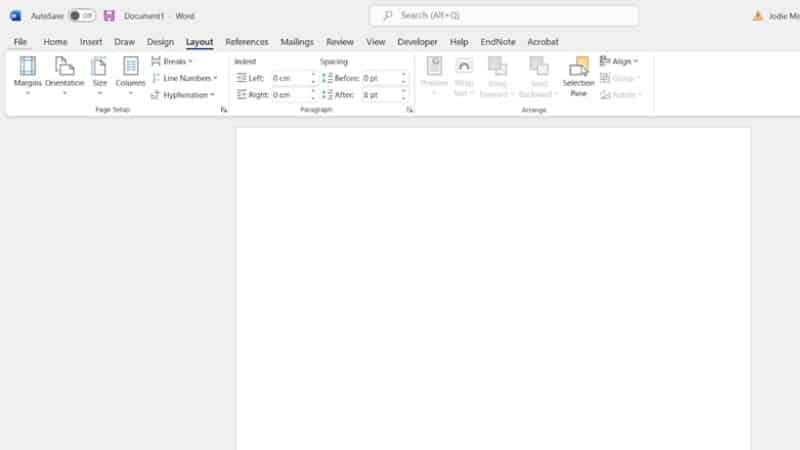
Click Layout Tab
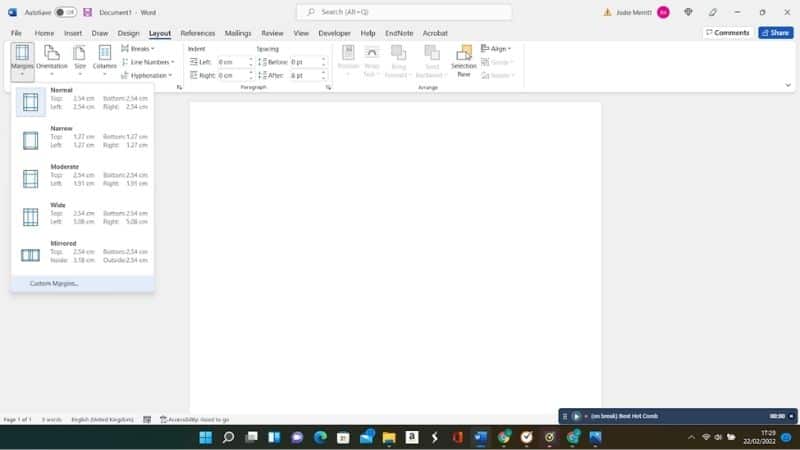
In some cases, this may also result in a dead end; if this occurs, you will need to double-check the state of your Sections – don’t worry, this is not as tricky as it sounds. Start by heading to the Ribbon at the top, and clicking the “Layout” tab located here. Next, select the Margins button, and then select the Custom Margins option.
Step
New Page Option
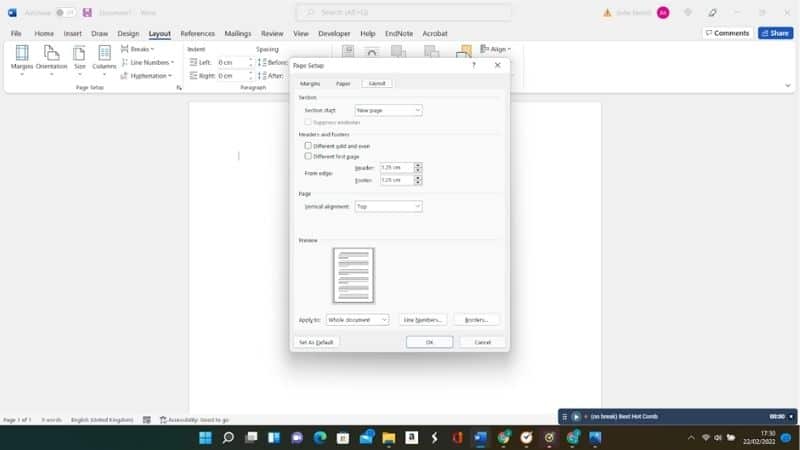
From here, click on the Layout tab again – a drop down menu will be revealed. In this menu, scroll down to the “New Page” option, and make sure that the option is selected. Once this is done, Click OK to confirm.
Step
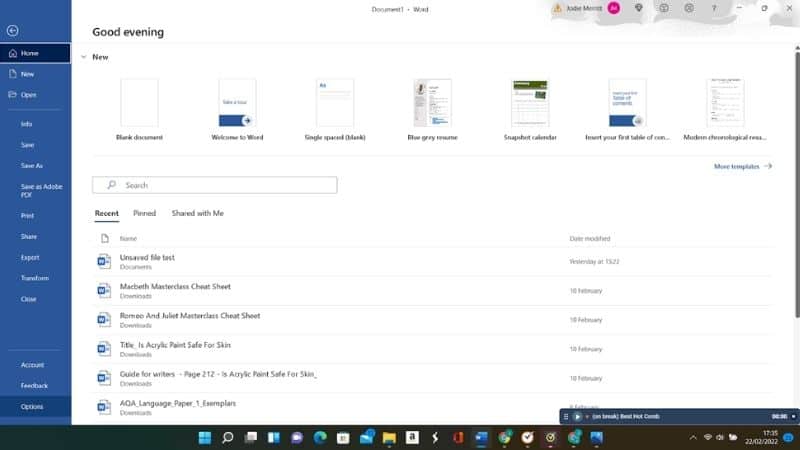
Head To File
If you are still plagued by a constant blank page slap bang in the center of your document, you can take a look at the line breaks that are currently in place within the document. To do this, head File in the top left corner.
Step
Select Option
Then select Options.
Step
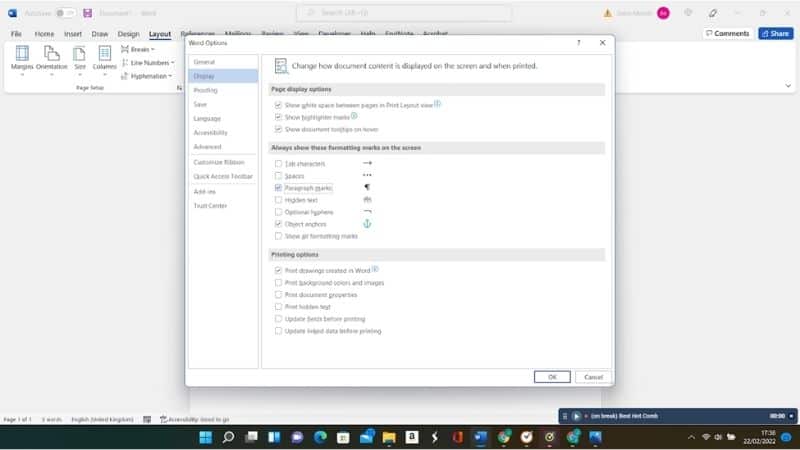
Check “Paragraph Marks”
A dialogue box will appear, go to Display, and then make sure that the box for “Paragraph Marks” is checked.
In the event that you have a random blank page right in the center of the document, an erroneous manual page break may be the culprit; turning on paragraph marks allows you to see the page break more clearly.
If one is present, you can click and delete it, and this should resolve the issue.
Section Breaks
If you are still struggling, your Section Breaks may be at fault. Next Page, Even Page, or Odd Page section breaks can cause a new page to appear – this may be the reason for your blank page if it appears at the end of the document.
In this case, simply place your cursor in the space before the Break and press Delete – this will remove the Section Break, and should remove any excess blank pages.
Final Thoughts
Discovering a blank page in the middle of your document doesn’t have to be a cause for concern – in fact, you can handle the situation confidently, without even breaking a sweat.
By using the tips and techniques above, you can troubleshoot the problem and come up with a solution – gain your reputation as Master of Word in no time!
