How to install Windows 11 from USB

Reviewed By: Kevin Pocock

Table of Contents
Knowing how to install Windows 11 from USB can come in really handy for formatting broken versions of Windows 11 that have been acting up for one reason or another. The bootable USB drive can also come in really handy for repairing and troubleshooting too, such as getting into safe mode. Unfortunately, Microsoft doesn't currently offer a .ISO (Disk Image) for users to download at the time of writing, but please don't download a shady .ISO image from the web as they may do more harm than good.
We will be guiding you on how to install Windows 11 from USB throughout the whole process, including getting a legitimate disk image direct from Microsoft, albeit creatively.
Make Sure TPM.20 is enabled
Unzip File
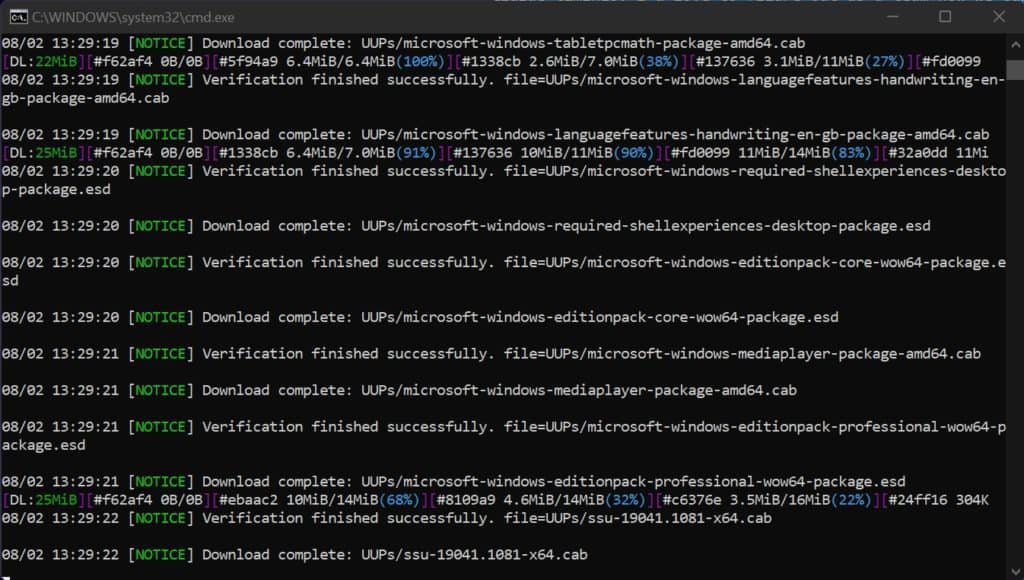
After decompressing the file, find and click ‘uup_download_windows.cmd'. This will open a command prompt window that downloads and creates the Windows 11 .ISO you'll be needing. This may take a while, with the .ISO weighing in at just under 5GB. The .ISO will appear in the same folder as the ‘uup_download_windows.cmd' file.
Make A Bootable Windows 11 USB Drive
After securing an empty USB drive with at least 8GB of free storage, we need to partition 1GB of storage as FAT32 storage, with the remaining storage partitioned as NTSC. The issue here is that Windows 11 requires secure boot to remain active, whilst NTSC bootable USB devices need secure boot to be disabled. By partitioning 1GB in FAT32, we can bypass this (FAT32 can't hold anything above 4GB). Screens courtesy of Toms Hardware:
Delete Current USB Storage Drive Partitions
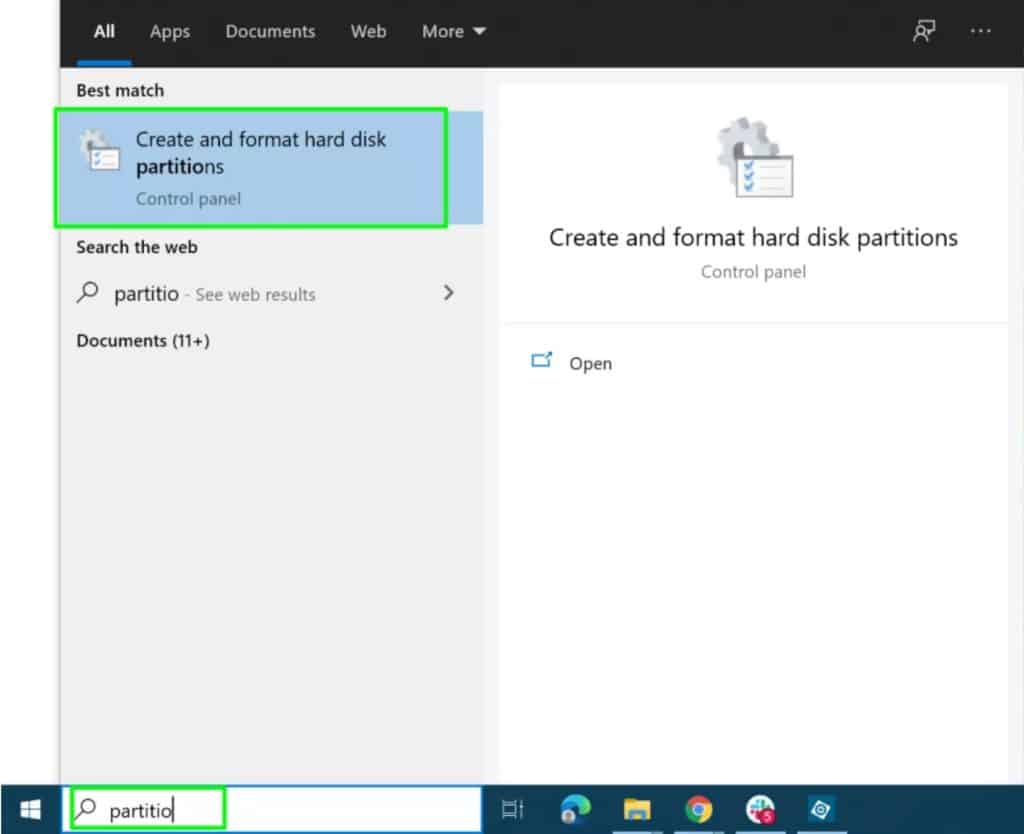
Open Disc Management by searching for ‘partitions' in the search bar, then select all existing partitions on the USB drive and deleting them. Simply right click the partition and hit ‘Delete Volume'.
Create FAT32 and NTSC Partitions
Right-click the now unallocated space and select ‘New Simple Volume' then name is whatever you want. Make sure this partition is only 1GB then repeat for NTSC which should be for the remaining storage.
Mount Windows 11.ISO
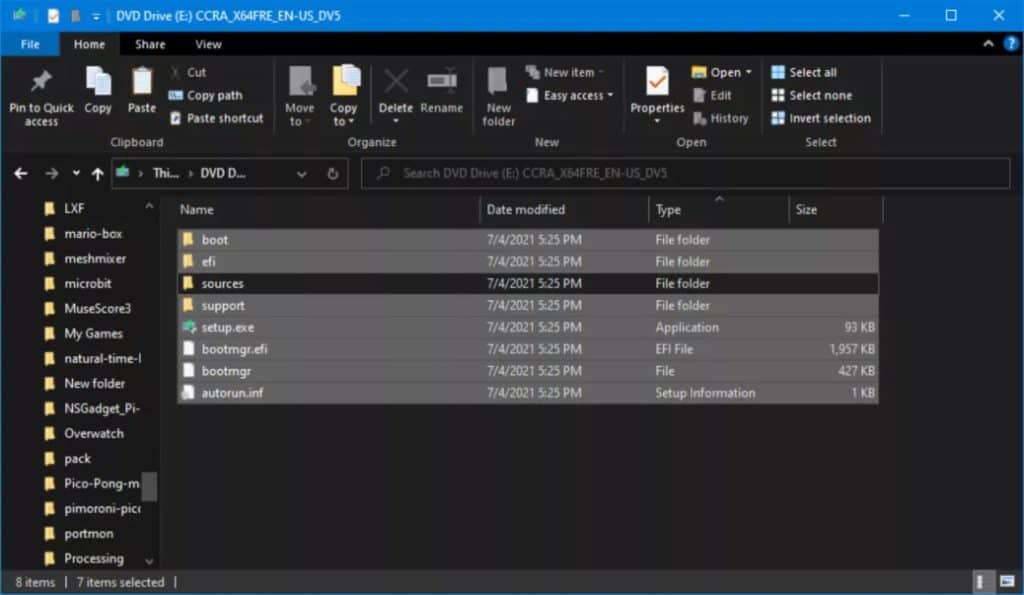
Right-click your Windows 11 .iso file and select mount. This will open the disk image as a file directory like a physical disc (remember those?). Copy all files and folders except the “sources” folder onto the FAT32 partition. Then, create an empty folder on the FAT32 partition called ‘sources' and copy the ‘boot.wim' file ONLY from the disk image sources folder. Finally, copy all disk image files onto the NTFS partition.
Install Windows 11
Congratulations, you now have a bootable USB Windows 11 drive that will work regardless of secure boot being enabled.
Change Boot Order
Before installation, we need to change the boot drive order in BIOS settings. This is quite easily done by plugging in the USB then accessing BIOS as above, then navigating to the ‘Boot Order' menu. Then, simply use your arrow keys to move the USB Drive to the top position. Once you save and exit, your PC should restart and load up the Windows 11 installation window.
Go through the options
Select your language and other preferences > product key (this can be skipped for now) > accept licence agreement > custom install (for a fresh install) > select your hard drive. Windows 11 will then start to install. There’ll be some other quick preference choices to make and then that's it. Well done!
Keep your Windows 11 bootable USB handy, as this can be used to troubleshoot and repair your operating system should you ever need too. For all things Windows 11, make sure to bookmark us.
TPM stands for ‘Trusted Platform Module', it's a little chip that sits on your motherboard encrypting passwords and other sensitive information. It's also a requirement for Windows 11 to run, which has caused a few issues when it comes to PC compatibility. In most cases, users just need to turn the feature on in their BIOS menu. Here's some steps to take before installing Windows 11 from USB:
Enable TPM 2.0
Our in-depth guide can be found here, but here’s a quick refresh below:
Boot Into BIOS Menu
The BIOS menu can be accessed by repeatedly pressing the access key, which is normally one of the function keys (F12 for example) or Escape. The initial load screen of your device should tell you which button to press.
Find Security Options
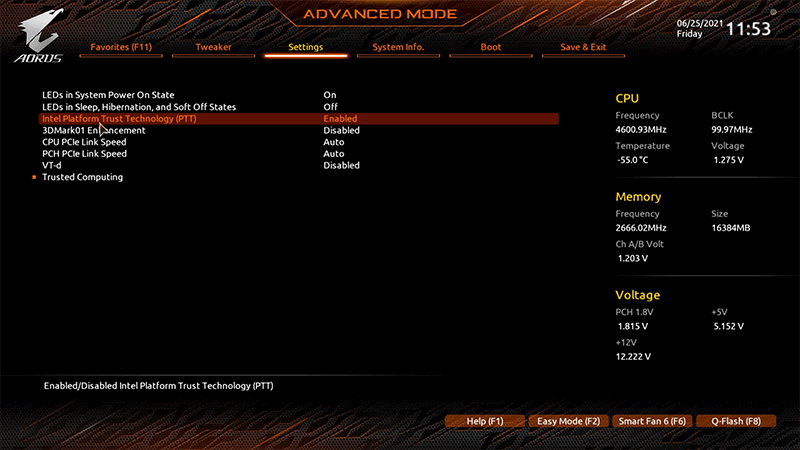
You should now be looking at the boot menu, it's a simple looking menu which is navigated by using the arrow keys on your keyboard. Navigate to your security menu to find the ‘TPM', Intel Platform Trust Technology' or ‘AMD CPU TPM' field and check if it's enabled. If it isn't enabled for a smooth Windows 11 Installation. Finally exit the BIOS menu and save.
Can't Find It?
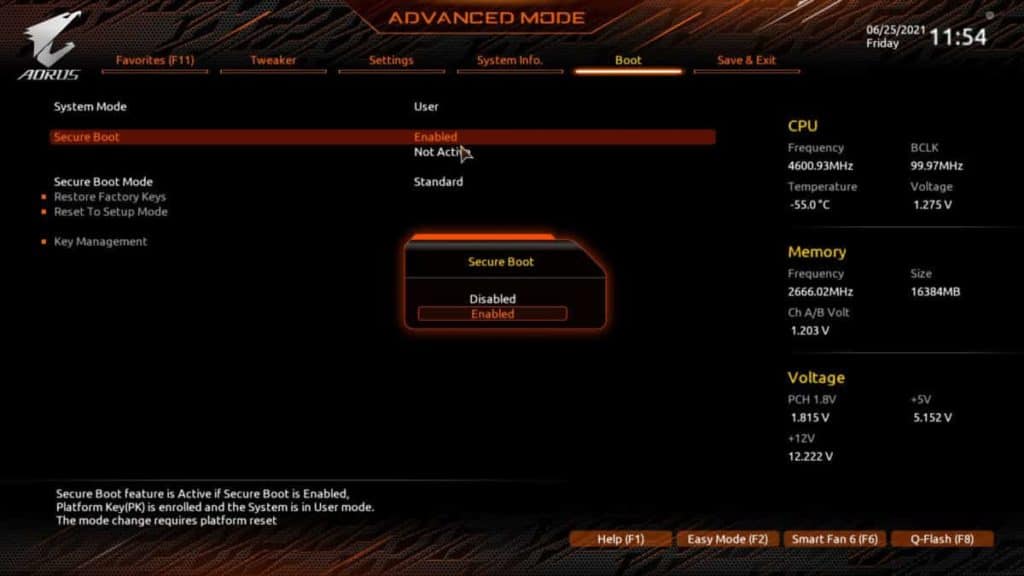
This is a common issue, not to worry. Instead, locate the ‘CSM'/'CSM Support' option in the BIOS menu system (It's normally under security). Disable this then save and exit. Go back into BIOS and enable ‘Secure Boot' then save and exit again. Finally, going back into the BIOS menu, follow step 2 to enable TPM 2.0.
Secure a Windows 11 Disk Image
We're going to use a site called UUP dump to get an ISO straight from Microsoft’s servers, here's how:
Go to UUPDump.net
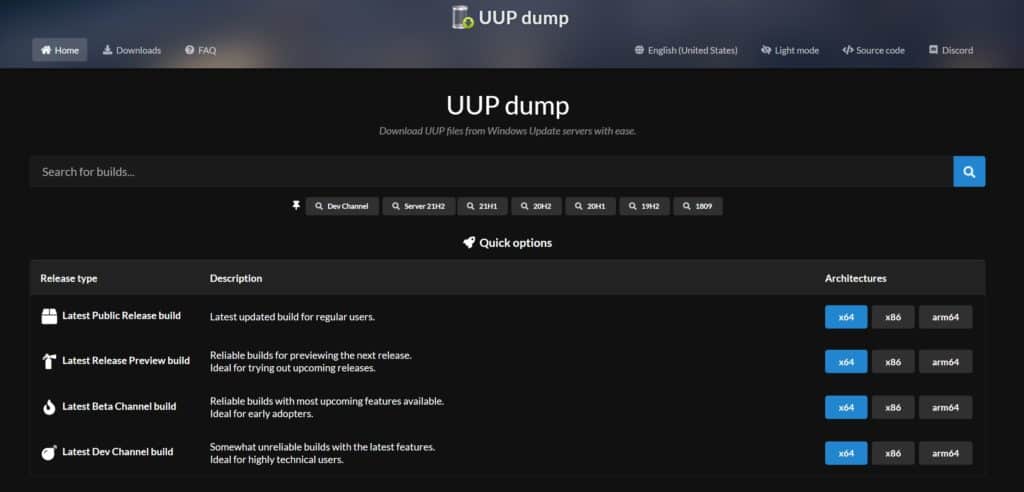
Click on the ‘Latest Dev Channel Build” and choose the version that suits your system requirements. Windows 10 users will most likely need to go for the arm64 version.
Download
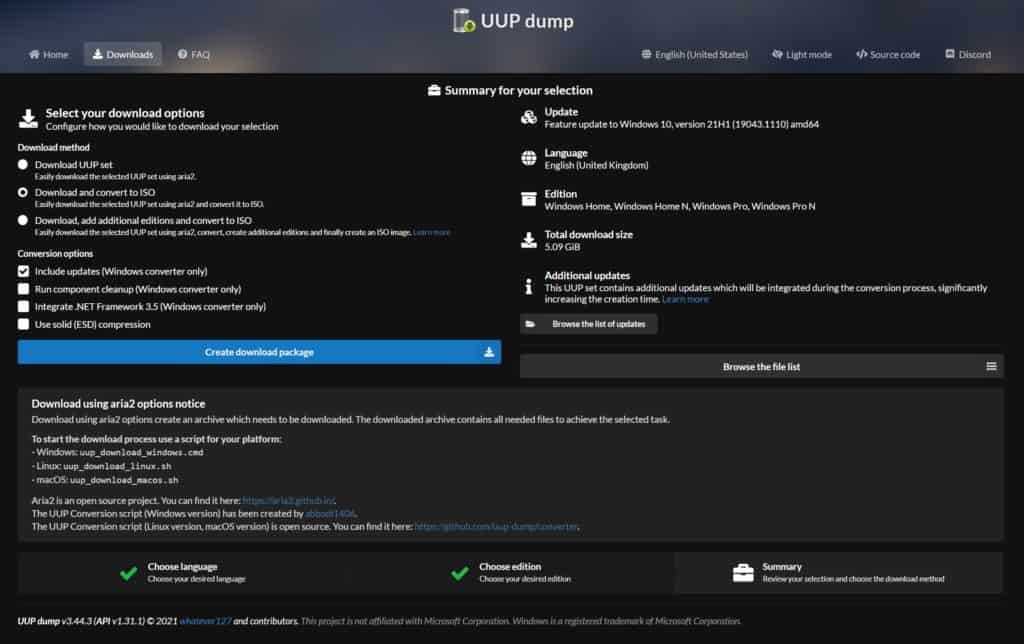
After selecting your language, select ‘Next' > Version of Windows > Select ‘Download and Convert to ISO' and check ‘Include Updates' > Click ‘Create Download Package'. Then go to the small .zip file that's been downloaded in Windows Explorer.
About the Author