How to Downgrade iOS and Keep Data; Step-by-Step Guide

Reviewed By: Kevin Pocock

Table of Contents
Knowing how to downgrade iOS and keep data is critical for those users who have just upgraded their iPhone or iPod Touch and disliked it.
As you may already know, Apple makes it hard to revert to previous versions of iOS, and before you begin, you have to check some important things to avoid losing data or critical information.
Many users encounter this issue after installing a beta or recently released version and discovering that it is plagued with bugs and lacks important features, rendering their phone inoperable.
However, the main issue is how to downgrade without losing data, which we'll cover in this article. So without further ado, let's get started.
Reasons for Downgrading iOS
There may be a variety of reasons someone may want to downgrade iOS, including:
- Bugs: as we mentioned earlier, a new iOS version has bugs and makes your iPhone hard to use.
- Unwelcome Changes: new iOS versions have some significant changes that may be unwelcome for users or developers.
- Slow Functionality: installing a new iOS version on an old phone can make it annoyingly slow. Older devices work better with older iOS versions.
What to Do Before Downgrading iOS
During this process you’ll need to restore your iPhone to factory settings, download the prior software version to your computer, load it onto your iPhone, and then import your data from an earlier backup to reinstall an iOS upgrade.
Because of this process, there are a few crucial factors you should take into account before choosing to remove the most recent version of iOS:
- Have a Backup: downgrading iOS will clean and wipe your device to the factory settings. If you don't have a backup in your archive, you will lose all your data and must start from scratch.
- Note for Apple Watch Users: watchOS can't be downgraded to the previous versions, and if you installed the latest version of watchOS and downgraded iOS, you may not be able to use your wearable features fully.
- Ensure iOS is signed by Apple: ensure the version of iOS you want to use after downgrading is still supported and signed by Apple. If Apple has stopped supporting the iOS version, you can't downgrade.
You can check for signed software on IPSW Downloads. The site isn’t owned by Apple, but it aggregates signed downloads originating from Apple.
How Can I Downgrade iOS Without Losing Data?
If you have decided to downgrade your iOS despite all the risks and potential setbacks, follow the steps below to uninstall the latest iOS updates on your iPhone.
1. Find Your iPhone Model
You must know your iPhone Model before downgrading your iOS to choose the best software to download from the website we mentioned above.
Step
Go to Settings menu
First, open Settings.

Step
Go to General
Then, head over to the General menu.

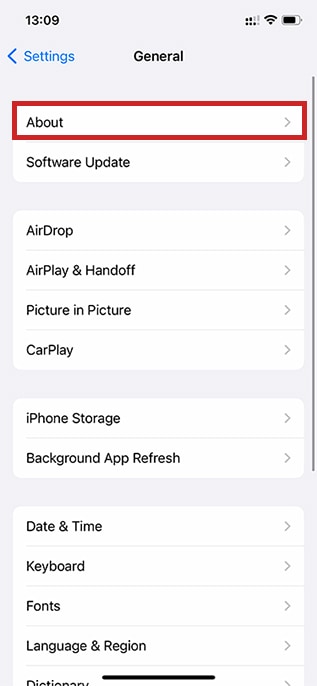
Step
Select About
Tap About.
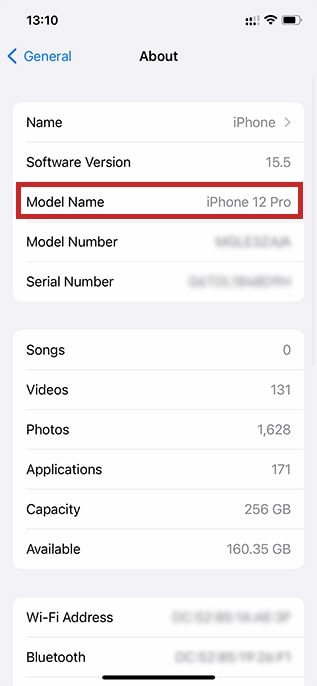
Step
Check your iPhone model
After that, you can see the iPhone model next to the Model Name.
2. Create a Backup
Before getting started, don't forget to create a full backup of your data and important information on your iPhone. You can either use iCloud or your computer. Remember, you can't recover lost data if you don't have a backup. Creating a backup will help you restore your data after downgrading iOS.
3. Download IPSW File
As you may know, Apple doesn't offer download files for older iOS versions; you must download them from the IPSW website.
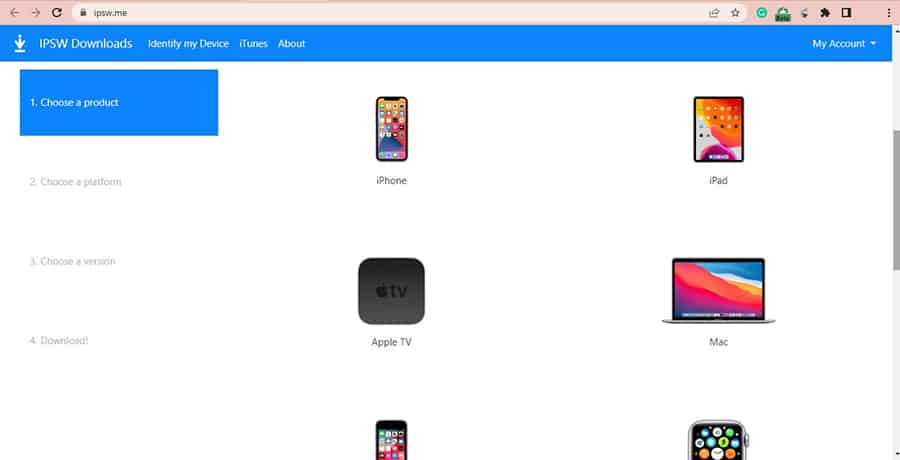
Step
Go to IPSW Downloads
Now, open IPSW Downloads.
Step
Choose your device
Select iPhone.
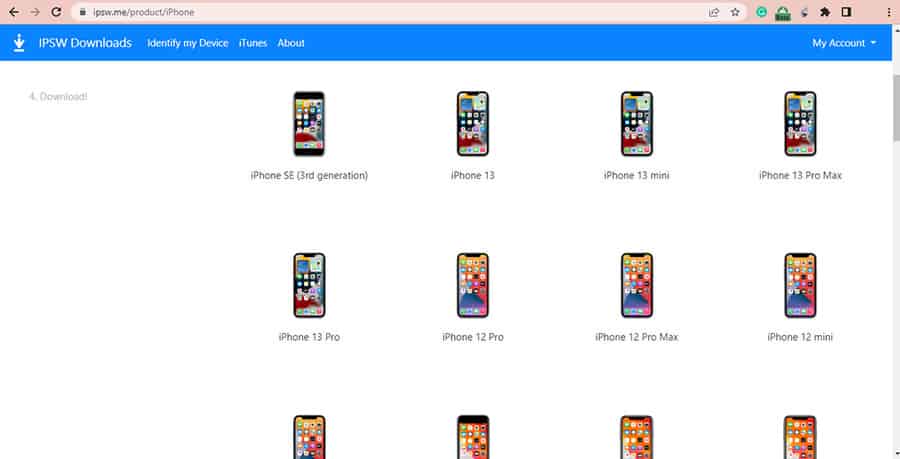
Step
Select your iPhone model
Following that, choose iPhone Model.
Step
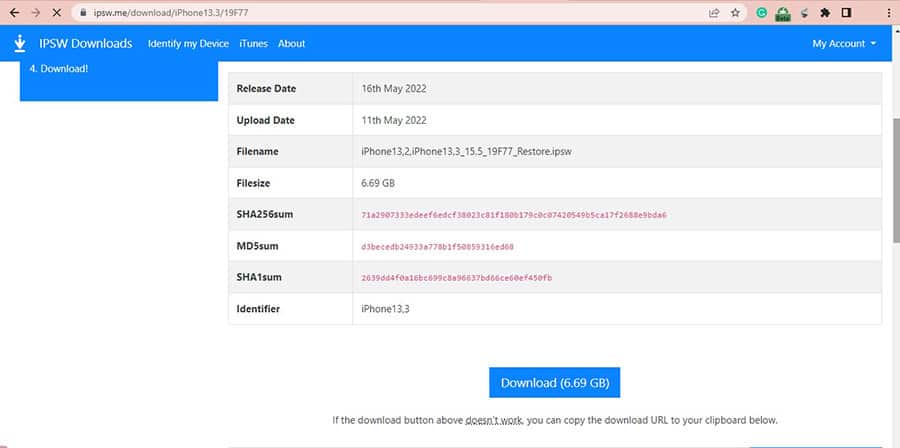
Find and select iOS version
Then, select the earlier iOS version you can download.

Step
Download it
Finally, click Download and wait for the download to complete.
4. Put your iPhone in Recovery Mode
After all the above steps, you must prepare your iPhone for downgrading, then put it in Recovery Mode.
Step
Connect iPhone to PC or Mac
Connect your iPhone to your computer or Mac with a safe and trustworthy Lightning cable.
Step
Enter Recovery Mode
Put your iPhone in Recovery Mode by following the steps below.
- iPhone 8 or later, including iPhone SE (2nd generation):
- Press and quickly release the Volume Up button.
- Press and release the Volume Down button.
- Press and hold the Side Button until you see the recovery-mode screen.
- iPhone 7:
- Press and hold the Volume Down and Power buttons until you reach the recovery mode screen.
- iPhone 6s or earlier:
- Press and hold the Home and Power buttons until you get the recovery mode screen.
5. Restore Device to Downgrade
Now it's time to use the IPSW file you downloaded before. So, keep your iPhone connected to your PC or Mac, and follow the steps below:
macOS Catalina or later:
Step
Open Finder
Open Finder and click your iPhone in the sidebar.
Step
Select .ipsw file after clicking Restore button
Then, hold the Option key and click on the Restore button. Now, select the .ipsw file you downloaded.
Step
Open the file
Click Open. Then select Agree to accept Terms and Conditions.
Windows (Laptop, PC) or macOS older than Catalin:
Step
Run iTunes app
To begin, open iTunes.
Step
Click on Restore
Then, hold the Shift key and click on the Restore button
Step
Open .ipsw file
After that, select the .ipsw file you downloaded and click Open.
Step
Agree to terms
Now, click Agree to accept Terms and Conditions. The process will begin and take about 15 minutes.
6. Restore Backup on iPhone
Once the downgrade iOS process has been finished, your iPhone will have a clean copy of the previous iOS version or the .ipsw file you downloaded. Then, you must restore the backup you created earlier to access your data, messages, photos, apps, etc.
Note that, you can't restore the backup made after the latest iOS update. So remember to create a backup from time to time to avoid losing any data. In this case, you need to restore from an older backup. Follow the steps below to recover your iPhone backup:
For macOS Catalina or later:
Step
Select your phone in Finder, then click on Restore Backup
Open Finder and click your iPhone in the sidebar. After that, select Restore Backup.
Step
Select your iOS backup
Select the iOS backup you'd like to restore. (check the time and date). Then, for an encrypted backup, enter your password when asked.
For Windows or older macOS older than Catalina:
Step 1
Select Restore Backup in iTunes
First, open iTunes. Then, select Restore Backup.
Step
Choose your iOS backup
Following that, choose the iOS backup you'd like to restore. (check the time and date). For an encrypted backup, enter your password when asked.
Don't unplug your device during the restore process. When done, your iPhone will boot and run your selected version of the iOS with all your data. That's all!
Final thoughts
Users decide to downgrade iOS after upgrading to the latest version for many reasons. The only thing that may stop them is losing their data. Knowing how to downgrade iOS and keep your data is essential. And using this guide you can do just that.
About the Author