Last Updated on
There’s a good chance the Excel sheet or workbook you’ve been working on has a lot of important information. Just one change to a character or piece of information in a table or formula will completely ruin your hard work. Good news, you can protect your excel workbook and spreadsheet with a password to make sure no one messes around with your hard work.
It’s also a decent bet that the Excel workbook or sheet in question has quite a bit of sensitive, and possibly private, information on it. Well, users can also encrypt their Excel files so that only authorized personnel can access them. Make sure to write down or make a mental note about the passwords provided though, as once lost there’s no way to recover it. Well, kind of.
There are third-party applications and relatively simple hacks to unprotect Excel files, so another good practice is to limit who can physically access the necessary files behind certain drives and network permissions. Although a spreadsheet is protected and encrypted, it can still fall into the wrong hands and be hacked, anything can with enough knowledge.
How to password protect Excel

Were going to break this down into three sections. How to protect spreadsheets, workbooks, and finally, how to encrypt a workbook. The former allows users to view workbook and sheet information but restricts editing privileges to those with a password. The latter locks down viewing a workbook until the correct password is entered. Let’s get straight into it.
How to protect a sheet

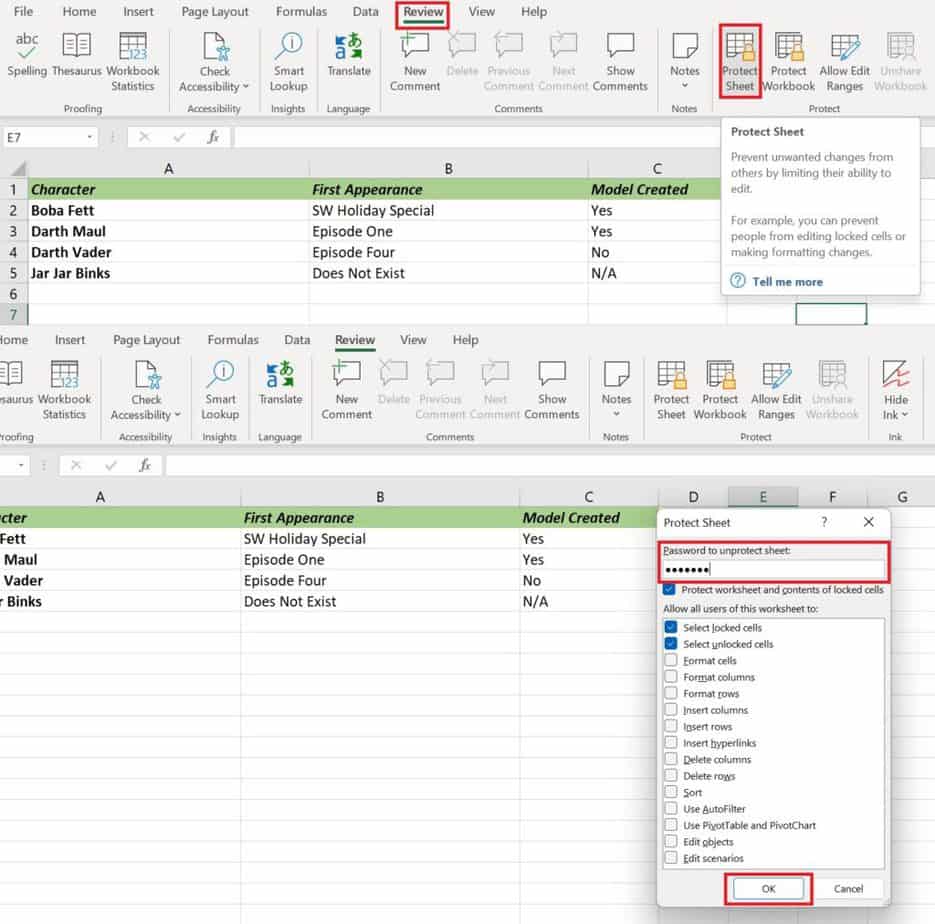
Under the review tab on the top ribbon of Microsoft Excel, click on ‘Protect Sheet’ in the Protect group. This will bring up a new window asking for password input and what permissions need to be locked behind it. Once done, click OK.
How to protect a workbook

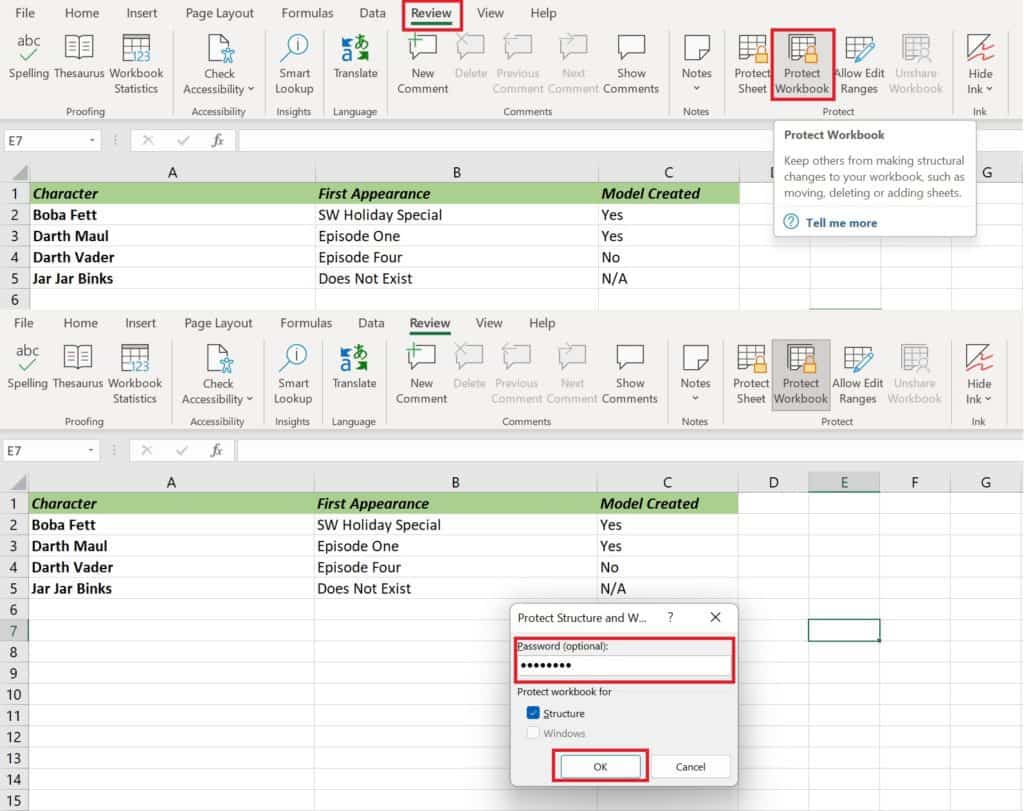
Rather than protect a single sheet, users can also protect a whole workbook. Click ‘Protect Workbook’ in the Protect group under Review, to set up a password for the workbook. Click OK to finish up.
How to encrypt a workbook

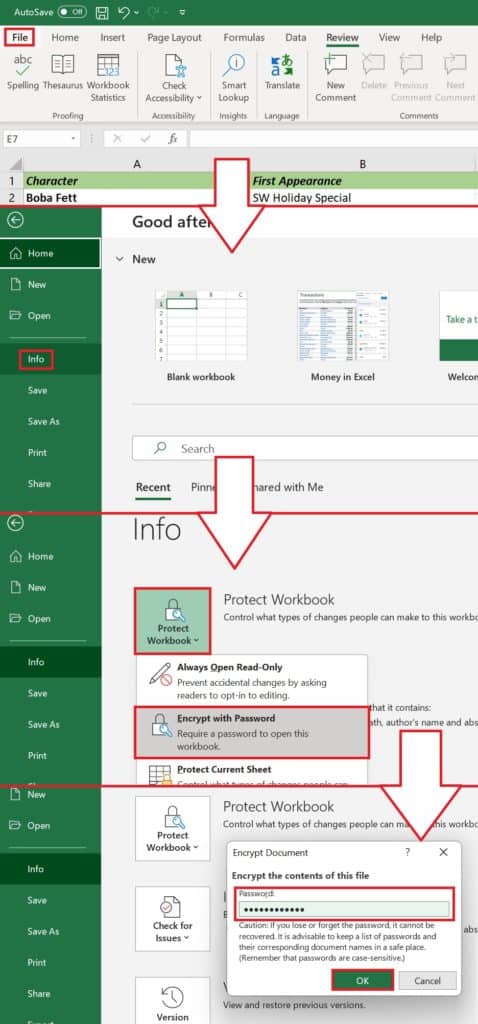
This option works a little differently due to locking down viewing privileges behind a password. Go to File > Info > Protect Workbook > Encrypt with Password. Then, enter your chosen password and hit OK, and then re-enter to make sure the password is correct, and that’s it.
Thanks for choosing PC Guide for learning how to password protect Excel. For more help with Excel and Microsoft Office, visit and bookmark our Office hub.


