How To Make Columns In Word

Reviewed By: Kevin Pocock

Table of Contents
There is a range of hidden features in Microsoft Word that many users may not be aware of, despite Word being the go-to word processor for the majority of the globe.
Word allows you to create a number of documents and format them in several unique ways so you can write a document or report for any scenario.
If you are thinking of writing a newspaper article, newsletter or leaflet, the format on your Word page must look a bit different so it can become clearer and more readable. This can be done by inserting columns to break up words and creating a structured format for your specific document.
Adding columns is luckily very easy. However, it is done slightly differently depending on what version of Word you are using, so to make this clearer below we have conducted a step-by-step guide on how to add columns to every version of Word.
Word 2013
If you have not updated to Word 2016 or are resisting doing so because you prefer the layout of the earlier version, then luckily you can still add columns to your work:
Step
Open Word
First you will need Word open along with your written piece that you want to edit.
Step
Page Layout Tab
At the top of the screen there will be a menu with some options you can pick from including referencing and mailing. Click on the ‘Page Layout' option near the middle.
Step
Click Columns
Once you have clicked this there are a few formatting options you can choose from including the size and orientations of the page.
‘Columns' will be to the right, click on this.
Step
Choose How Many Columns
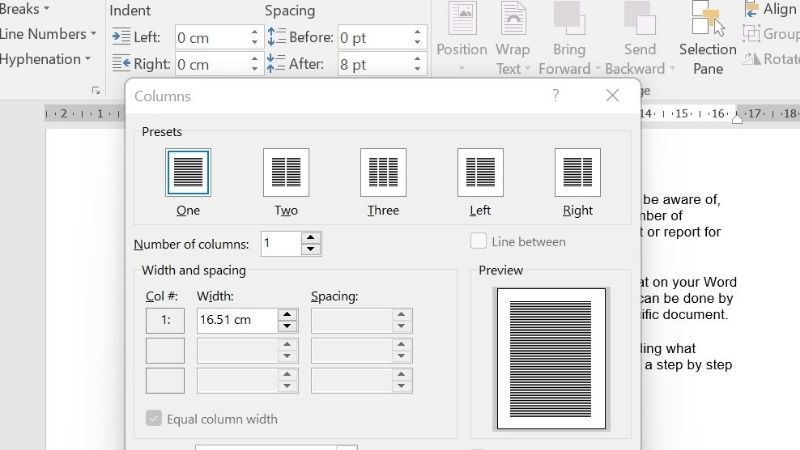
You will now be asked to pick how many columns you want to insert. Simply click the amount or if you want a few more, click the ‘More Columns' option at the bottom of the drop down menu.
Step
Apply
Click the selected text you want to apply the column to and it will appear after a second or two delay.
Word 2016
Word 2016 is an updated version of Word with a bit of a different layout and some extra features, however you can still use the column feature and here is how:
Step
Highlight Text
Start by opening your document of choice and highlighting all the words you want to format into a column.
Step
Layout Tab
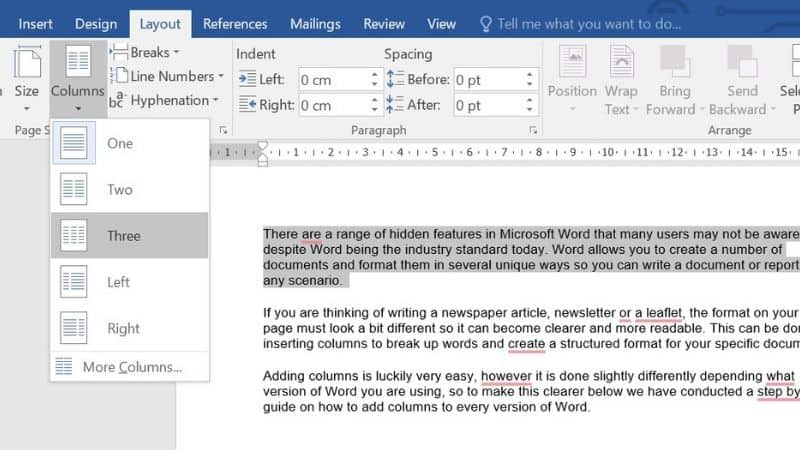
At the top, instead of the page layout option there will simply be ‘Layout' in the menu, click on this to open a drop down menu of options.
Step
Select Columns
‘Columns' will be one of the options you can choose from, click on this and you will similarly be asked how many you want to put in your work.
Step
Choose How Many Columns
Click on the amount of columns you want to insert or if you don't see the option you're looking for, click the ‘More Columns' option.
Step
Apply
Click ‘Apply' and the columns will be inserted around the highlighted text after a few seconds. This can sometimes take up to 10 seconds so if it does not happen straight away, it may just be in the middle of processing the columns.
Conclusion
Columns are a great way to format your work and are a must if you are planning to write a newspaper or newsletter.
It is therefore always worth knowing where the column option is just in case you ever need it to tidy up future documents, or if you are ever asked to write a document that requires columns to be formatted correctly.
About the Author