How to Start Windows 11 in Safe Mode with Networking

Reviewed By: Kevin Pocock

Table of Contents
Sometimes, people need to know how to start Windows 11 in Safe Mode with Networking drivers enabled. Windows OS isn't exactly world renowned for its stability, certainly with the growing popularity of Windows 11 beta builds. Whilst it's a versatile and easy-to-use system, crashes, bugs or a bad install may prompt troubleshooting and repairs at software level. The easiest way to find any faults with Windows is knowing how to start Windows 11 in safe mode with networking.
Safe mode allows users to run a ‘No Frills' version of Windows 11 with just the necessary drivers, this is so users can try and pin-point what is causing specific problems by running programs one at a time. It's a feature that is incredibly useful for developers, so much so that safe mode is the only version of the OS they boot into. More on that later.
As the name suggests, learning how to start Windows 11 in Safe Mode with Networking is safe enough to boot into, with Windows 11 reverting to it's full-fat experience once the user’s PC is restarted. It's part of Windows 11s troubleshooting suite which you'll see shortly.
How to Start Windows 11 in Safe Mode with Networking
Accessing Windows Recovery Environment
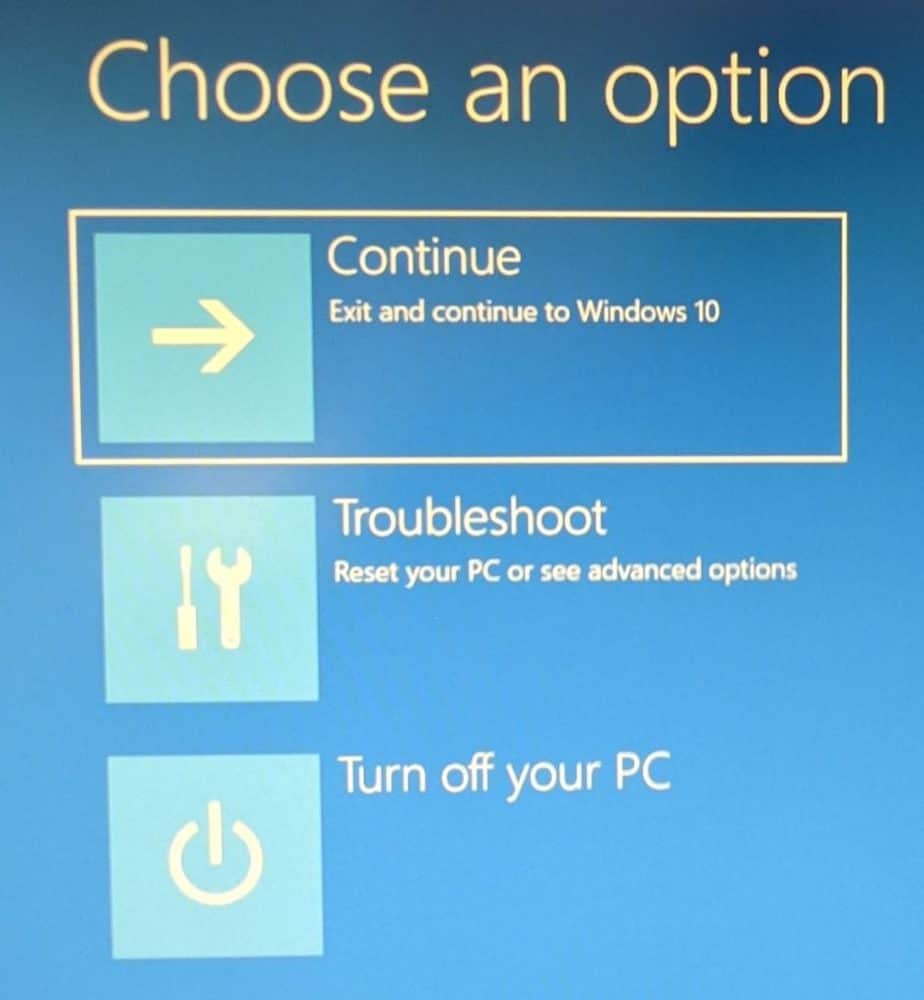
On the ‘Choose an Option' screen and click the ‘Troubleshoot' pane.
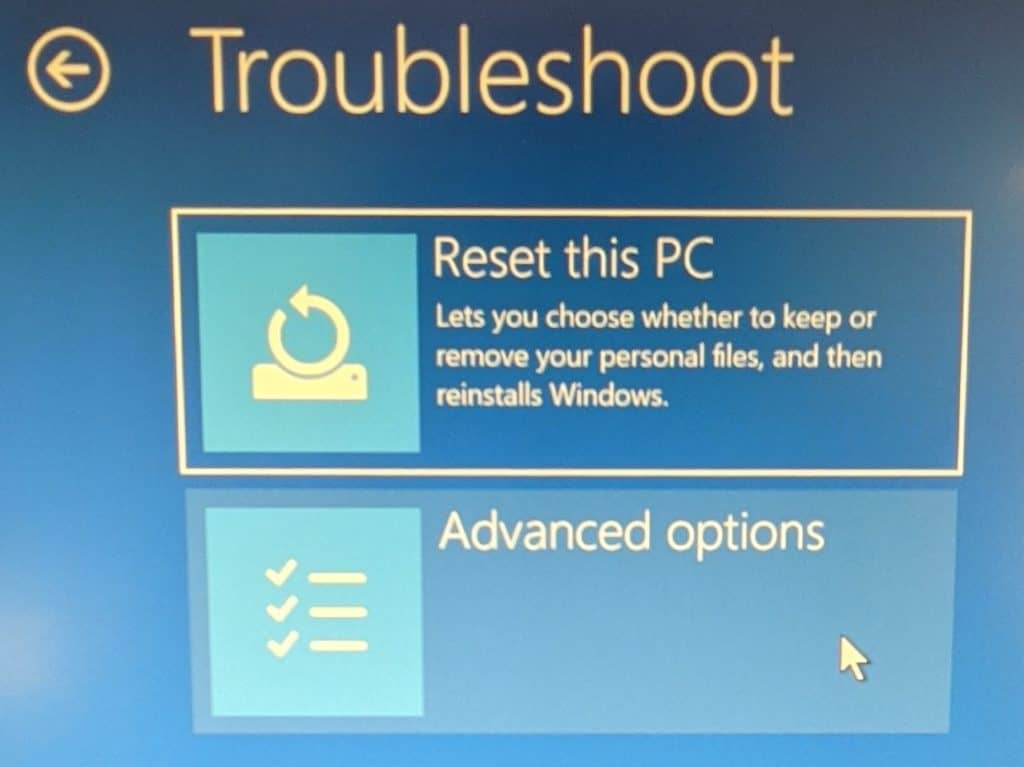
Next, select ‘Advanced Options’
Hit ‘Start up Settings' next
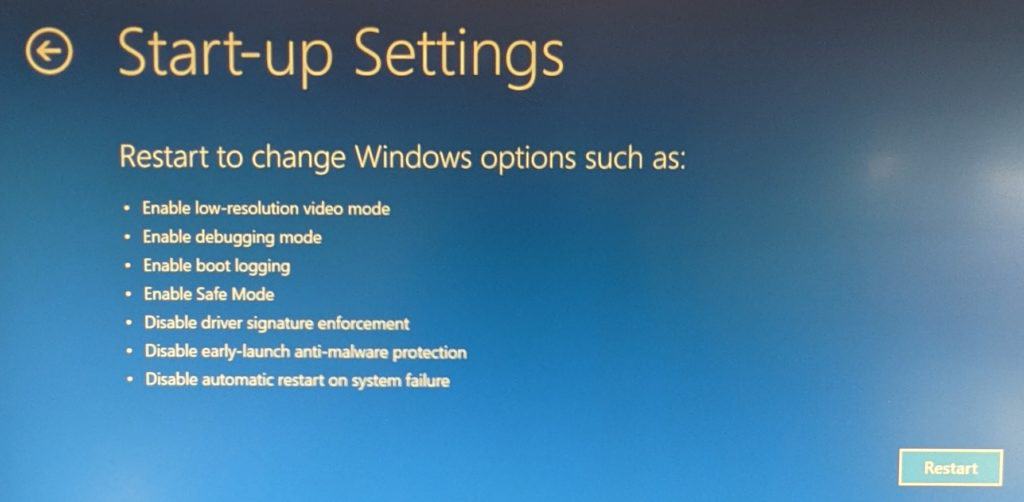
Hit restart on the bottom right to restart Windows 11
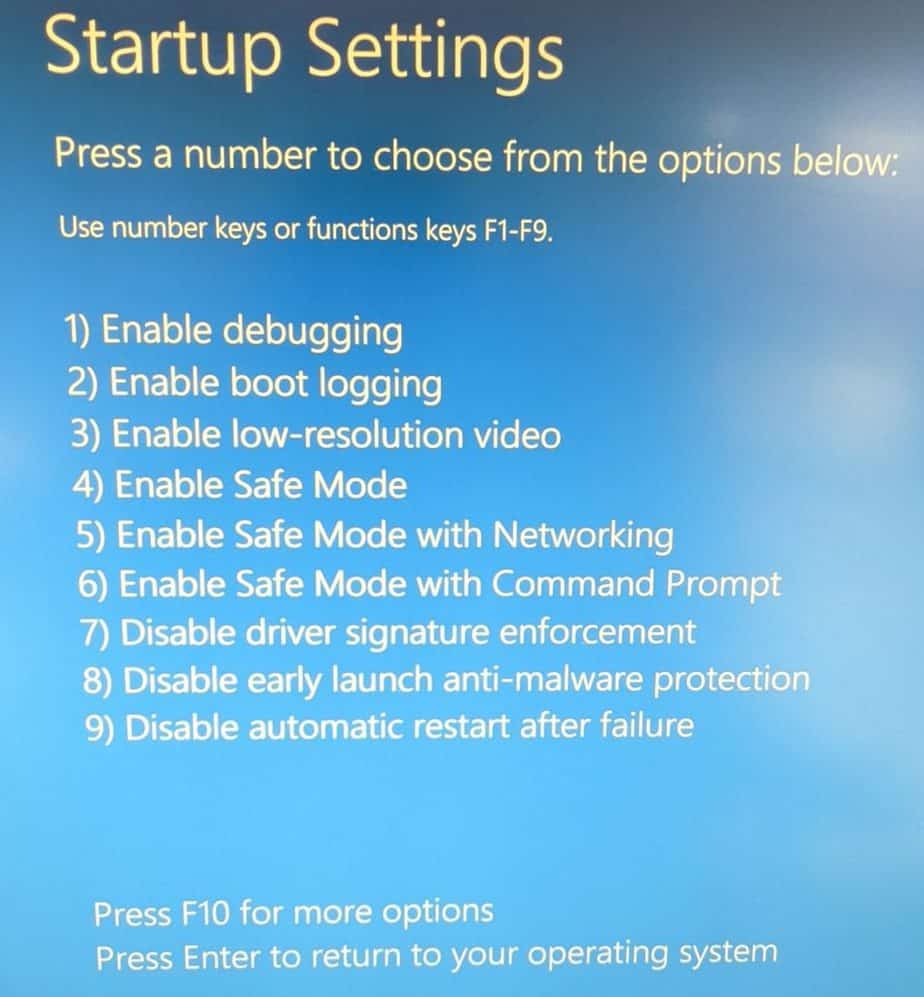
Once loaded, hit the corresponding function key (F1 to F9).
F4-F6 are the Safe Mode options. This will then boot Windows 11 into the corresponding Safe Mode.
Boot Into Safe Mode With Networking By Restarting
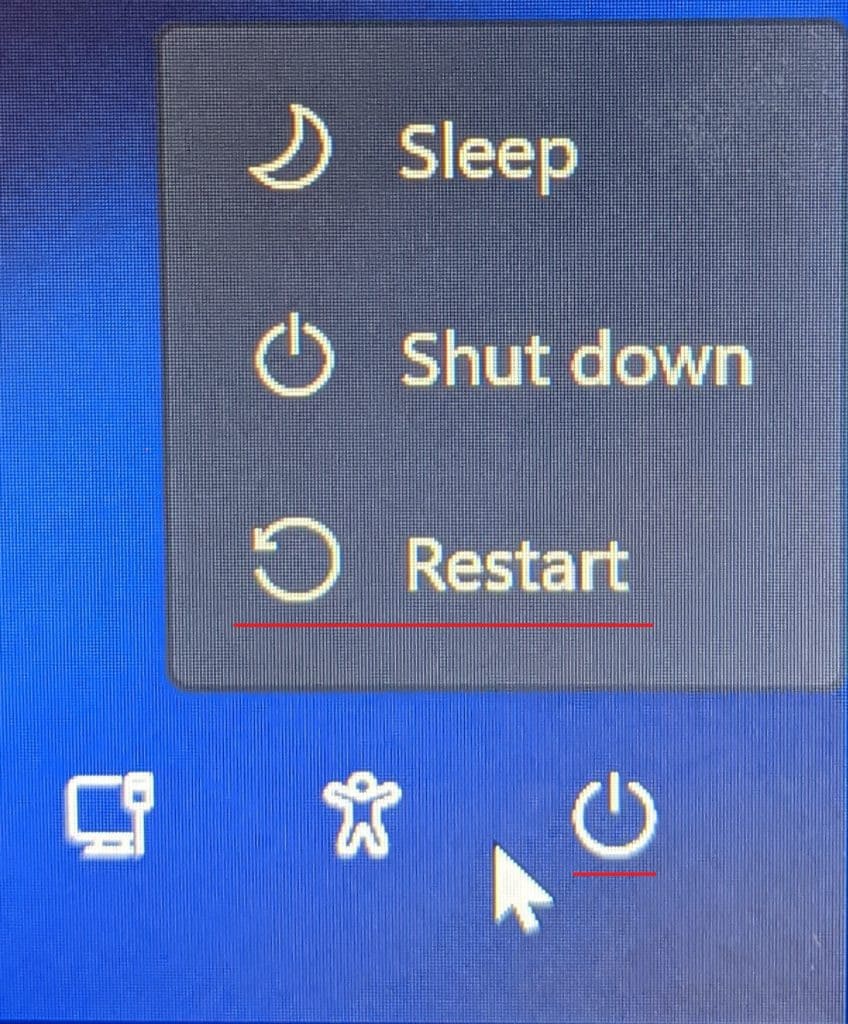
The first way to do this is to hit the start menu icon > power button > Hold the shift key and click ‘Restart'.
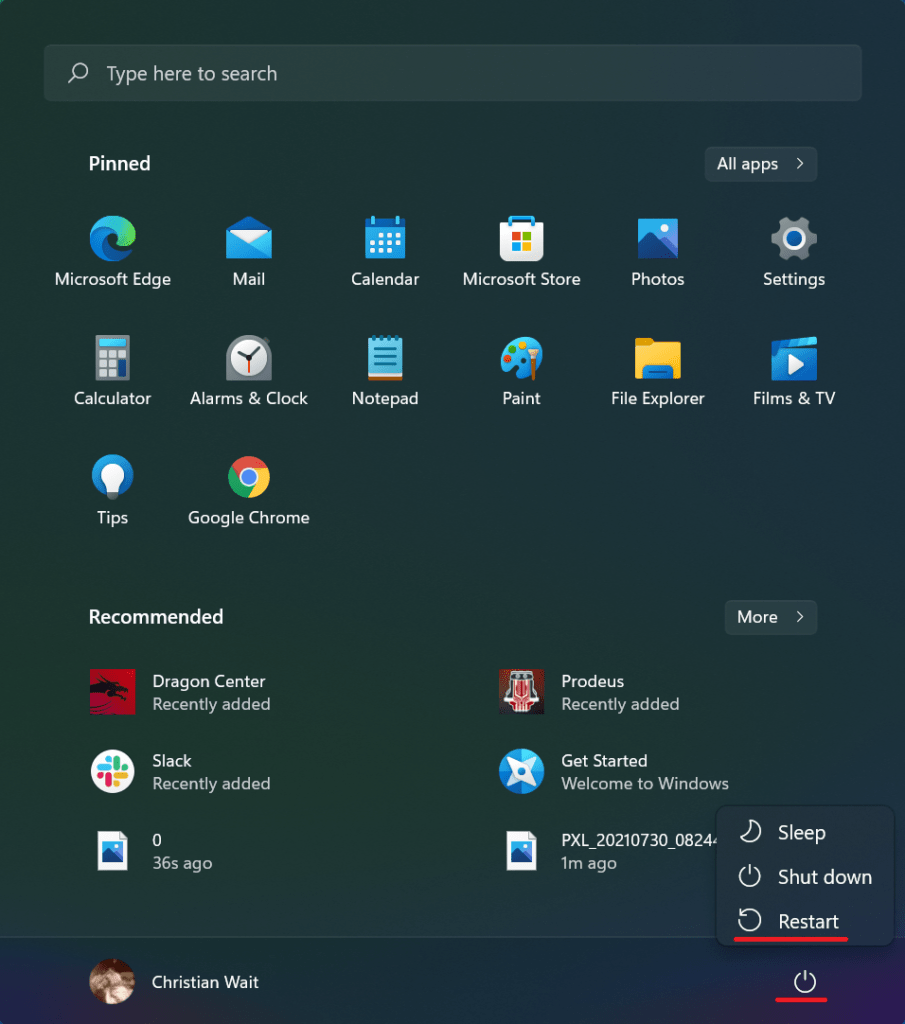
This will reboot your system into Windows Recovery Environment, scroll back to Window Recovery Environment for next steps.
The above steps can also be performed on the Windows 11 lock screen.
Boot Into Safe Mode With Networking from Command Prompt
In this how-to, we're going to show you how to start Windows 11 in Safe Mode with Networking so that users still have their internet connections. Of course, standard Safe Mode can be accessed in the same way if the issue is network-based or if you'd prefer this option, just select Safe Mode instead of Safe Mode with Networking.
The three types of Safe Modes are:
Type ‘CMD' into the search line on the Windows 11 start Menu
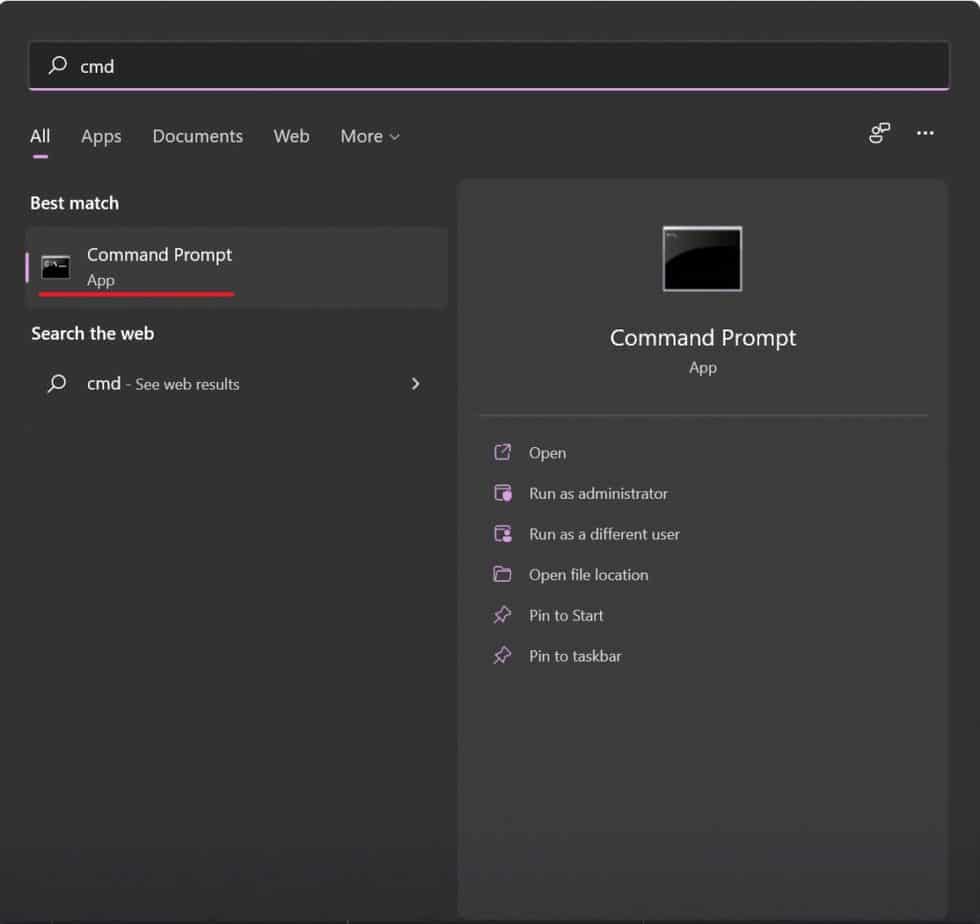
Enter the command below onto the command line and press enter to reboot into the Windows Recovery Environment. Refer back to the Windows Recovery Environment steps for how to start Windows 11 in Safe Mode with Networking.

‘shutdown.exe /r /o'
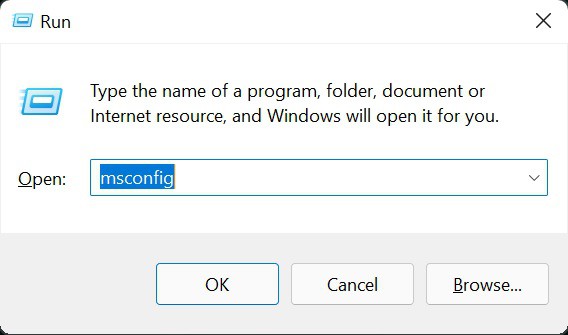
Boot into Safe Mode With Networking Every Start-up
This should only be done for users depending on Safe Mode for consistent troubleshooting tasks such as app/software developers and IT Technicians. Do not use this option for one-off issues, otherwise Windows 11 will not boot as normal until this process is reverted.
Start by pressing the ‘Windows' key and ‘R' and your keyboard to launch the ‘Run' window. Then, type ‘msconfig' and hit enter on the keyboard or click ‘OK'.
Click on the ‘Boot' tab and tick the ‘Safe Boot' option, then click OK
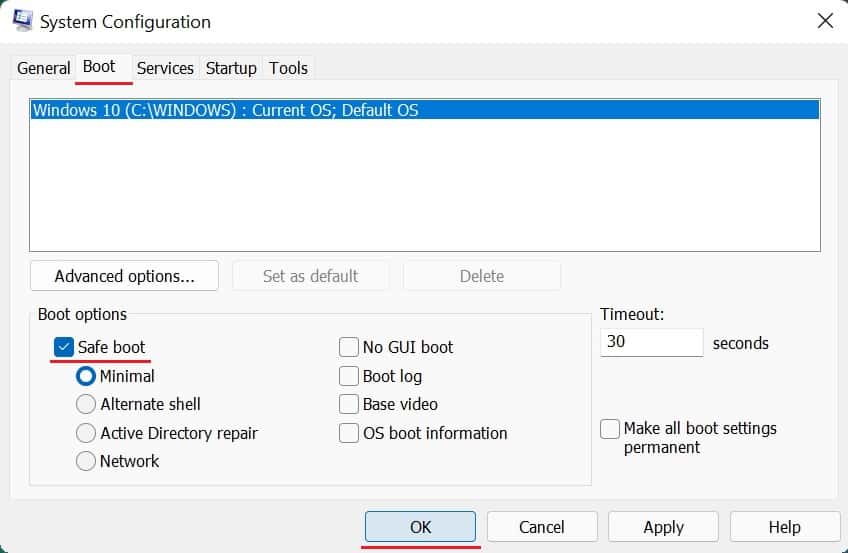
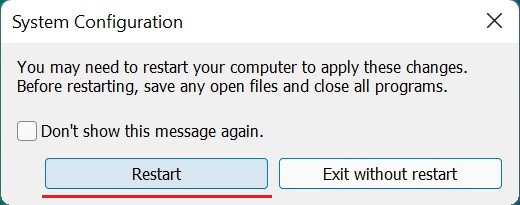
Hit ‘Restart' on the next pop up, Windows 11 will now boot into Safe Mode every time.
To reverse this, just uncheck the Safe Mode check box on the Boot tab on the System Config window.
Boot Into Safe Mode With Networking Via Bootable USB
For this, you will need to create a back-up disc from another PC or your current one if you still have access. By Using a USB pen drive with at least 8GB free, Windows formats said USB drive and converts it into a bootable drive which can reinstall Windows and troubleshoot when all else fails. It's always wise to create one just to be on the safe side, see our guide for doing just that.
Plug in the Bootable USB drive.
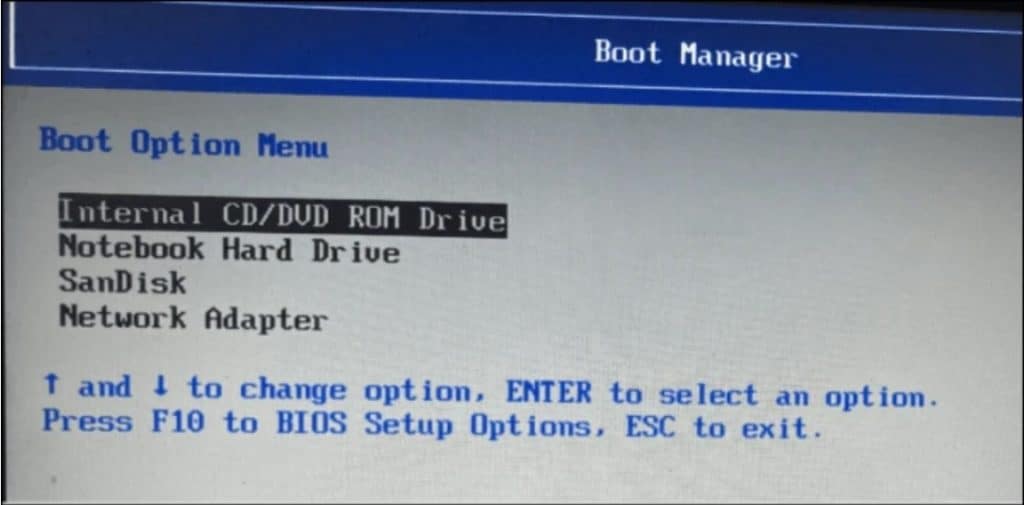
You will first need to enter your BIOS boot device options menu, this varies from motherboard to motherboard. The general use is to repeatedly hit the correct key as soon as your PC starts up. So for example. ASUS machines/motherboards require users to hit ‘Escape'. The initial boot screen should tell you as detailed on the examples above.
Once accessed use the keyboard arrow keys to move the USB bootable drive to the top of the list and hit enter. Now the PC will restart and boot using the USB drive as opposed to the standard bootable hard drive inside the PC.
Navigate the following clicks: Troubleshoot > Command Prompt. Then enter the command below and press Enter.
‘bcdedit /set {default} safeboot minimal'
- Safe Mode: No third party apps are loaded and only necessary drivers are used. Users will notice a change in display quality, with the picture looking slightly distorted or enlarged. That's only because Windows 11 hasn't loaded your graphics card drivers, so don't worry. It will all go back to normal after a simple reboot.
- Safe Mode with Networking: Same as the above but with networking drivers loaded, allowing users to get online. Please note, it's not advised to run any web browsers whilst in this mode due to no security, firewall or antivirus being loaded as standard.
- Safe Mode with Command Prompt: Windows 11 GUI (General User Interface) isn't loaded whilst booting in this mode, just the Command Prompt console. Unless you're an advanced user or have specific instructions to solve a Windows 11 issue this way from a reputable source, we would recommend avoiding this option.
Close the Command Prompt and click Continue to reboot Windows, which will now boot into Safe Mode everytime unless reversed via Command Prompt or in System Configuration as above.
Force Windows 11 into Safe Mode With Networking
Whilst we wouldn't recommend this, there may be no option if Windows 11 doesn't boot to the login screen. Windows 11 Automatic Repair mode triggers when Windows 11 doesn't boot three times in a row. As soon as windows starts loading on start-up, hold down your power button to shut down. After repeating this three times, Windows 11 will now boot into Automatic Repair Mode, once Windows has done it's automatic checks, click on ‘Advanced Options' to get into the Windows Recovery Environment.
We’re working hard on delivering the best Windows 11 informative content the web has to offer. If you’re stuck on something, check out our Windows 11 Hub!
Here we go, it's always wise to make sure you make a note of any changes to settings so you can revert them if needed. Also, make sure personal files such as documents and pictures are backed up via a USB device or your preferred cloud storage service (Such as Google Drive, OneDrive etc)
Boot Into Safe Mode With Networking From Settings
Go To Settings
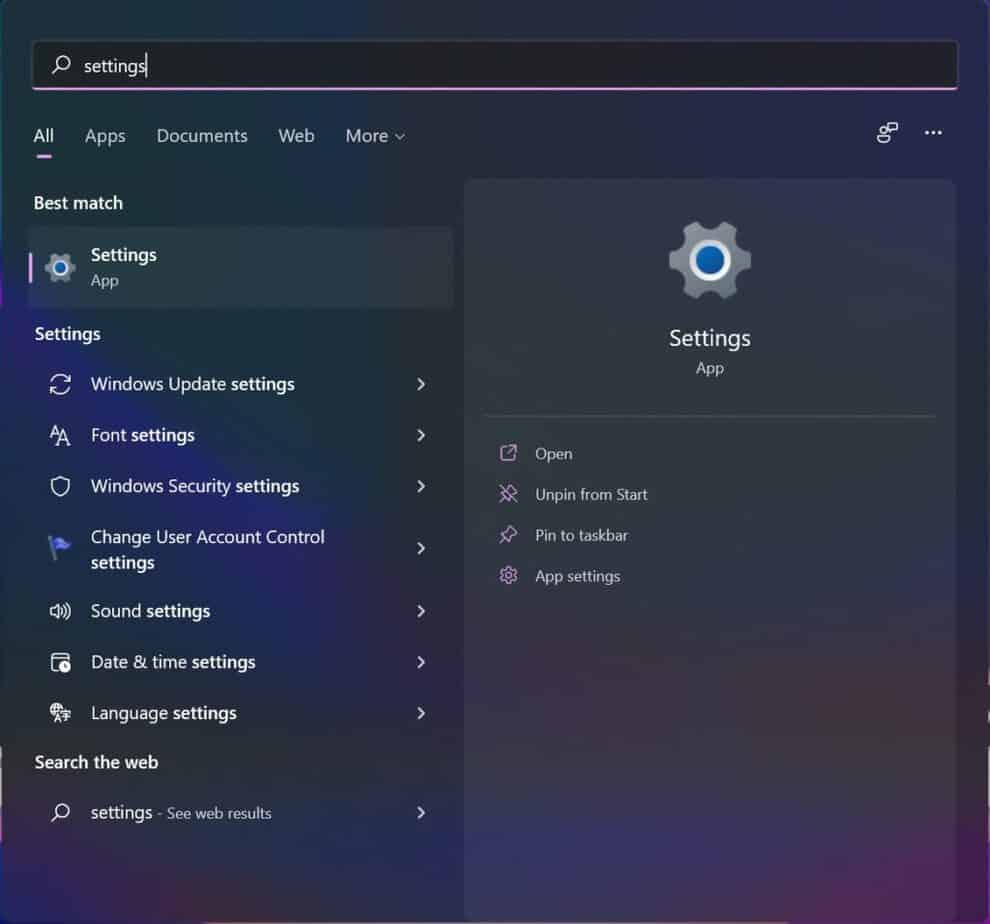
Search for and click settings in the start menu search field
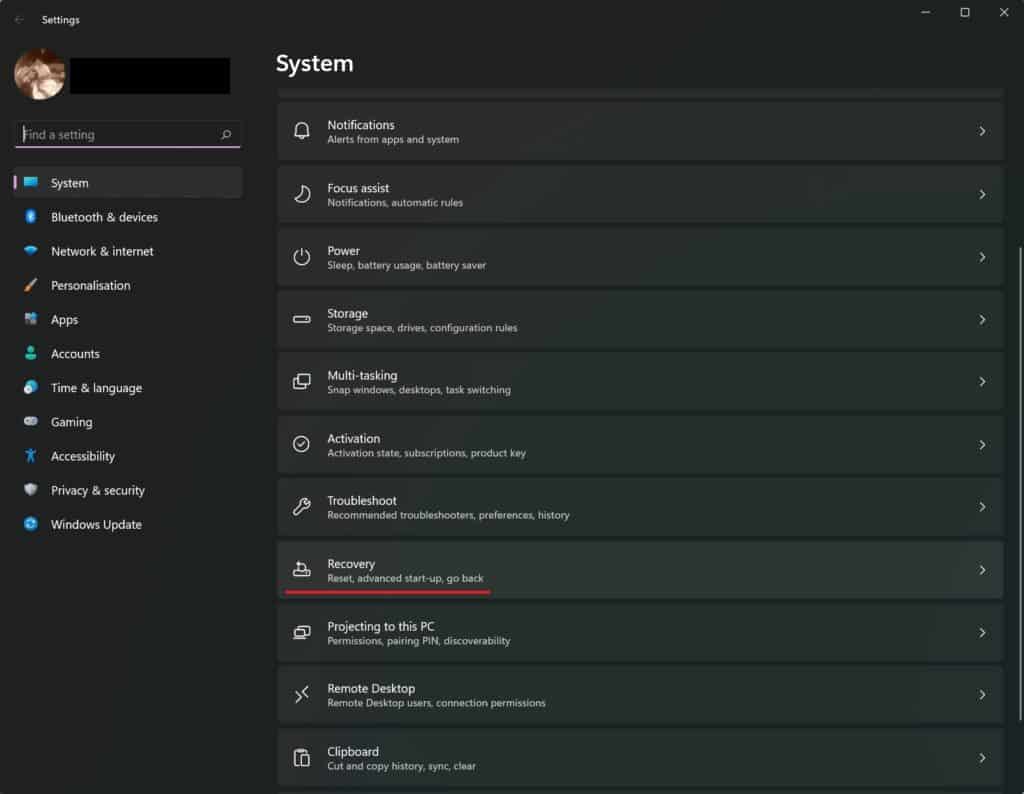
Scroll Down and Click ‘Recovery’
Restart
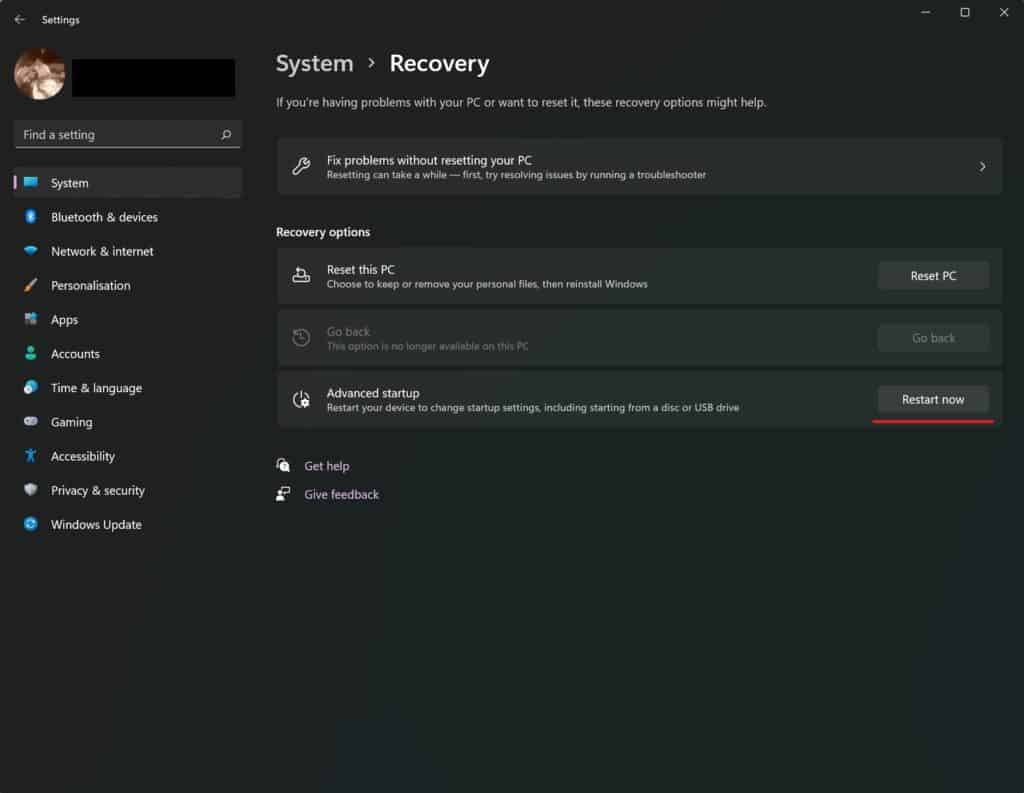
In the recovery menu, click ‘Restart Now' in the ‘Advanced Start-up' field.
And Again…
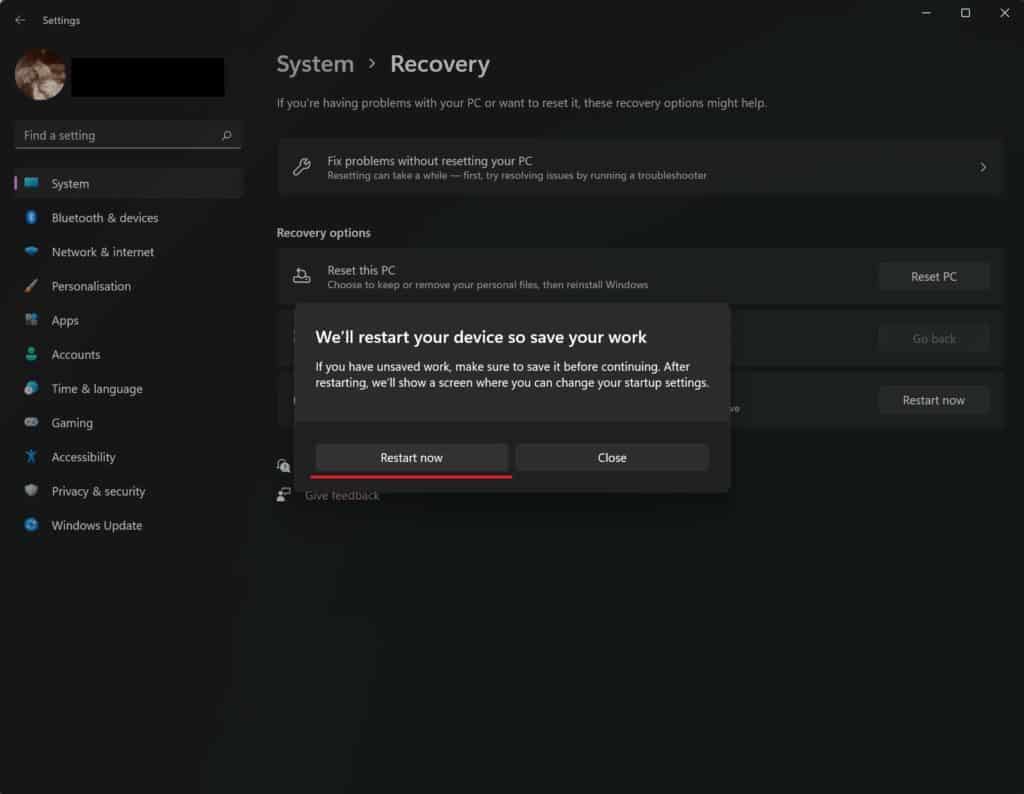
Click ‘Restart Now', this will reboot your device and enter the ‘Windows Recovery Environment'. See ‘Accessing Windows Recovery Environment' for next steps.
About the Author