Stable Video Diffusion vs Runway Gen-2

Table of Contents
Runway has dominated the AI video vertical since March 27th, when Runway Gen-1 was released to the public. Since then, Runway Gen-2 has represented “the next step forward for generative AI”, with little competition. This week, a new challenger has entered the ring, Stable Video Diffusion, from the firm keeping its promise of open-source AI more faithfully than OpenAI. Stability AI has introduced two new AI video generator models, SVD and SVD-XT, based on the AI art generator model Stable Diffusion. Between Stable Video DIffusion VS Runway Gen-2, which is the better text-to-video AI model?
Is Stable Video Diffusion better than Runway Gen-2? – Quality compared
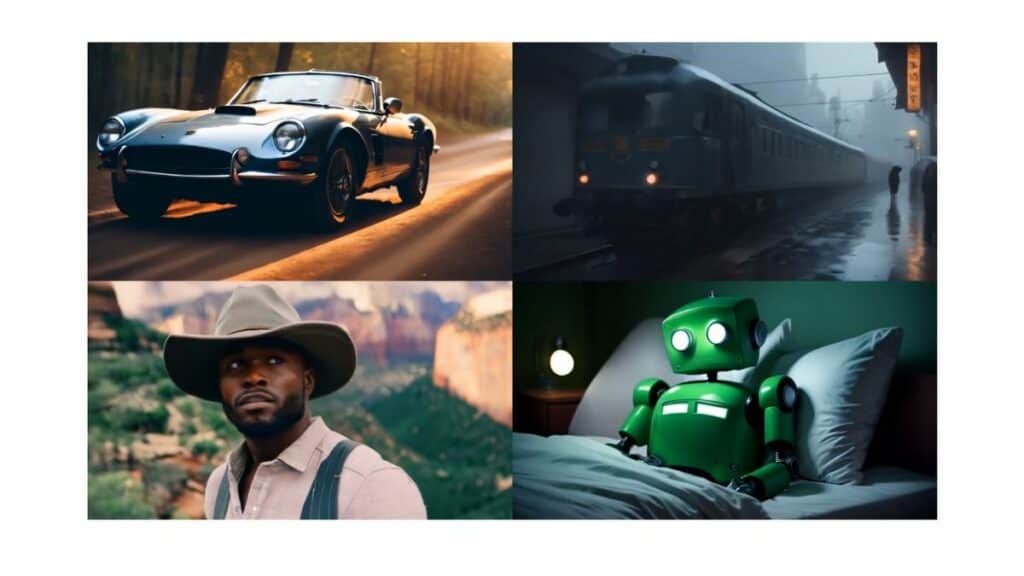
Demonstrating the quality of any generative AI model is a funny thing because (technical fidelity aside) the quality of the result is somewhat down to the artist. As a result, showing only results from within the walls of Runway AI Inc. could, in theory, be doing the model a disservice. With nothing but respect for the engineers behind it, scientists and creatives are often very different people. Of the collage shown below, the top left and top right are frames from a cinematic AI video tutorial by Curious Refuge. As a leading educator of the creative application of text-to-video AI models, this is what filmmakers and video editors can expect from the software.

Pictured above: Curious Refuge, via YouTube. Pictured below: Runway AI Inc.
By contrast, the bottom left and bottom right are frames generated by Runway AI Inc itself. Both are impressive demonstrations of this developing technology, but both are subject to the telltale artifacts – the smoothness, grainy texture, and warped inter-frame interpolation – of today’s models.
Below, we see this week’s brand new competitor, Stable Video DIffusion. All four of these frames were generated by Stability AI, using either SVD or SVD-XT. The aesthetic quality itself doesn’t appear to differ between the two AI models.

Essential AI Tools
Stable Video Diffusion VS Runway Gen-2 – Features compared
Runway Gen-2 is the more mature software, providing various AI Magic Tools to “ideate, generate and edit content like never before.”
Runway’s website includes various stylization tools, while Stable Diffusion‘s video generator is brand new and has none of the features listed below. We predict this to change fairly soon, though.
The complete list of AI models and AI Magic Tools available from Runway ML currently stands at:
- Gen-2: Text to Video: “Generate videos with text prompts.”
- Gen-1: Video to Video: “Change the style of a video with text or images.”
- AI Training: “Create custom portraits, animals, styles and more.”
- Text to Image: “Generate original images with nothing but words.”
- Image to Image: “Transform any image with a text prompt.”
- Expand Image: “Expand the edges of any image.”
- Frame Interpolation: “Turn a sequence of images into an animated video.”
- Erase and Replace: “Reimagine and remix any part of any image.”
- Infinite Image: “Expand an image by generating outside the original canvas.”
- Backdrop Remix: “Give any photo infinite backgrounds.”
- Image Variation: “Generate new variations of an image.”
- 3D Texture: “Generate 3D textures with text prompts.”
- Inpainting: “Remove people and things from videos.”
- Text to Color Grade (LUT): “Color grade videos with text prompts.”
- Super-Slow Motion: “Turn any video into smooth slow motion.”
- Blur Faces: “Automatically blur faces in videos”
- Depth of Field: “Adjust the depth of field of any video.”
- Scene Detection: “Automatically split your footage into clips.”
- Clean Audio: “Instantly remove unwanted background noise.”
- Remove Silence: “Cut silence from audio or video.”
- Transcript: “Transcribe any video to text.”
- Subtitles: “Generate subtitles for any video.”
- Add Color: “Colorize black and white images.”
- Upscale Image: “Increase the resolution of an image.”
- Motion Tracking: “Automatically track the movement of any object.”
- Green Screen: “Remove or replace video background.”
Runway Gen-2 motion brush
Motion brush works with image prompts. This means you’ll need to start with an image, as opposed to a text prompt, when using the motion brush tool. It’s easy to do, and only involves one more step than starting with a text prompt, and we can guide you through it now.
Step
Open Runway
Open Runway Gen-2. You can test this tutorial using the free trial or Basic Plan. Both are free ways to gain limited access to Gen-2.
If you plan on using the footage, you’ll want to upgrade to (at least) the $12/month Standard Plan.
Step
Prompt Gen-2 with an image
Provide Runway Gen-2 with an image prompt, using any of the following three input methods:
-
- Upload an image from your computer. Simply drag and drop an image file into the Gen-2 UI.
-
- Use the text-to-video panel (within Gen-2) to generate a new image from a text prompt.
-
- Head to the standalone text-to-image tool in Runway, then drag and drop your generated image into Gen-2.
Step
Open Motion Brush
Select “Motion Brush (BETA)” to start. You’ll find this button at the bottom of the prompt panel, underneath the “Text”, “Image”, and “Image + Description” buttons.
Step
Create your selection area (mask)
Brush over the area you want to control. With the selection brush, you’re selecting which parts of the image will be animated. Anything not brushed over (also known as “masked”) will remain static, like the input image.
You’ll find a slider near the top of the interface to change how thick your selection brush is. You’ll also find an eraser button, allowing you to brush with the negative effect, removing your selection (this does not erase the image itself).
This is an existing concept in both video editing and image editing called masking. If you’ve ever heard someone refer to a layer mask in Photoshop, it’s the same process. In Adobe software, this selection brush is called the masking tool.
Step
Customize your motion controls
Now you can customize the motion controls along the bottom of the user interface. You’ll see three options:
- Horizontal (X-Axis)
- Vertical (Y-Axis)
- Proximity (Z-Axis)
Tweak these until you’re happy wit the directionality of your animation. If you make a mistake that the eraser tool wont fix, simply click “Clear” near the bottom right. This will reset all settings, and remove any mask (selection area) from your image.
Step
Generate your video
When you’re happy with your settings, hit “Save”.
This will return you to the Gen-2 UI, where you can hit “Generate”, to watch your image transform into an animated video based on your settings!
Final thoughts
In summary, these text-to-video models are similarly capable tools.
However, Stable VIdeo Diffusion is based on the popular Stable Diffusion AI image generator. Not only does this give Stability AI a foothold in a whole different modality, but it’s also the world’s best open-source option in that vertical. Text-to-image AIs and image-to-video models are all making similar progress to these exemplary text-to-video rivals. While photorealism is yet to be achieved with AI-generated video models, 2024 could be the year that real and fake become indistinguishable.
