How to make a Discord channel read only on desktop and mobile

Table of Contents
If you are figuring out how to make a Discord channel ‘read-only,' then we have you covered right here.
Now, when you make a new server, you add some necessary channels like the welcome channel, general channel, and a few more. If you have a lot of server rules and you keep adding to those, then it makes sense to have a ‘read only' channel where the instructions are logged and visible to everyone.
Much like the term suggests, it is a ‘read only' channel where the members with permissions (usually only the admin) can post. Other members cannot send texts into the channel.
That being said, it is quite easy to make a read-only channel on Discord. All you have to do is create a new channel and adjust the permissions.
Quick Answer
To create a read only channel: Go to the Server > Create new ‘Text’ channel > Set up the channel > Edit channel settings > Permissions > Advanced Permissions > Disable permissions (except message history and ‘view channel’) >Save the settings
How to make a Discord channel read only on PC
If you already have a channel and you want to make it a read-only channel, then you can follow the steps from step 4.
Step
Go to your server
Open Discord and head over to the server that you want to create a read only channel in. If you haven’t created your server yet, then check out our guide on how to make a Discord server.
Step
Create a new channel
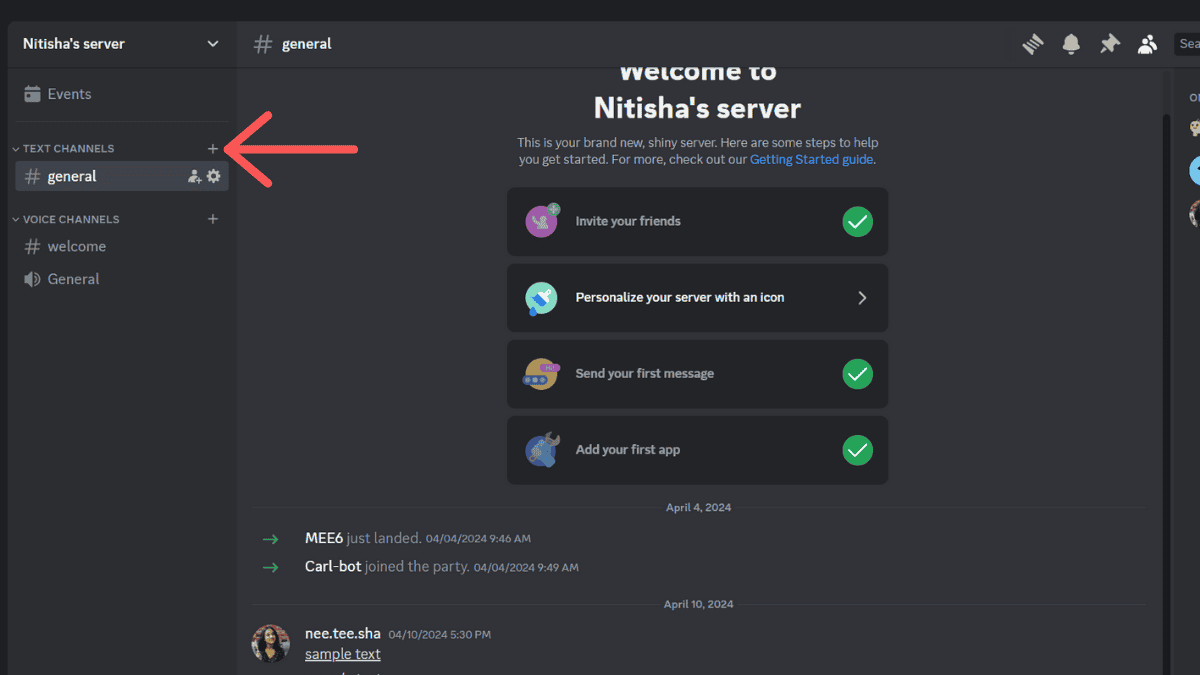
Next, click on the ‘+' sign next to ‘text channels' to create a new channel.
Step
Set up the channel
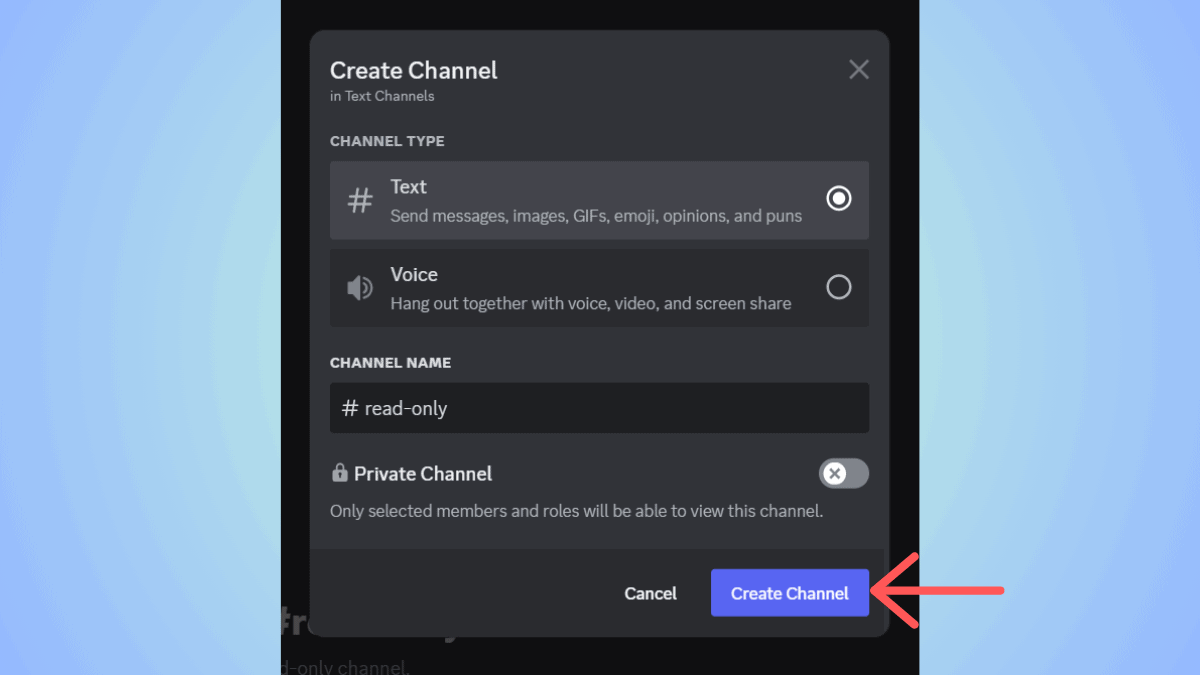
Then, you will be asked to name the channel. And for channel type, select ‘text.'
Step
Edit channel settings
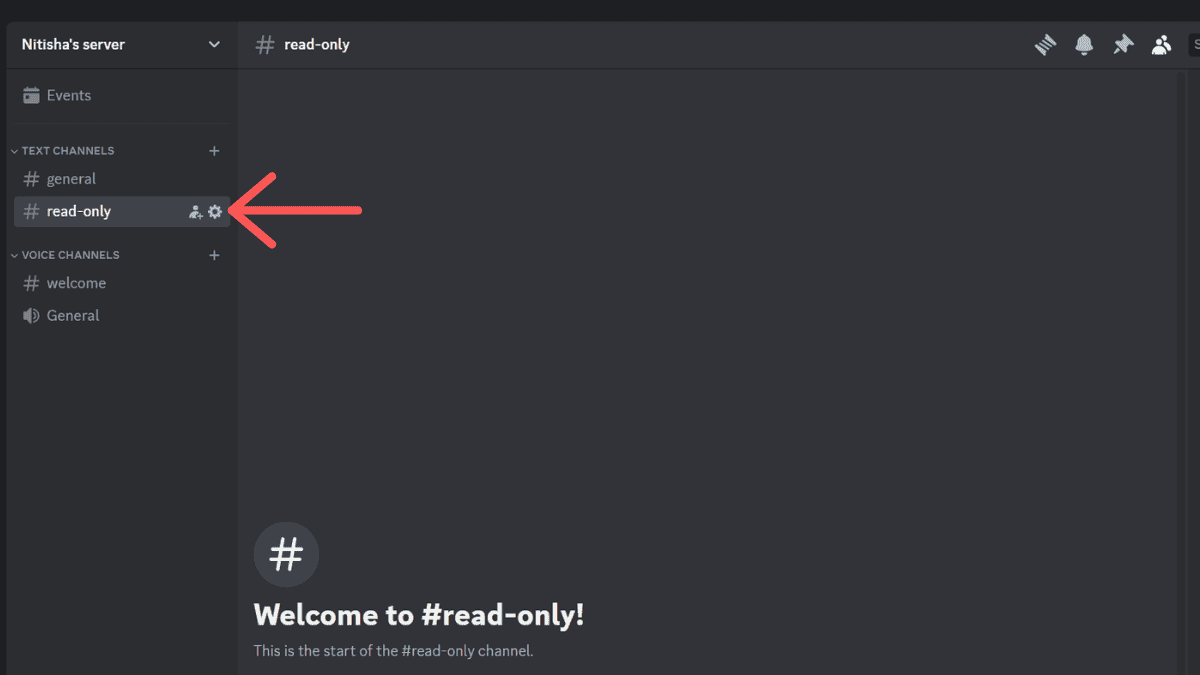
Click on the cogwheel next to the channel name to open the channel settings.
Step
Go to advanced permissions
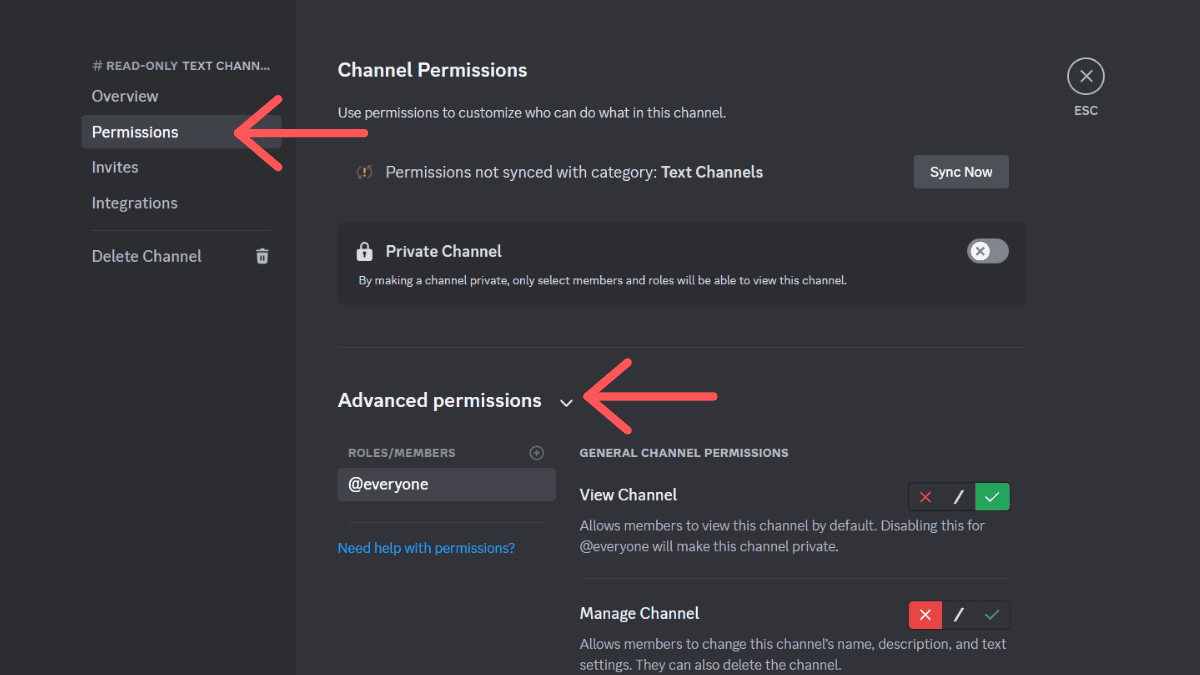
Next, click on the ‘Permissions' tab and then click on ‘Advanced Permissions' to expand the menu.
Step
Disable permissions
Now, to make this a read only channel where you (admin) or members with certain roles only can post, you will have to disable permissions.
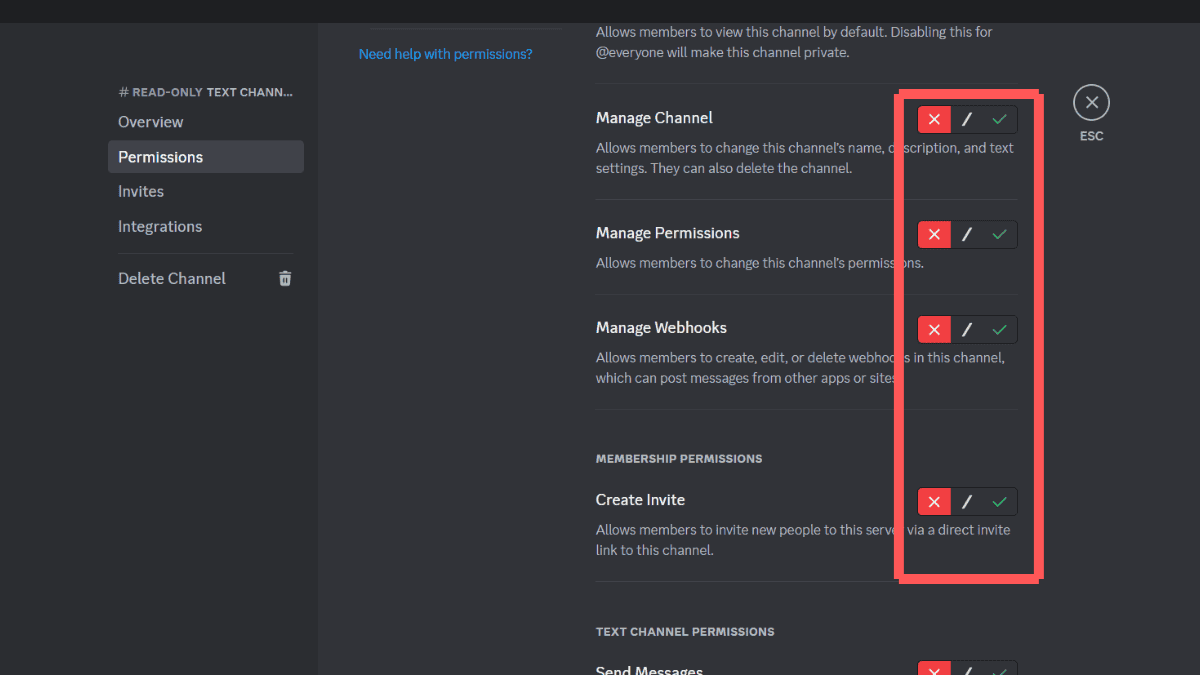
Under Advanced Permissions, disable every option except ‘View Channel' and ‘Read Message History.' Of course, if you want to make it a private channel, you can enable the ‘View Channel' option.
Step
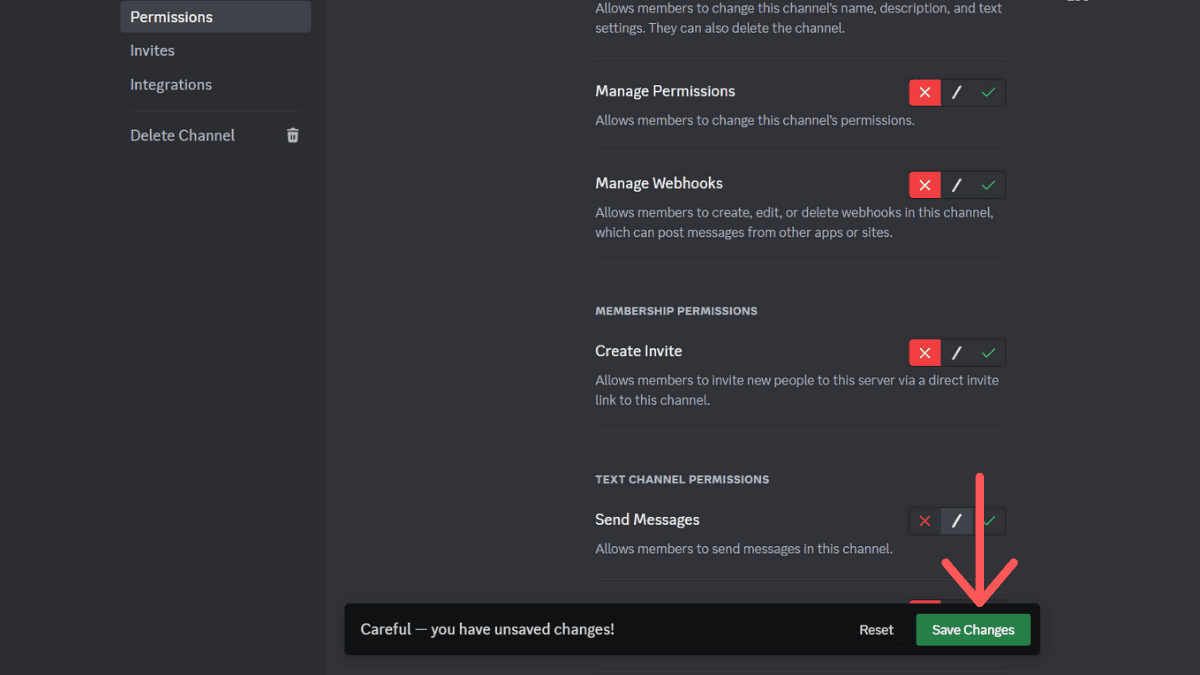
Save the settings
Once you're done setting permissions, click on ‘Save Changes' to save the settings.
How to make a Discord channel read only on mobile
You can create new channels for your server using the Discord mobile app. Again, if you already have a channel and want to make it a read only channel, you can follow the instructions from step 4.
Step
Head over to the server
Launch the Discord app and go to the server that you want to add or alter the read only channel.
Step
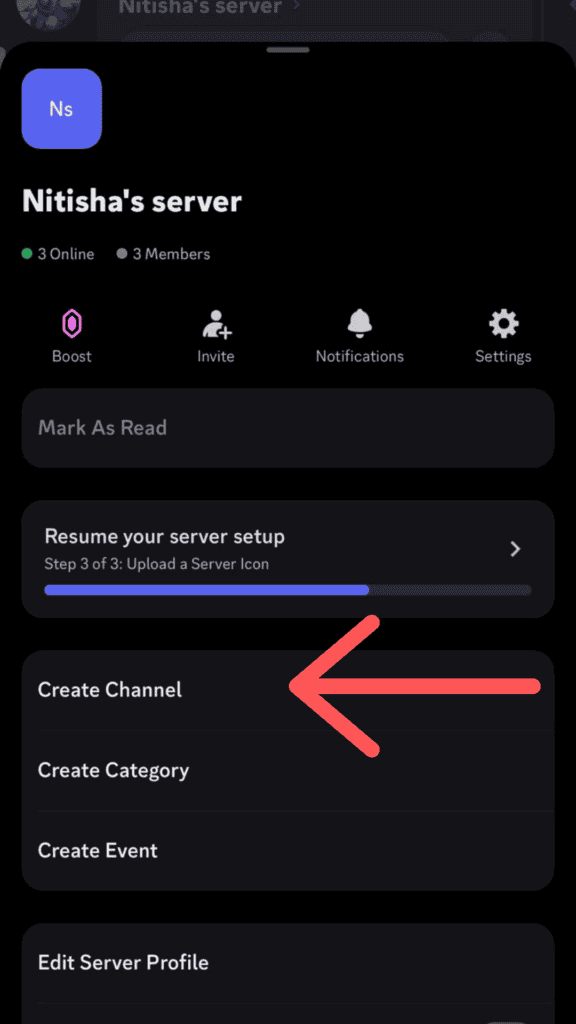
Open the server profile
Tap on the server name to view the server. There, you will see a ‘Create Channel' option – click on it.
Step
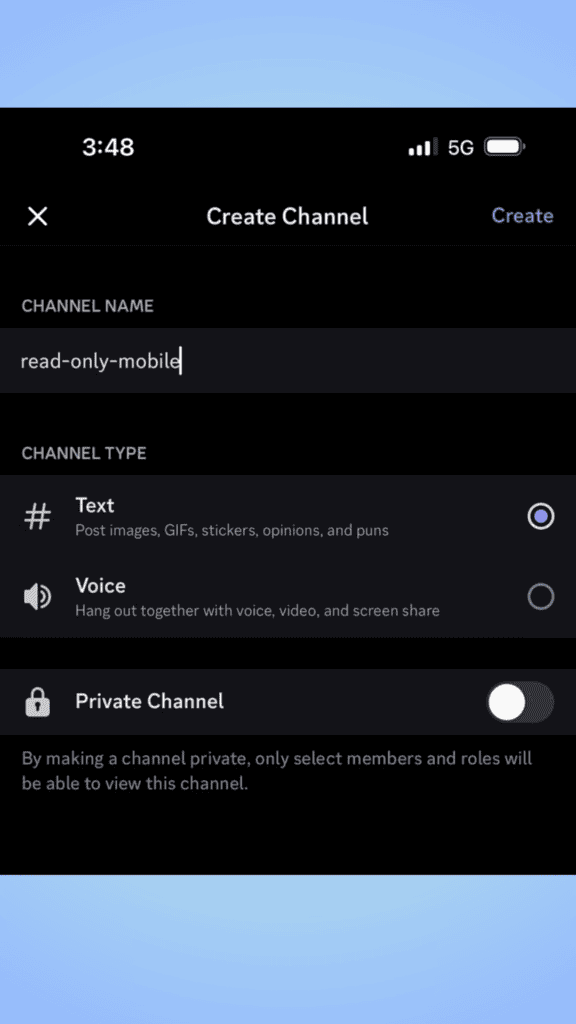
Set up the channel
Next, you will prompted to select a channel type – check the ‘text' option. Name the channel and toggle the ‘Private Channel' option on if you want it to be a private channel. When you're done, click on ‘Create' at the top-right corner.
Step
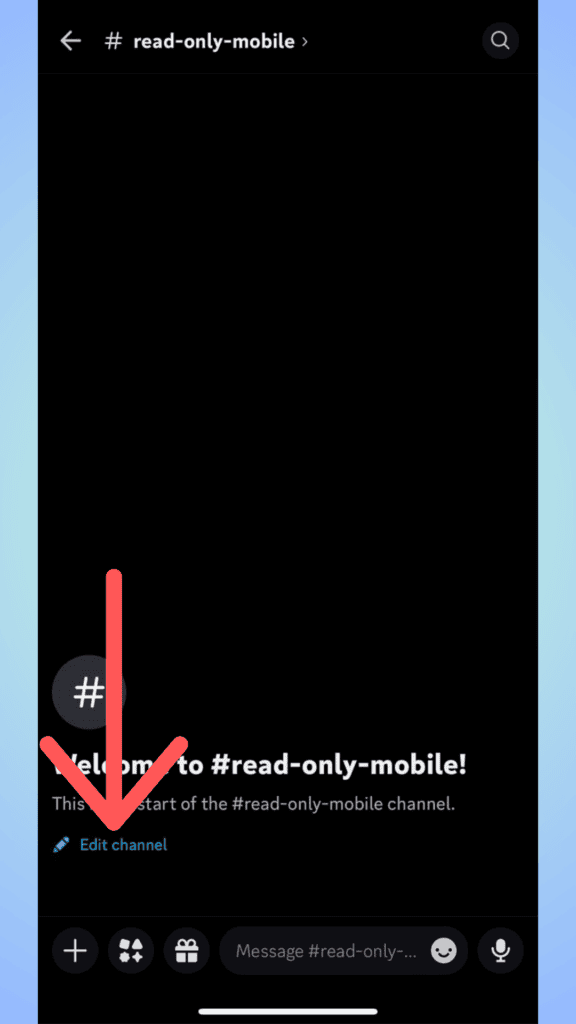
Go to channel settings
Once the channel is created, go to the channel and click on ‘Edit channel' to open Channel Settings.
Step
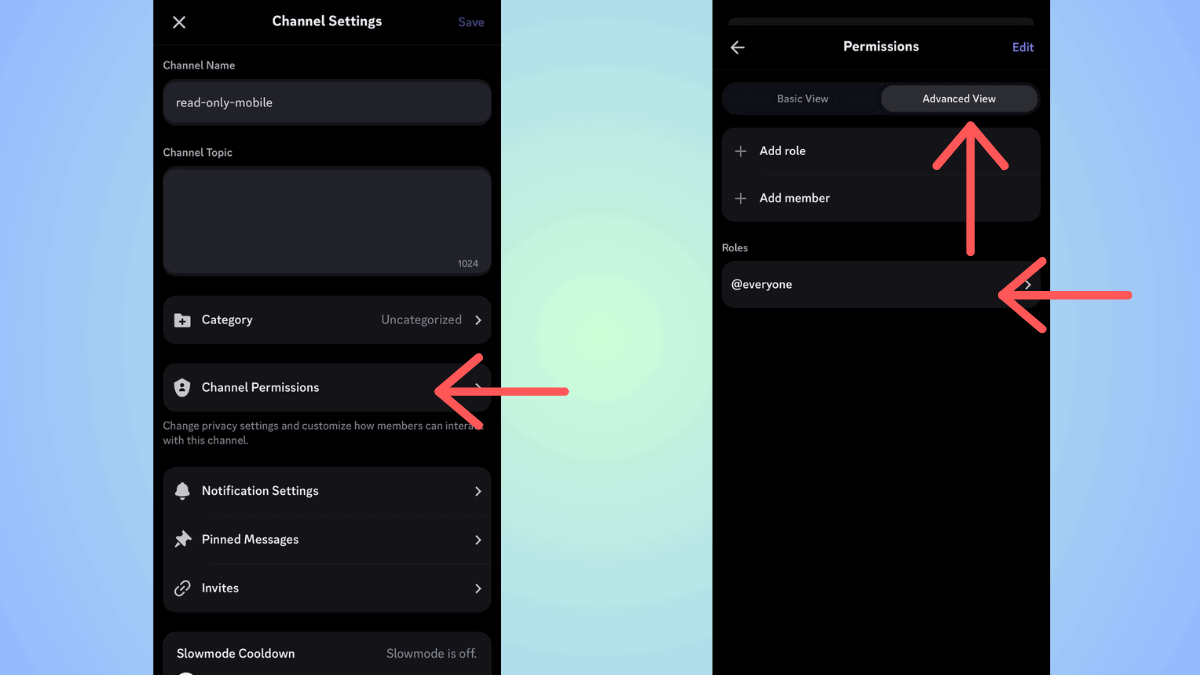
Go to Advanced View
In Channel Settings, go to Channel Permissions, and then switch to the Advanced View.
Step
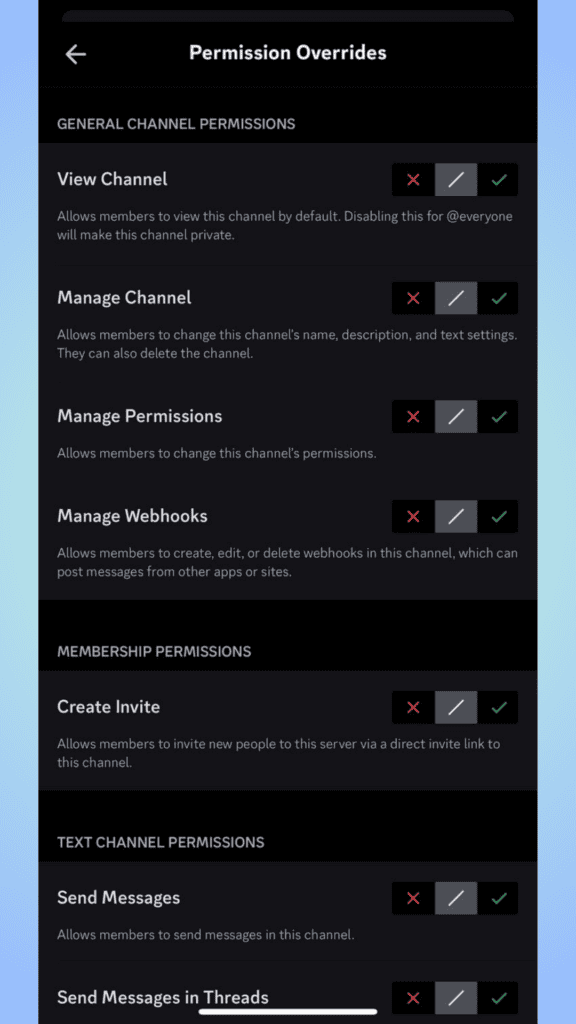
Set permissions
In Advanced View, click on roles, and you will be led to the channel permissions. Here, you have to disable all permissions except ‘Read Message History', as this will allow new users to read the previous messages.
Conclusion
To sum up, to create a read-only channel (if you don’t have one), you will have to create a new text channel and set the right channel permissions. If you already have a text channel, then you can refer to the above guide to adjust your settings to make it a read only channel. You can do this on your PC (website or desktop app) or you can also use your mobile.
About the Author