How to autofill dates in Excel – 2 quick methods

Reviewed By: Kevin Pocock

Table of Contents
Are you wondering how to autofill dates in Excel? We’ve got you covered.
Manually filling dates in an Excel spreadsheet is not only tedious but also increases the possibility of errors. Using an autofill setting saves time and reduces the chance that a minor typing mistake leads to a massive problem. Therefore, learning how to autofill dates in Excel can make your life easier.
In this guide, we'll cover how to autofill sequential and non-sequential dates in Excel.
How to autofill sequential dates in Excel
First, we will discuss how to autofill sequential dates in an Excel spreadsheet. These are dates that follow after each other.
Step
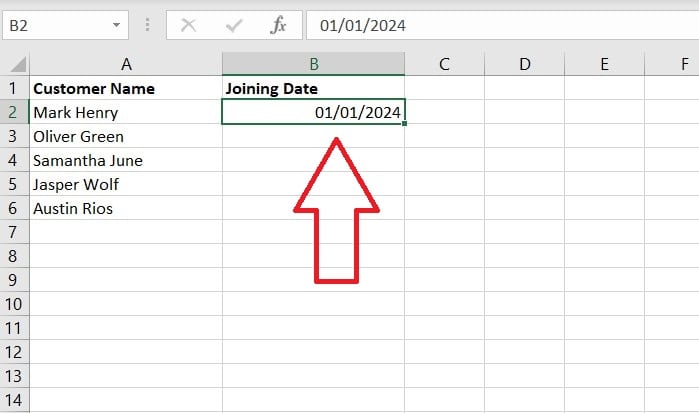
Type the date in a cell
Select the first cell that you want the dates to appear in and type in the first date of the sequence.
Step
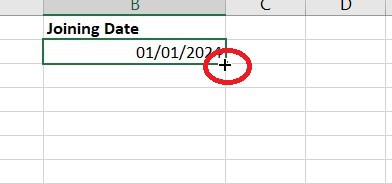
Select the Fill Handle
Select the Fill Handle (+ sign) that appears in the lower-right corner of your chosen cell, using the left mouse button.
Step
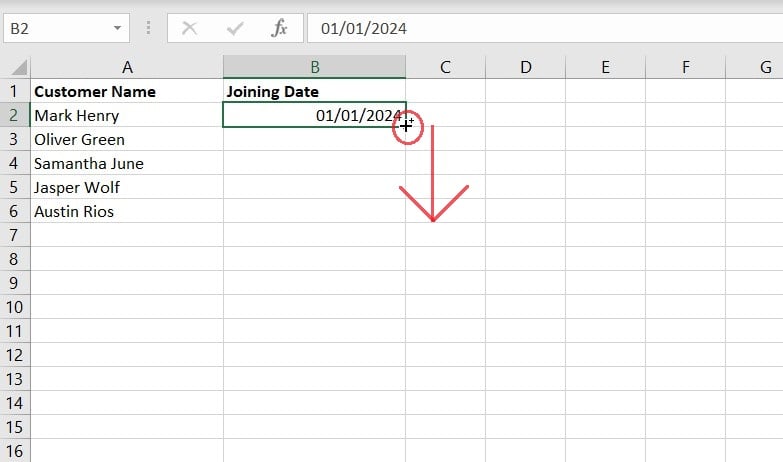
Drag it down
Keeping your finger on the left mouse button, drag the Fill Handle across the spreadsheet in your chosen direction. The Fill Handle can move up, down, and across.
Step
Release the button
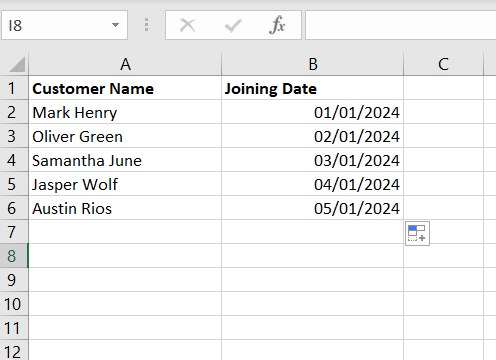
When all the cells you require to be filled are filled, release the button. However, keep in mind that this method allows you to fill sequential days only.
Step
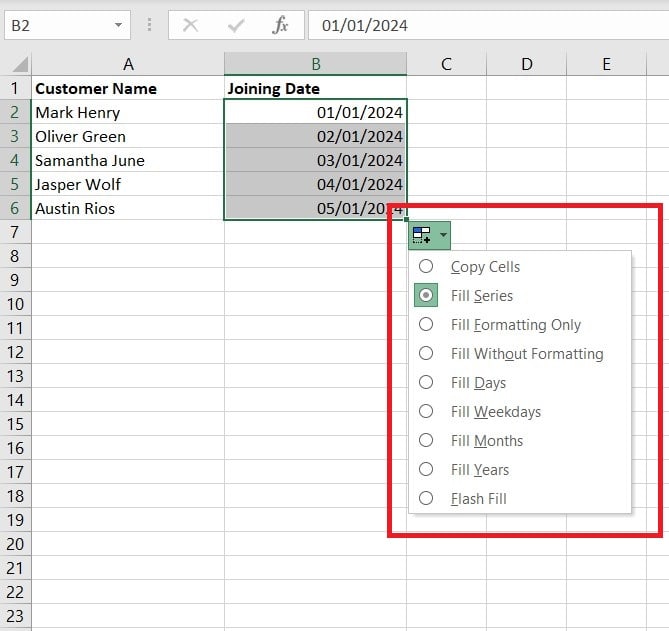
Choose from the options
For other options, when you have selected the full range of cells, click the Autofill icon in the lower-right corner. A pop-up menu will appear, with options for sequential dates including Fill Weekdays, Fill Months, and Fill Years.
How to autofill non-sequential dates in Excel
Now, let’s discuss how to autofill non-sequential dates. With this, you can put in the same date in every cell.
Step
Select the cell
Select the cell in which you typed the date.
Step
Fill the cells
Use the Fill Handle to fill the cells with the dates.
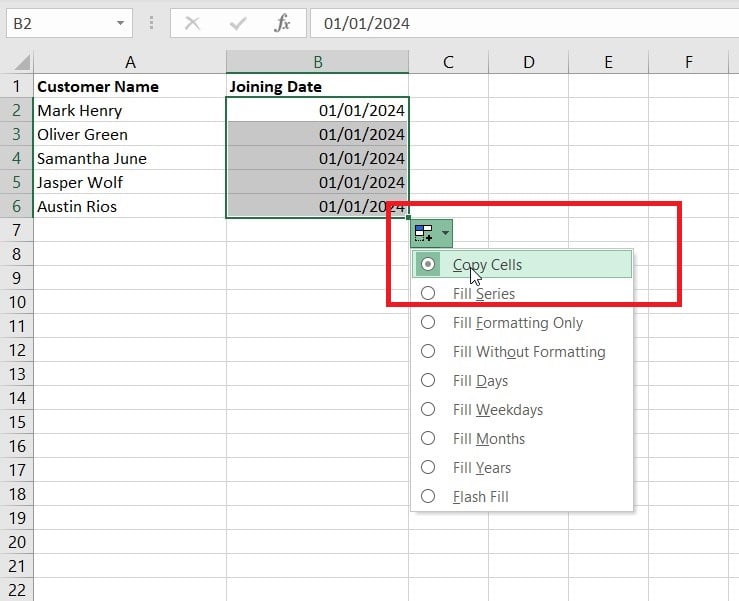
Step
Select Copy Cells
After the dates are filled, click on the Autofill icon, and select copy cells. This will copy paste the same date in every cell.
Conclusion
This was everything you needed to know about how to autofill dates in Excel. In this guide, we have discussed methods for both sequential and non-sequential dates so you can organize your sheets however you like. Also, remember that you can double-click on the Fill Handle as well to fill in the dates, but this only works if there is corresponding data in the column on the left side of the date.
To learn more about Excel, follow these in-depth guides:
- How to use VLOOKUP if cell contains a word within text in Excel
- How to add a number in front of a number in Excel
- Excel status bar not showing sum
About the Author