

Last Updated on
Spreadsheets make life so much easier for both businesses and members of the public. From managing inventory to keeping track of a monthly budget, Microsoft Excel really does, well, excel!
Excel can be quite daunting for new users, however. Many will want to just start typing out information like in Microsoft Word and other Office 365 apps, but it’s not that simple. Like anything else, it’s easy once you know how, and we’re here to make sure you know how to use technology. More to the point, we want to show you how to add columns in Excel.
How to add columns in Excel

It sounds silly when working with a massive spreadsheet, but everyone using Excel will, at some point, need to make a new column in the middle of existing ones. Sometimes things change, and Excel is adaptable. One thing to remember is that new columns always appear to the left of the selected column, this will save some headaches in the long run.
There’s a couple of different methods when learning how to add columns in Excel, so let’s get straight into it. First, we’ll learn how to insert a single column and go from there.
Highlight and right-click
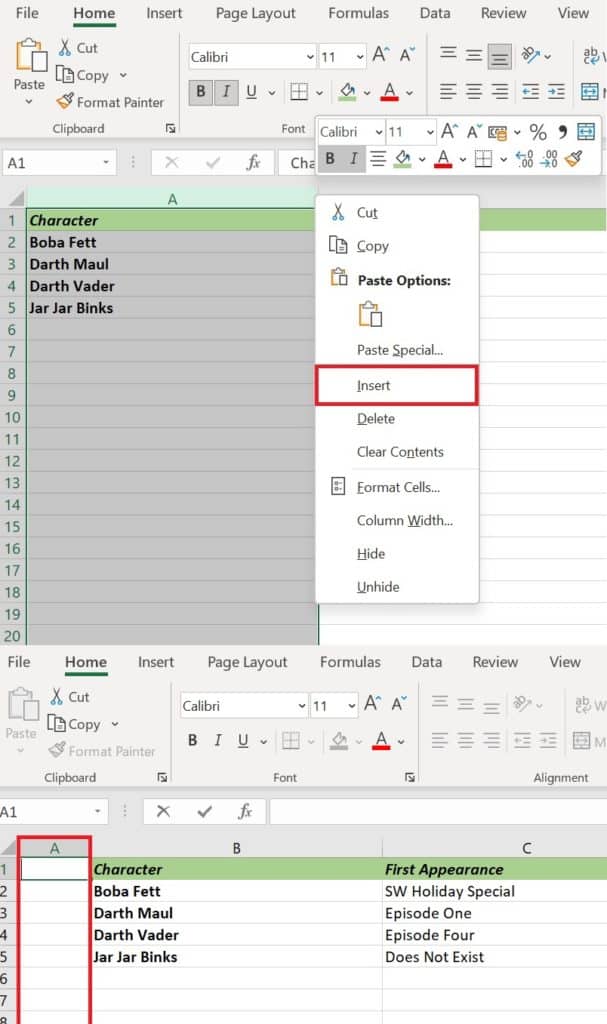
This will need to be to the right-hand side of where you’d like the new column to go. Click on the top of the column, in our example where the ‘A’ character is. Then, right-click and select insert, which will then produce a brand new column.
Use the ‘Insert Cells’ button
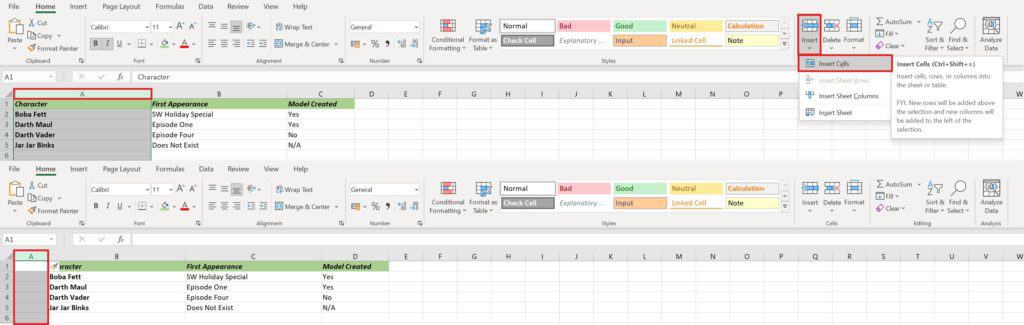
Alternatively, you can highlight the right-hand column and click ‘Insert Cells’ under the ‘Home’ tab on the top banner of Excel to produce the same result.
How to add multiple columns in Excel
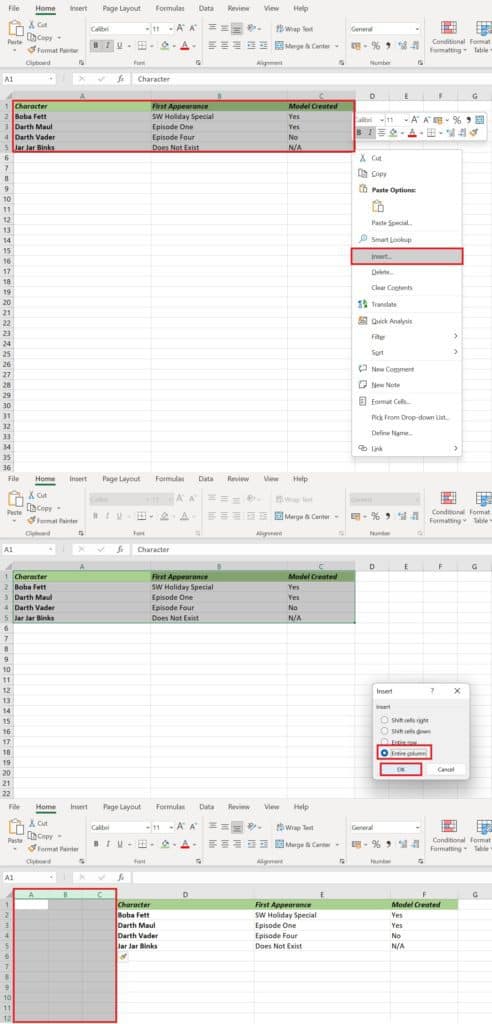
Simply left-click and drag to highlight the number of columns needed, then use one of the preferred methods above to duplicate. Users can also hold down CTRL and select columns instead of using the drag and highlight method.
Thanks for choosing PC Guide for learning how to add columns in Excel. For more help with Excel, Microsoft Office, and even Windows, visit and bookmark our Windows 10,11, and Office hubs.
