
Last Updated on
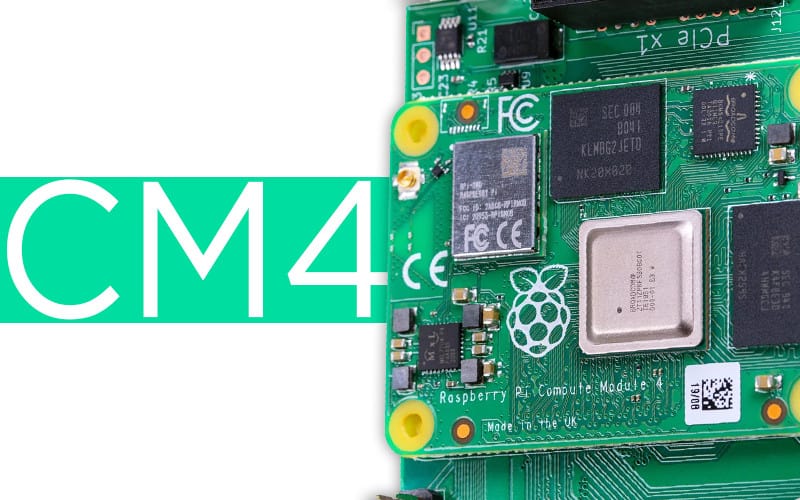
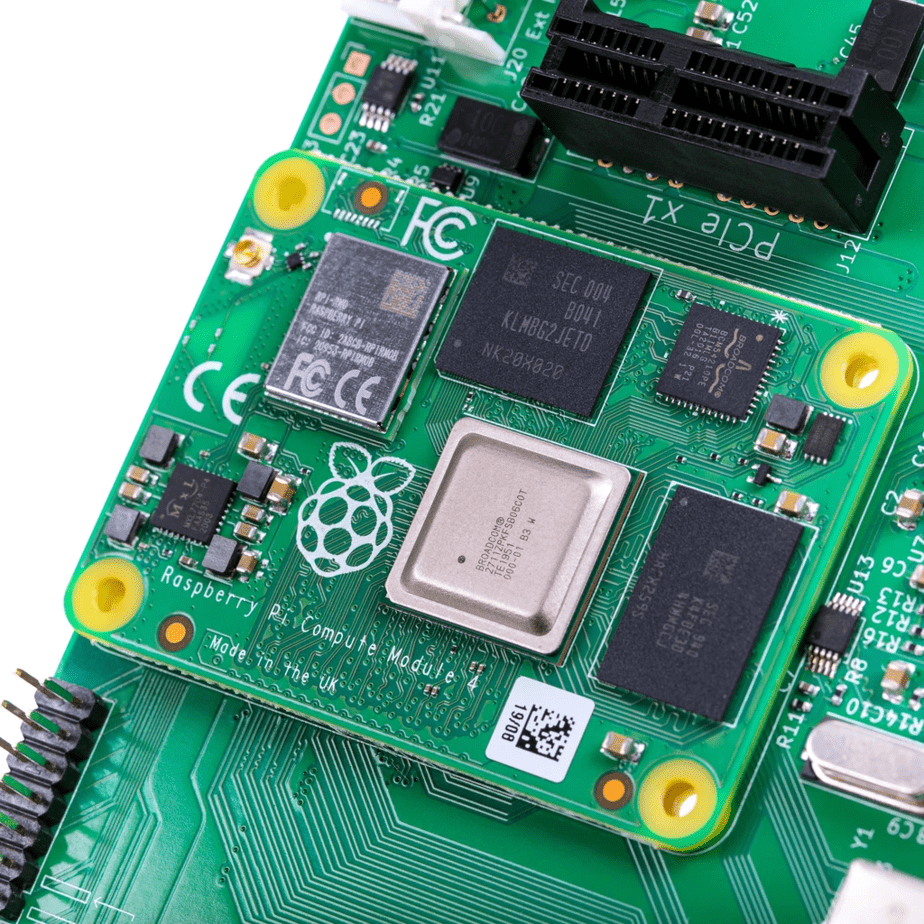
The Raspberry Pi Compute Module line is not really intended to be used by the average consumer, lacking any real day-to-day use unless you have a plan for an embedded system at the end of everything. This didn’t stop me from buying one back in August and only just manage to get hold of one. Pandemics, turns out they’re bad for production.
The super tiny form factor of the device means that it does require a bit more of an investment, but to not be burdened by an SD card or dedicated form factor is more than enough to convince me. I could pop this in a makeshift games console or use the unique feature on the I/O board – sold separately – to start adding extra cameras, displays and use the PCIe slot included (a whole 1x PCIe 2.0!). It also has full-fat HDMI ports on it, making it super easy to take around if I happen to forget a micro HDMI cable.
You’ll need an I/O board, as otherwise there’s absolutely no way to use the CM4. There’s nothing on it but the optional storage and wireless connectivity. Mine came with no Wi-Fi or Bluetooth (not something I need right now and easily rectified) but has 8GB of onboard storage – more than enough before I expand it with the PCIe slot with an M.2 drive.
![]()
The CM4 is an exceptional piece of kit and you can absolutely expect more projects from us to begin using it. The low profile options for different carrier boards, combined with the lessons we can learn together (like designing our own PCB!) is more than enough for me to recommend one of these. If you want an easy life, of the Pi400 or Pi4B would always be my first recommendation, but if you want to get weird and a little strange, you might want to consider the CM4…
When it comes back in stock.
So who is this guide for? Well, if you’re someone who is vaguely interested in another fork in the journey of Raspberry Pi projects, the CM4 is certainly the right step. Just having hold of the brain at all times is more than enough to kickstart many projects. Get your own PCBs made and you can start to condense down the form factor on the device to something much slimmer for say, fitting behind a TV without the bulk of multiple USB ports and such interfering with the low profile.
What will you need before you start?
- A Raspberry Pi CM4 (heavily, heavily out of stock)
- A Raspberry Pi CM4 Carrier Board (recommending the official I/O board to start)
- An HDMI cable
- A Micro USB Cable
- An SD Card (for those without eMMC memory)
- Ethernet
- A USB Mouse or Keyboard
- A 12V DC plug
- Jumper cables or jumper connector
The Micro USB Cable is only for data transfer and will not power your device. It’s useless after the fact unless you need to flash the CM4 itself. So make sure the brief time we’ll have with it isn’t wasted, that it’s rated for data transfer.
Connect your CM4 to the Board
Attach the CM4 to the board by simply aligning it with the two connectors on the IO board, then give it a good squeeze. It’ll crunch into place and you should be set.
Make sure the Raspberry on the Pi is pointing towards the GPIO pins (leaves away from it) and you should be good to go!
Connect the jumper and micro USB
I’m using one of those weird little nubbins from my Bitcoin Tracker project that let the connector to the LCD actually work. If you have a PIR sensor, there’s one on there too. If not, you can always just place two breadboard jumper cables on the ends. This will stop the eMMC from trying to boot and place it into a loading state, ready for us to install the operating system onto it. Plug it into your power.
If you’re on Windows, head to Github and download the entire ZIP folder. In it, you’ll find Win32, a folder containing a setup wizard for RPIBoot, the program to kickstart the CM4 into life and open its doors for you to install Raspberry Pi OS. Once it gets going, don’t close it until it is absolutely done. It’s going to install a specific driver and then also install the program needed. Now plug in the Micro USB to your PC.
Your Windows PC should immediately recognize it with the regular jingle, but you won’t be able to access it. If it comes up and asks you to format it, ignore it or hit cancel. This is Windows trying to get to the Linux part of the device and you really don’t need it breaking.
RPIBoot
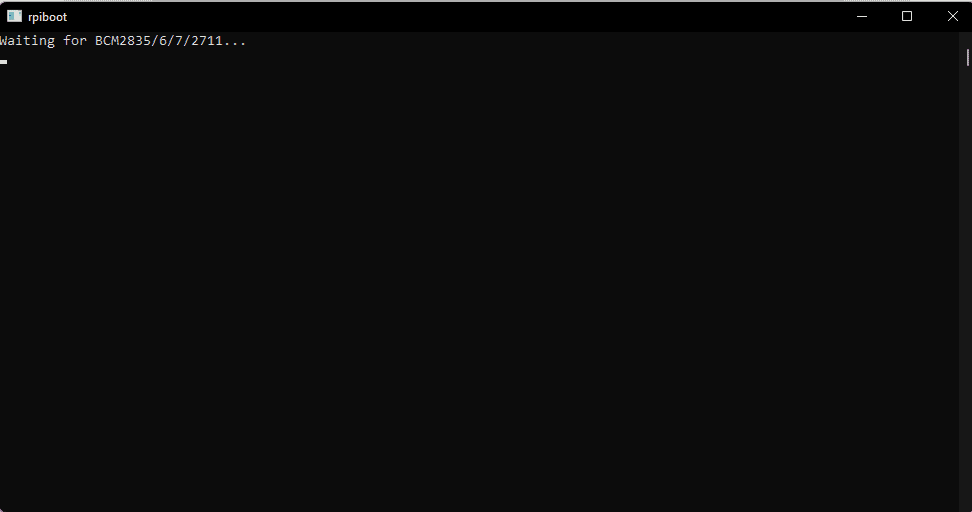
RPIBoot is a bit of software that allows you to flash the eMMC of the CM4 so that you can do away with the SD cards of the regular Pi 4 and cut about without one.
Obviously, this doesn’t apply to those without eMMC, you will want to install Raspberry Pi OS to the SD card as usual.
This will run through a sequence and activate the bootloader onboard the CM4, which you’ll then need to download Raspberry Pi Imager, which is a program that downloads, writes, and finishes up the complex task of creating a bootable drive on the CM4’s eMMC.
If RPIBoot doesn’t work or seems stuck in a loop, don’t fret, this happened to me too. I closed the installation and driver install too soon. Just unplug and restart the process from the previous couple of steps.
Raspberry Pi Imager
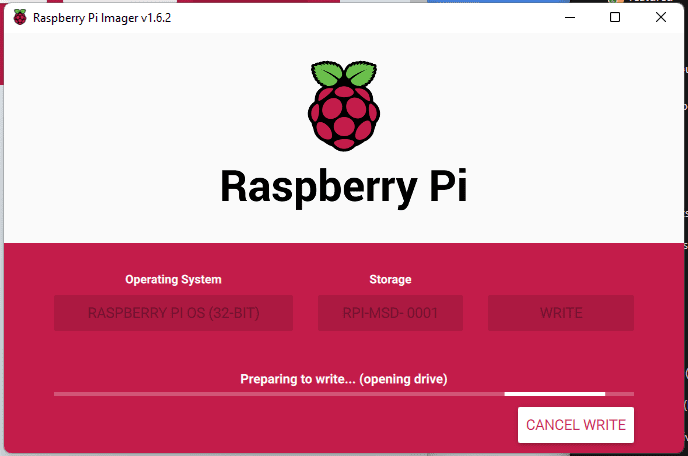
The imaging software will handle downloads and writing to the eMMC for you, but if you’re new to this and want to know which version you should download, just go with the one that is the official Raspberry Pi OS image.
There’s also now an official version of Pop! OS from System76 and other versions of Linux or RetroPie is available within the imaging app.
Edit the Config File
Before we unplug, now that your CM4 is fully flashed and ready to go, you’ll be surprised to learn that the USB Ports are disabled by default. Yes, really. Remember, this is a board designed to be embedded elsewhere and not for consumer-level off-the-shelf use.
In the “boot” folder, find the config.txt and add the following:
dtoverlay=dwc2,dr_mode=host
This will turn on the USB ports when you boot up, but if you accidentally keep the micro USB in, you will run into issues. Before you begin your first boot, make sure everything is unplugged. Boot and then plug in your mouse or keyboard.
If you’re like me and couldn’t get a wi-fi version, this is where you’ll plug in your dongle or ethernet cable.
Boot up and enjoy!
You’re done! Let Raspberry Pi OS set up, follow any instructions needed and if you want to SSH or VNC in, be sure to head into the configuration menu in the “start menu”. This will let you also turn on I2C and other options for using the GPIO pins for various projects.
