
Last Updated on
Following on from my fight against Jeff, with a Ring Clone and building the basics of a camera with buttons, I decided the only way up was to bash my head against the wall until I made two screens work on a Raspberry Pi without any real hassle.
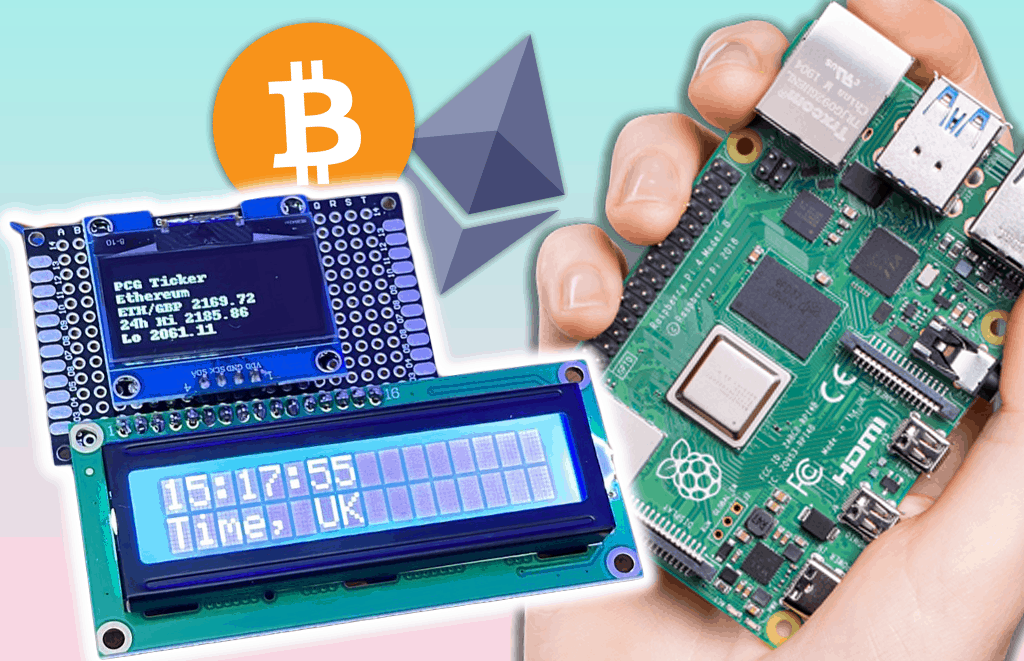
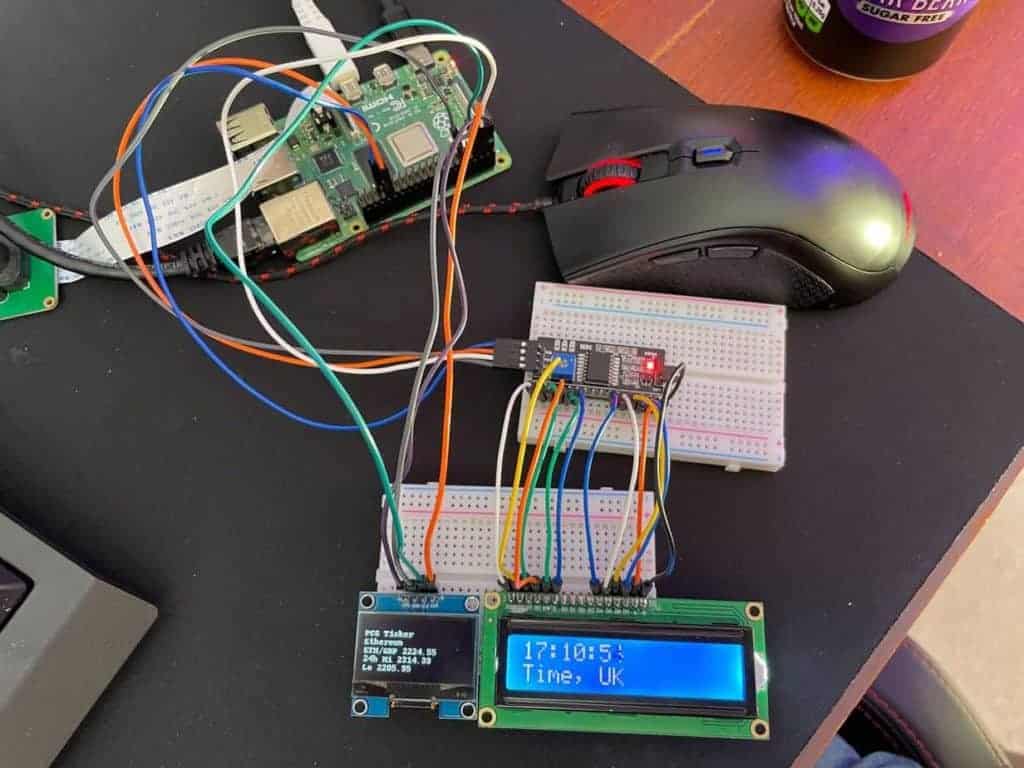
This was a task and a half. Screens wouldn’t work together, learning the very, very basics of I2C and how to coerce it to do what I want, along with a couple of almost-fires, but the “finished” product has a face only a father/mother could love. The string of wires and two screens that sort of just hinge on a breadboard, it’s been a fascinating experiment and I’m going to take you through the excursion, with the hopes you make your own!
At some point, we will begin placing these in custom cases and enclosures, but for now, just appreciate the mess.
Making some changes to the Pi
Install the Python Libraries
We’re going to be using the Luma OLED library for this project, which you can get by the Terminal:
sudo -H pip3 install –upgrade luma.oled
Be sure to install Pip and Pip3 if you haven’t yet!: sudo apt-get install python3-pip
We’ll also need to install the RPI_LCD library via:
sudo pip3 install rpi_lcd
And Requests, to handle getting things from the internet for us:
sudo -H pip3 install requests
Everything else we’ll be using comes installed already with Python 3. I’m using Python 3.7.
Import Python Libraries #1
Now we’re getting into it. Load up Thonny (or your chosen IDE) and import the following libraries (it’s a lot, but trust me):
from signal import pause
from time import sleep
from threading import Thread
import sys
import time
from time import strftime
Your standard libraries for things when dealing with timings. Threading is something we’ll get into later, but it’s the method of getting Python to do two things at once for us.
from rpi_lcd import LCD
This is the library to use the LCD.
from luma.oled.device import ssd1306, ssd1309, ssd1325, ssd1331, sh1106, ws0010
from luma.core.interface.serial import i2c
from luma.core.render import canvas
Now this is overkill for what we’re doing, but it does cover all bases depending on what OLED you happened to buy. If you wanted to simplify it down you could easily just remove the devices you won’t be using. Leave the other two, as we need this to tell Luma how to draw on the screen and where the I2C is.
Define Each Screen
Now type in:
lcd = LCD()
serial = i2c(port=1, address=0x3c)
device = sh1106(serial, rotate=0)
This is simply naming the components we’re using, as well as dictating to Python where things are on the I2C bus.
For instance, if we went into the LCD init file, which contains the instructions for the LCD screen and changed the Bus to 5, it’d look for the I2C connections on the Raspberry Pi 4 and 400 on the alternate I2C pins and bus.
Get the Crypto Prices
So this script I’m using is adapted from the Luma.OLED library, which comes with a few examples – including a Bitcoin Ticker. However, I found the code messy and decided to do my best to clean it up. I’m by no means any good at coding, I just know how to make things legible – I hope.
Here, we’re going to be importing the requests library, but also using the Luma script’s method of immediately killing the script if it can’t find the library – in the event we move the script to another Pi or do a fresh install.
try:
import requests
except ImportError:
print(“The requests library was not found. Run ‘sudo -H pip3 install requests’ to install it.”)
sys.exit
Now we have the method of grabbing data from the web, we’re going to actually grab the ticker and tell Python what we want to display it as, while also giving us an error if (and probably when) Bitstamp goes down:
def fetch_price(crypto_currency, fiat_currency):
bitstamp_api = “https://www.bitstamp.net/api/v2/ticker/” + crypto_currency.lower() + fiat_currency.lower()
try:
r = requests.get(bitstamp_api)
return r.json()
except:
print(“error fetching from Bitstamp API”)
Now let’s fetch the prices:
def price_text(crypto_currency, fiat_currency):
data = fetch_price(crypto_currency, fiat_currency)
return [
‘{}/{} {}’.format(crypto_currency, fiat_currency, data[‘last’]),
’24h Hi {}’.format(data[‘high’]),
‘Lo {}’.format(data[‘low’])
]
Here, we’re not only fetching the currency, but we’re also slotting it into three rows, with a 24 hour high, lowest and at the top, its current value.
Push data to the OLED
Now we’re actually going to code the OLED to take the data and present it on screen. We do that by treating it as a ‘canvas’ and we’re going to ‘draw’ on it, while also putting it into the right places on the screen.
We’ll start with Bitcoin:
def btc(device):
with canvas(device) as draw:
rows = price_text(“BTC”, “GBP”)
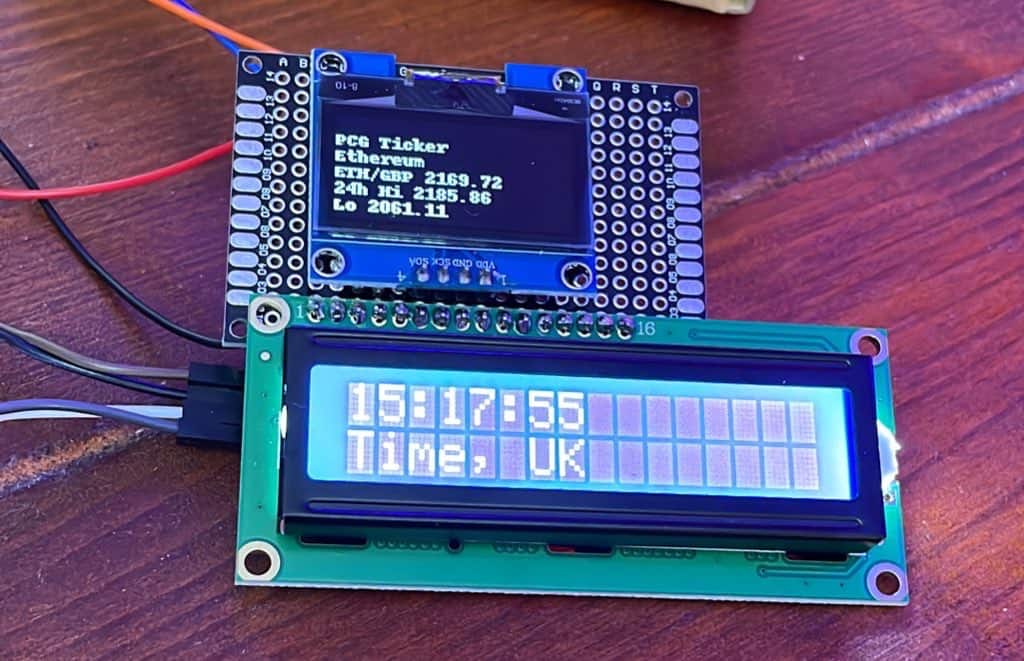
draw.text((0, 10), “PCG Ticker”, fill=”white”)
draw.text((0, 20), “Bitcoin”, fill=”white”)
draw.text((0, 30), rows[0], fill=”white”)
draw.text((0, 40), rows[1], fill=”white”)
draw.text((0, 50), rows[2], fill=”white”)
As the screen is only five rows tall, we’re going to fill it up with information and leave the top blank. But if you change the ((0,10)) or any of the numbers, you can move it up and down the screen as you see fit.
To center it, just take five from each of the designated numbers.
Now this line of code is actually integrated with the fetching loop above, so we can simply just change the definition name to what we want and the chosen cryptocurrency.
So you’d want to change the following:
def btc to def eth or def ltc to tell Python it’s a different definition and loop. You can name these whatever you like, but the rest of my code relies on these names so be sure to change things below if you’re deciding to rename the definitions.
Then in the canvas, you’re going to want to change the BTC to ETH or LTC (or whatever else is available on Bitstamp) and also the indicated name on the third row.
fill=”white” is simply to tell the OLED that the screen needs to make the font white, or it’ll come out the default on a black background.
If you want your currency, change GBP to USD or other currency, but check what Bitstamp calls it before doing so or the script won’t recognise it.
Also be sure to keep the (device), as this tells Python which screen to send the information to.
Write to the LCD 1602
We haven’t forgotten about the LCD! Don’t fret! Here’s how to get it running:
def lcd_time():
while True:
lcd.text(strftime(“%H:%M:%S”),1)
lcd.text(“Time, UK”,2)
time.sleep(.01)
I’m using it as a clock face, saving room on the OLED – as well as just not being able to figure it out in time – but I think having a dedicated large clock is a better fit, though you’re more than welcome to use it for anything else.
We’re doing this the lazy way, instead of hardware, we’re just using strftime and forcing the LCD to refresh every second to give the illusion of a running clock. The second row then displays the local time zone. Each row is indicated by the 1 and 2, if you have a larger LCD, you’ll be able to fit more information on it.
Get the OLED screen to swap between data sets
So we’ve got three (or however many you have) cryptocurrencies to track and can’t just rely on a tiny screen to display everything all at once. Instead we’ll swap between each data set through the time.sleep(10) command. We’re also going to tell Python to swamp between each screen on a ten second interval. If this is too short, just increase it.
def oled_crypto():
while True:
btc(device)
time.sleep(10)
ltc(device)
time.sleep(10)
eth(device)
time.sleep(10)
Additional Things
Very quickly, we’re going to add a timestamp and message to those using this through the terminal, just to keep you informed of the loop still running. All it does, is after every loop of 30 seconds, it pushes a message to the terminal, letting you know that it’s working.
def tickerunning():
while True:
print(“Running Ticker!” + strftime(” %H:%M:%S”))
time.sleep(30)
Python Threading
So when I was looking up tutorials for my own benefit for Threading, the main one I came across was so impossibly dense, that I was taken aback. How could I make this simple thing work, if I had to know all these things? Well, it turns out, it was just made far more difficult than it needed to be.
Using another YouTube video, I found that all I needed to get things going was to use the following lines of code:
try:
oled_display = Thread(target=oled_crypto, daemon=True)
lcd_display = Thread(target=lcd_time, daemon=True)
ticker = Thread(target=tickerunning, daemon=True)
lcd_display.start()
oled_display.start()
ticker.start()
pause()
All we’re doing here is telling Python that we need to run these three scripts at the same time, by point it to the def of each one, then telling it to be True, to just keep running.
Underneath (don’t forget this step, it caught me out multiple times), we’ll also tell it to start by using the names we’ve given each thread.
Finally, we need to have a way to kill the program if we wanted:
except KeyboardInterrupt:
pass
And also close down after a half second, as well as attempt to clear the LCD (your mileage my vary):
finally:
sleep(0.5)
lcd.clear
We’re going to need to begin altering the Pi’s config file, so be sure to add these correctly – it’s not hard to do – and if you run into any issues of booting after the many reboots following on from this, mount the SD card into another PC and make any alterations you need to revert the Pi back to its default state.
When you hit run, it should then immediately light up both screens and display the data! Wonderful! Admire your work and feel accomplished as you watch the crypto prices potentially fluctuate.
If you wanted to only focus on your investments, say with Bitcoin, you’d simply just remove any mention of the other two currencies, and then in the loop where we’re flicking between each data set, change the time.sleep(10) to time.sleep(.01) to have a true live update.
If you don’t want the clock, then get rid of it too! Just erase any mention of the LCD screen and Bob’s your uncle!
I’m currently working on getting this into an enclosure, including soldering it to an Adafruit 4×6 PCB.
Download the code!
How to change config.txt on Raspberry Pi
We need to go through the terminal to edit this, as accessing it via the user interface will just prevent us from doing anything. Using this command, we can jump straight into it without the hassle of a text editor.
sudo nano /boot/config.txt
We need to scroll down (with the arrow keys) to ‘uncomment’ and activate a few features to ensure the Pi is properly ready.
Somewhere down the page is ‘Uncomment some or all of these to enable the optional hardware interfaces’. We need to delete the # from before the following:
dtparam=i2c_arm=on
dtparam=i2s=on
dtparam=spi=on
While the other two are needed for this project, we’re best uncommenting them for future purposes.
Turn on I2C
We’ll need to turn on I2C, which we can either do via the Pi’s GUI, by hitting the raspberry and going into preferences and choosing Configuration and then in Interfaces turning on I2C. If you’re running headerless or want to feel like a hacker, we can go through the terminal.
Type: sudo raspi-config and then in the configuration tool, choose section 3 and then P5 to turn on I2C.
Reboot.
How to Wire a 1602 LCD
Incredibly common around maker spaces, the 1602 LCD can display two lines of sixteen characters, it looks a little intimidating when you have to wire one up for the first time, but we’re going to ignore 4 of the 16 pins for this project and actually take a small shortcut to make things easier.
The 1602 LCD can come in three varieties, one without a header pin, with headers already soldered on, and a version with the controller soldered on, which also includes a contrast toggle.
I’d highly recommend the last one, it makes life so much easier and means you won’t have to buy multiple pieces or spend time soldering the screen together with the screen. However, if you wanted to, it’s quite easy to fit it together.
I made my life a million times more difficult and bought one without the controller, so had to attach one separately onto the back via jumper wires which in the long run made things a lot easier on us wiring this thing up to the Raspberry Pi. Converting the 12 wires to 4 and then into the Pi just gives us a lot more flexibility – figuratively and literally.
If you’re having to connect the controller, plug it into a breadboard and connect each pin via a jumper wire to each matching pin on the LCD. The ones I have actually indicate where the LED backlight is supposed to be plugged into, so work backward from there. Just skip over D0, D1, D2, and D3.
If you’re still unsure, here’s what each pin on your LCD actually means:
- VSS – Ground
- VDD – +5V Power Supply
- VO – Contrast
- RS – Controls the LCD’s memory
- R/W – Switches between Read and Write
- E – Enable Pin
- D0-D7 – Data reading and writing pins
- A – 3.3V backlight
- K – Backlight ground
We’re going to come back to the LCD later on when we start working on the Raspberry Pi, so don’t worry about connecting it up just yet.
Get the SDA and SCL pins ready
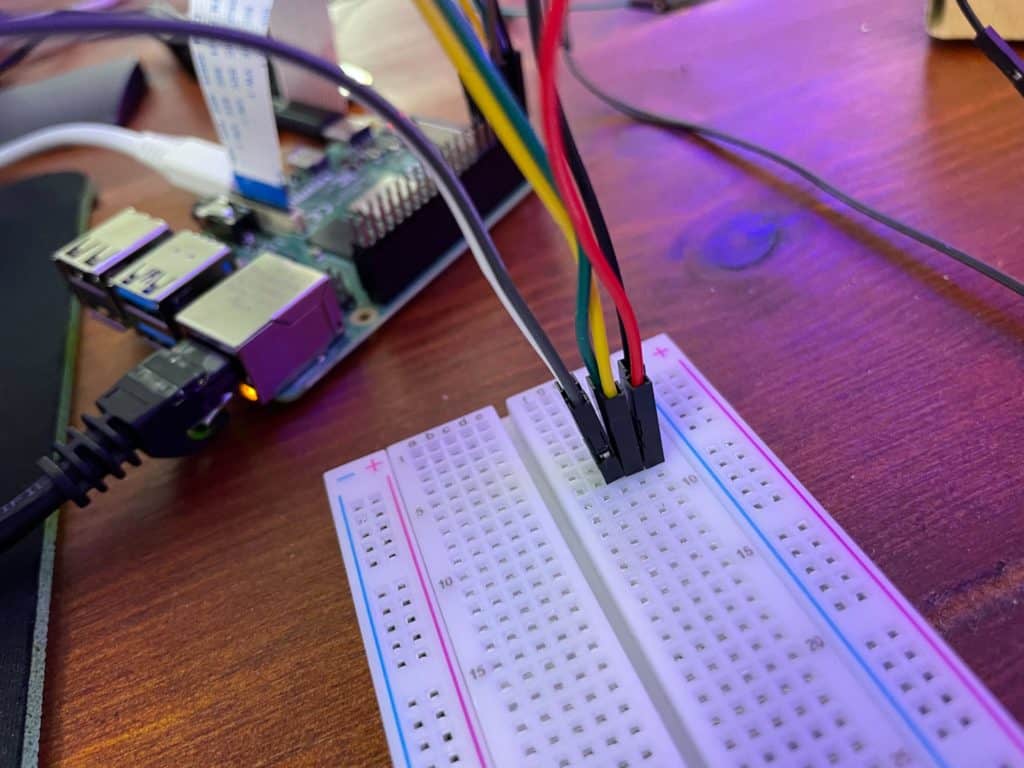
Take two Female to Male jumper cables and place them on Pins 2 and 3, noting which are SDA (Pin 2) and SCL (Pin 3).
Plug the two jumper wires from Pins 2 and 3, noting where SDA and SCL are when you do, and place them into the breadboard with at least two pins free on above and below.
Wire up your OLED
I’m using an SH1106 OLED from AliExpress, but I’d recommend buying from a more reputable seller like Adafruit. We’ll get the drivers for this and the LCD later on. First, let’s wire up the OLED on our breadboard and to the Pi.
Taking jumper wires (Male to Female), VCC (or on mine, VDD) goes to the 3.3V pin and ground to any ground. With the OLED in the breadboard, plug in your SDA and SCL pins to two of the pins on the board above or below your two SDA/SCL wires.
The OLED runs on I2C, a protocol for connecting devices developed by Phillips Semiconductors (now NXP) nearly 40 years ago. I2C has set addresses – this is going to come up later – which the Pi and Python in turn use as a way to send the data to the right places.
Once you’ve connected it, open the Terminal.
Install and Use I2C Tools
Back in the terminal, use the two following commands:
sudo apt-get install -y python-smbus
sudo apt-get install -y i2c-tools
The -y skips the yes prompts that will appear during installation, letting you just get to the meat and potatoes.
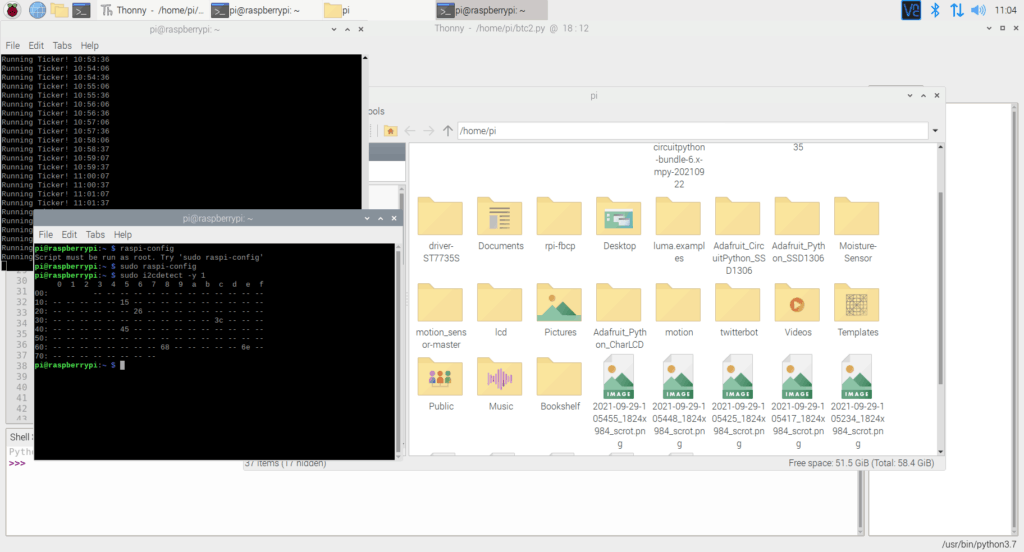
Now we can use the tools to detect our OLED screen, which should be assigned address 3c, by using the following command:
sudo i2cdetect -y 1
This will go through all the I2C addresses and should hopefully bring up your OLED screen. If it appears, you’re in business. If not, try rewiring.
Wire Up and Set Up the LCD 1602
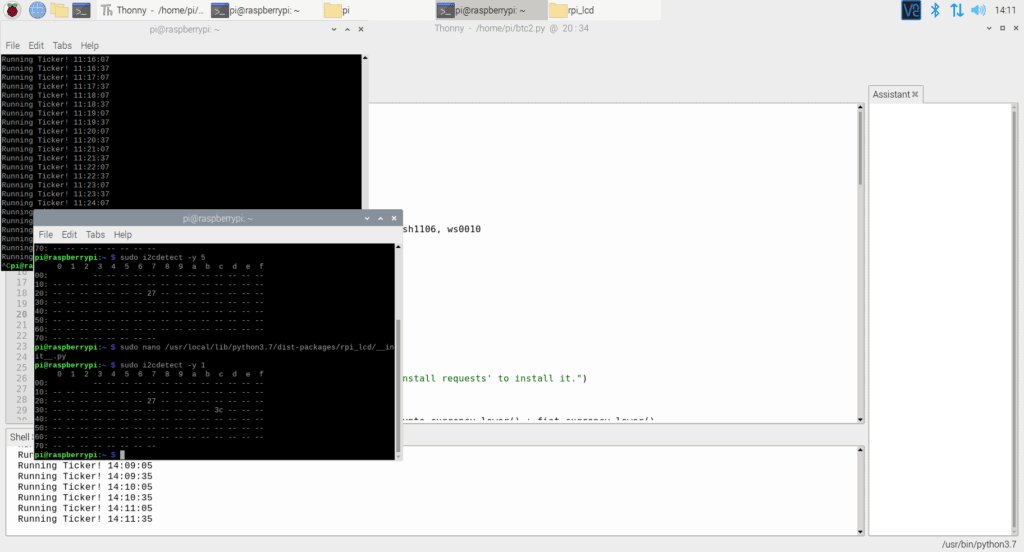
The LCD works off of I2C as well, so we’ll need to connect it to the same pins on our breadboard (which if we move it to a more permanent board afterward, we can solder them all together).
Once you’ve done that, take wires from the four-pin connector for your LCD and take the SDA and SCL pins to two of the pins matching with the wires from the Pi in the Breadboard, while you take the two power wires to the 5V pin and ground.
If you now check with i2cdetect -y 1, you should see the LCD pop up under 27.
