How to screen record on Windows 10

Reviewed By: Kevin Pocock
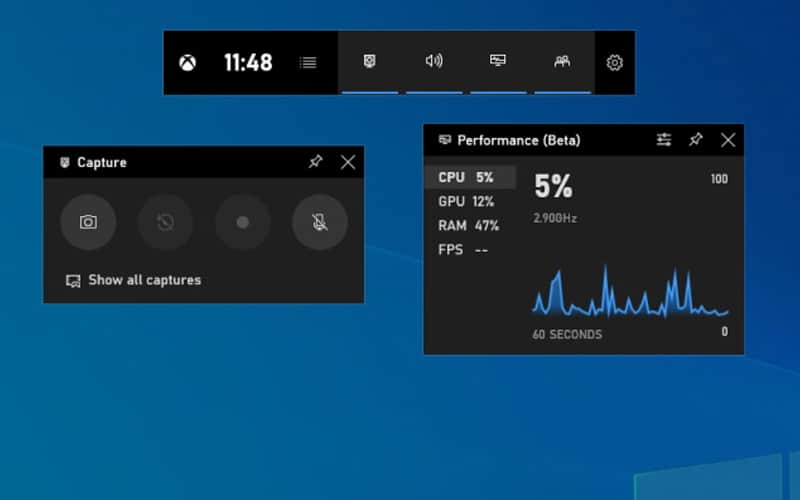
Table of Contents
There are a number of reasons why you might need to know how to screen record on Windows 10. You could be recording a tutorial, wanting to capture a complex PC process, or simply wanting to record your PC gameplay. Luckily for you, learning how to screen record on Windows 10 is a quick and easy process, requiring little setup and execution time.
Screen Record on Windows 10 – step-by-step
Step
Find the Built-In Screen Recording Tool
To begin, open the Start menu and search for the “Game Bar” application. You can simultaneously press the “Windows key + G” to launch it directly.
Step
Activate Game Bar
Once the Game Bar is open, you can start recording by clicking the “Record” button. Alternatively, press “Windows key + Alt + R” to begin recording immediately.
Step
Adjust Recording Settings
Before you start recording, adjusting the recording settings according to your preferences is important. Click on the “Settings” icon (represented by a gear) on the Game Bar to access these options.
You can configure settings such as audio recording, microphone input, and video quality here.
Step
Begin Recording
Once you have adjusted the settings, you’re ready to start recording! Click the “Record” button or use the “Windows key + Alt + R” shortcut again.
A small timer will appear on the top right corner of your screen to indicate that the recording has started.
Step
Capture Your Screen
Now that the recording has begun, you can freely navigate your Windows 10 interface and perform the actions you wish to capture.
The screen recording tool will capture everything within its frame, whether demonstrating a software tutorial or recording a gameplay session.
Step
Pause & Resume
During the recording, you may need to pause temporarily. You can do this by clicking the “Pause” button on the Game Bar or reusing the “Windows key + Alt + R” shortcut.
When you’re ready to continue recording, click the “Record” button or use the shortcut again.
Step
Stop Recording
Once you have finished recording your screen, it’s time to stop the process. To do this, click the “Stop” button on the Game Bar or use the shortcut “Windows key + Alt + R” one last time.
Your recorded video will be automatically saved in the “Videos” folder within the “Captures” subfolder.
Step
Access Your Recorded Videos
To access your recorded videos, open the File Explorer and navigate to the “Videos” folder.
From there, locate the “Captures” subfolder, where you will find all the recorded videos in Windows 10. Simply click on the video file to play and review your recording.
Step
Edit & Share Your Recording
If you wish to edit or share your recorded video, you can use various video editing software. Windows 10 also provides a basic video editing tool called “Photos” that you can use to trim, add effects, or combine clips.
Once you are satisfied with the edits, you can easily share the video with others through email, social media, or any other preferred platform.
How Long Can I Record My Screen In Windows 10?
The available storage space on your device determines the length of your screen recording in Windows 10. You can record for as long as there is sufficient space to store the video file. It’s recommended to have enough free space to accommodate the duration of your recording.
Screen record on Windows 10 – Final thoughts
Recording your screen in Windows 10 is a simple process that can be accomplished using the built-in features of the operating system. With the Game Bar tool, you can effortlessly capture tutorials, gameplay, or any other screen activity.
Adjust the settings according to your needs and explore the various editing options to enhance your recordings. Now that you know how to record your screen, you can easily share your knowledge, create engaging content, or simply keep a record of important tasks on your Windows 10 device.
About the Author