How to insert a checkbox in Excel – our guide to adding checkboxes

Reviewed By: Kevin Pocock

Table of Contents
If you want to learn how to insert a checkbox in Excel, we’ve got you covered right here.
If you have any experience in data entry or management, then you are likely already familiar with Microsoft Excel. This program is used by businesses around the world to create spreadsheets and forms for compiling data in an accessible and easy-to-understand format. As for checkboxes, these are interactive cells that allow you to check, or uncheck, a certain group within the spreadsheet. If you want to create a digital form in Excel, then it will help to have a column with checkboxes.
In this guide, we will discuss how to insert a checkbox in Excel. But first, we’ll go over how to enable the developer tab, as you can’t add a checkbox without it.
How to enable the developer tab
In order to add checkboxes to a spreadsheet in Excel, you will first need to add the developer tab to your main toolbar at the top of the screen.
Step
Click on the Microsoft button
How you do this will depend on which version of Excel you are currently using. For Excel 2007 and all prior iterations, you will need to click on the ‘Microsoft Button' in the top right corner of the program.
Step
Show developer tab in Ribbon
From here, click on ‘Excel Options' and then ‘Popular' to find the option ‘Show Developer Tab In Ribbon’.
The ribbon is just another name for the expanded toolbar at the top of Excel, through which you access most of the program’s features.
Step
Navigate to customize ribbon (For new version of Excel)
When using Excel 2010 or any version after this, you can enable the developer tab by clicking on ‘File’. After this, click on ‘Options’ and navigate to the ‘Customize Ribbon’ option.

This will open up a list of tabs you can add to the main toolbar, including the developer tab.
How to insert a checkbox in Excel through the developer tab
Now that you can access the developer tab from your main toolbar, it is time to learn how to add a checkbox to a cell in Excel.
Step
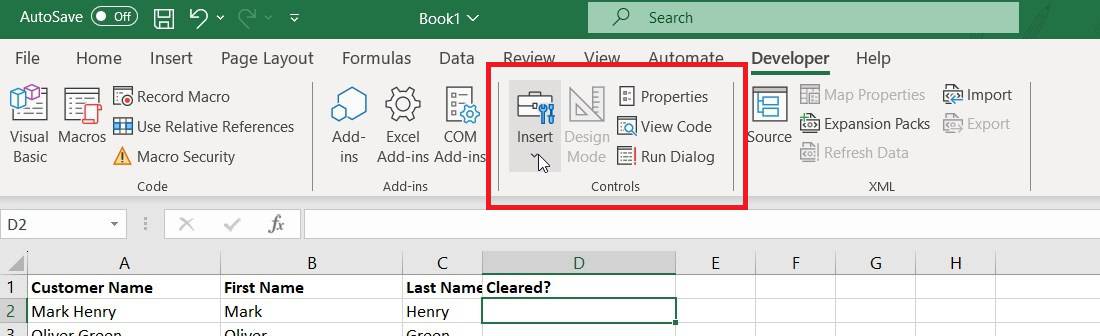
Click on the insert button
From the developer tab, click on the ‘Insert’ button. This will open up a drop-down list of items you can insert into your chosen cell.
Step
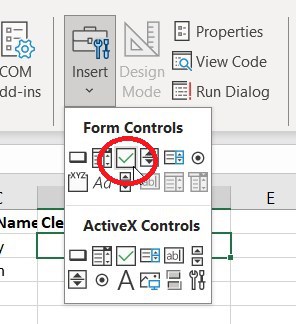
Select the checkbox
From under ‘Form Controls,’ choose the checkbox icon.
Step
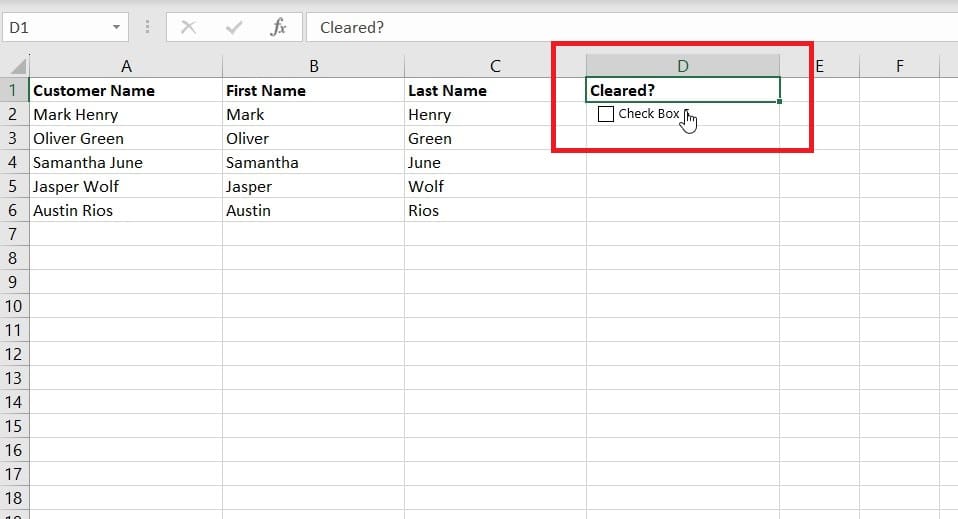
Select a cell
You can now click on any cell within your spreadsheet to add a checkbox to it.
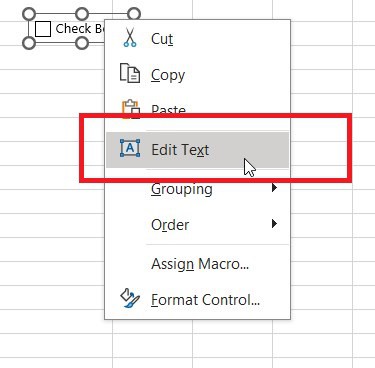
When you first add a checkbox, you’ll be able to adjust its placement. On top of that, you can also right click on it and select ‘Edit Text’ to change or remove the default text next to it.
Conclusion
Checkboxes are useful features that will allow you to create digital forms or surveys in Excel. They also have a multitude of other uses, which is why it is very useful to know how to add a checkbox in Excel. After you add one, you can simply copy and paste it to other cells to create more.
To learn more about Excel and its features, use these helpful guides:
About the Author