
Last Updated on
Google Docs is a free cloud-based word processor that allows you to create documents, spreadsheets, presentations, drawings, and forms from anywhere at any time. It also comes with a variety of different formatting tools for you to utilize, including indentation.
Indenting text in a document is a common practice in writing. If you want to add some extra space between paragraphs or even just help to organize your articles, then you should indent them.
In this tutorial, we will be showing you how to indent text in Google Docs. Read on!
What Is The Purpose Of Indenting Paragraphs?
In general, when you are writing an essay, article, report, etc., it is good to have some spaces between paragraphs. This makes your content more organized and easier to read. It also helps if you want to change the order of the paragraphs later. Essentially, indents are used in order to make articles and documents more readable and structured.
How To Indent In Google Docs?
So, now that you know what the purpose of indenting is, we are now going to be sharing with you a simple tutorial that will ensure you’re able to easily indent your Google Doc paragraphs. Let’s check it out below:
Step
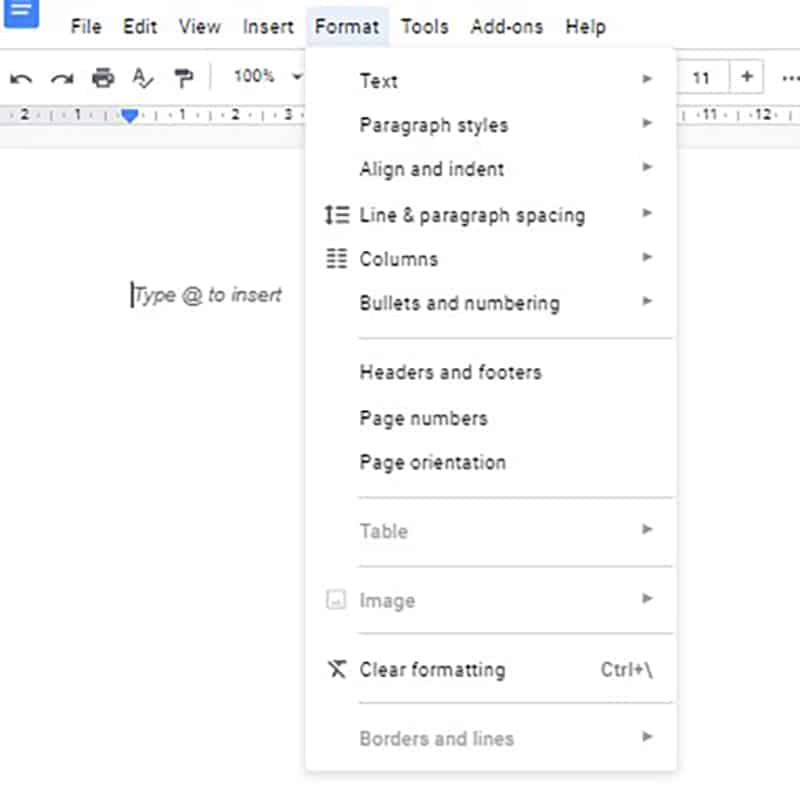
Format
First, open any document in Google Docs. Now, go to the menu bar (the top right corner) and click the “Format” option. It should bring down a drop bar menu, as you can see below:
Step
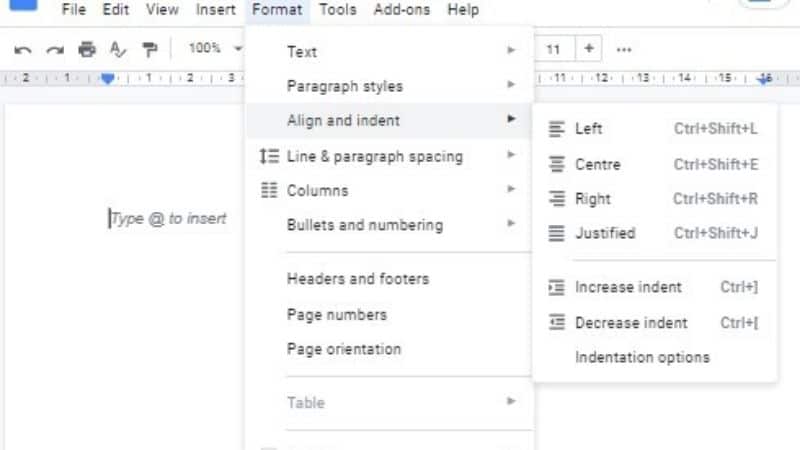
Align And Indent
Now, scroll down and look for the “Align and indent” option. You should find it under the heading called “Paragraph styles”. Click on it and you will see a variety of different indent options for you to choose from.
Step
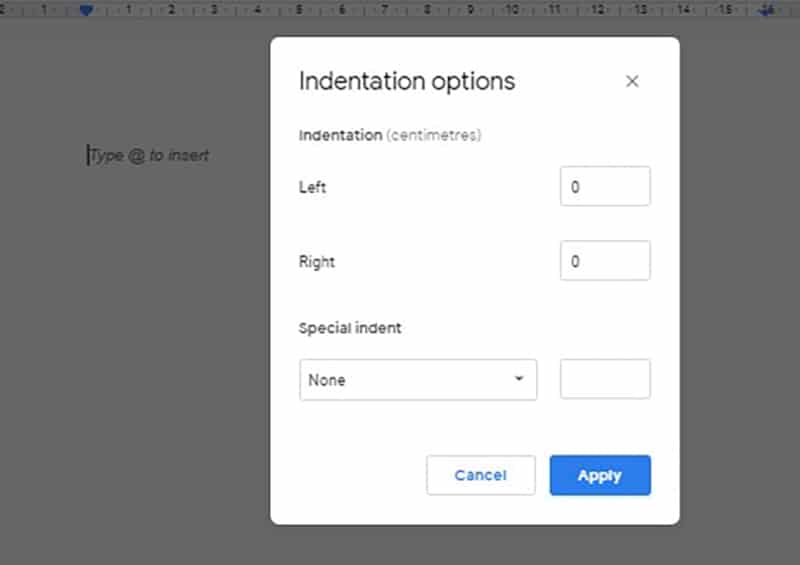
Indentation Options
Once you have done this, all you will then need to do is select how you would like to indent your paragraph. As you can see, you will have four different indenting options to choose from.
These are as follows: Left, Center, Right, Justified. As soon as you click OK on the indentation style that you would like, your paragraph will become indented.
If you are not happy with the way that the indentation looks, then you have the option of either increasing or decreasing the amount of indentation. You can do this by clicking on either “Increase indent” or “Decrease indent” depending on what you would like. To do this, you will need to click either option, which is located underneath the indentation styles, which you can see in the above image.
However, if you would like to customize the indentations that you use, then you have the option of selecting the specific measurements that you would like.
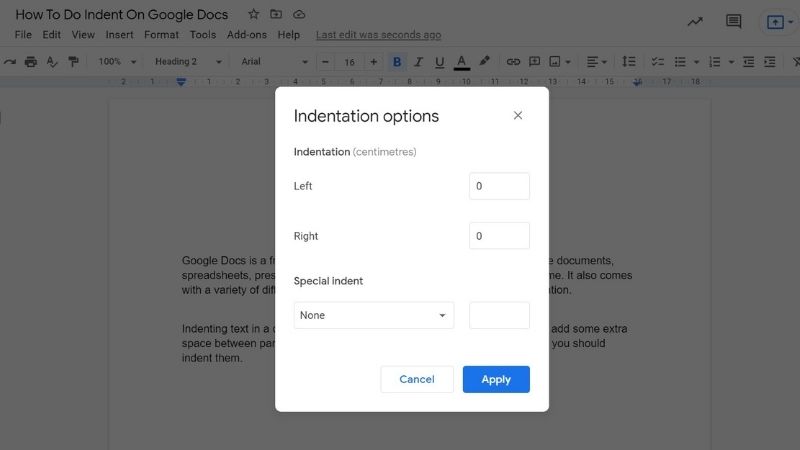
You can do this by selecting “Indentation Options” which is located directly underneath the “Increase Indent” and “Decrease Indent” options. Once you have clicked on it, it will open up a separate tab.
Step
Special Indent
After you have opened up this section, you will then have the opportunity to set the specific measurements (in centimeters) which you can clearly see from the image above. If you would like to use a special indent, then you can do so by clicking on the drop-down menu located underneath the heading “Special indent”.
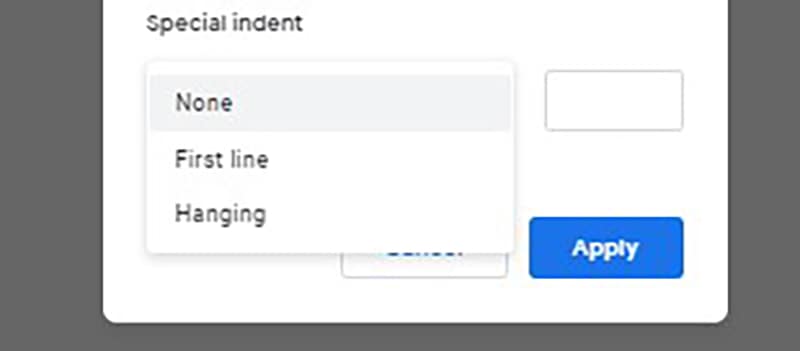
Once the drop-down menu is opened, you can then choose to either opt for a first Line indent or a hanging indent. Once you are happy, you can then go ahead and apply.
Final Thoughts
This was our guide on how to indent paragraphs in Google Docs. We hope that you found it useful!
Thank you for reading.
