

Last Updated on
For readers who need to reference their work or create a page of references, learning how to do a hanging indent on Word will make a piece read clearer. A hanging indent offsets a sentence or paragraph by one-half inch from the left margin, making the reference stand out and easy to read.
You’ll find that bullet point lists do this automatically, but a hanging indent gets rid of the point and adds a certain amount of style to a piece of writing. Students and various professionals will make great use of this Microsoft Word feature.
How to do a hanging indent on Word
Here are the steps and screenshots necessary for learning how to do a hanging indent on Word. Although versions of Word vary from Office 2016 to Office 365 visually, these options should remain mostly intact across versions from Office 210 upwards. For this how-to guide, we’ll be using the Office 365 version of Word.
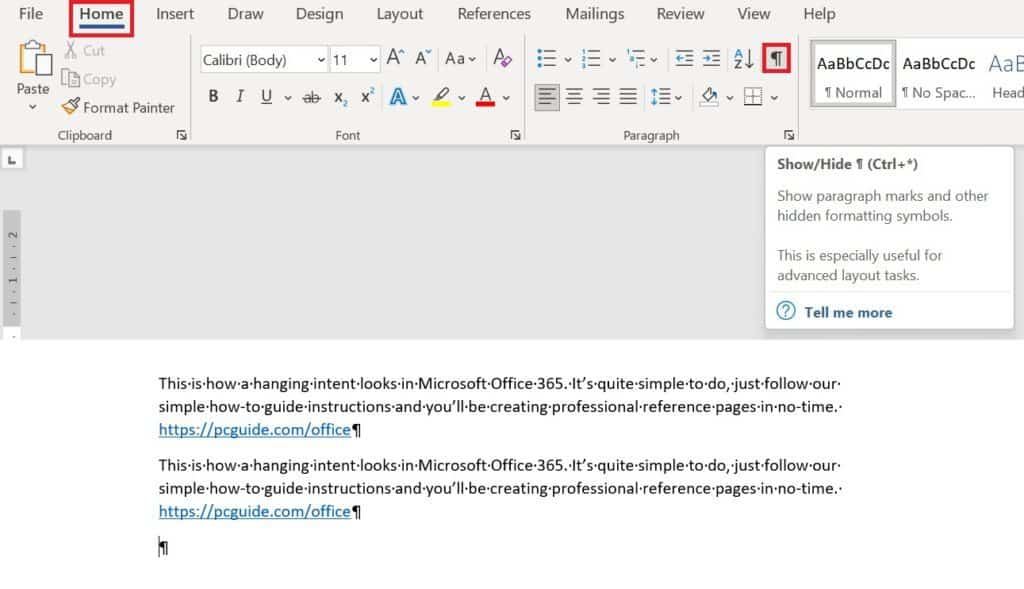
Also, please note that hanging indents can only be performed on properly formed paragraphs. To check that the paragraph is applicable, click the show/hide paragraph mark as shown below under the home tab, in the paragraphs section. If it is, it will end with the pictured pilcrow mark.
How to do a hanging indent on Word with the ruler
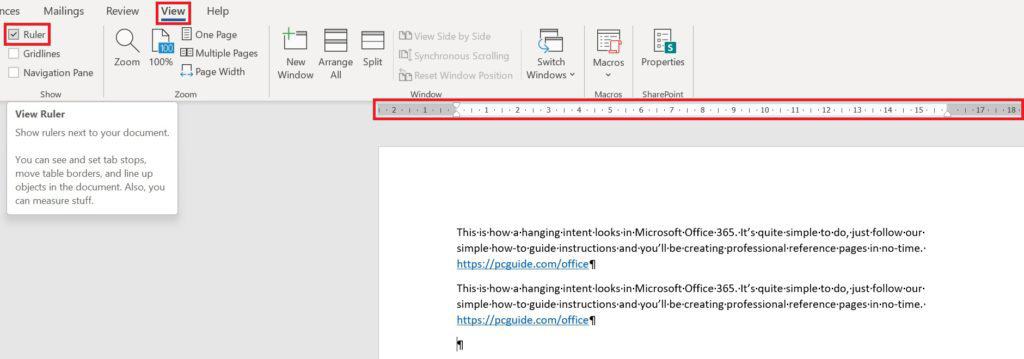
There are two ways to create hanging indents, and using Words ruler can be a quick fix, albeit not as accurate, for the odd reference needed in a piece of writing. If you don’t have the ruler tool active, tick the ruler box in the show group under the View tab on the top menu of any word document. This is pictured below.
Select the text
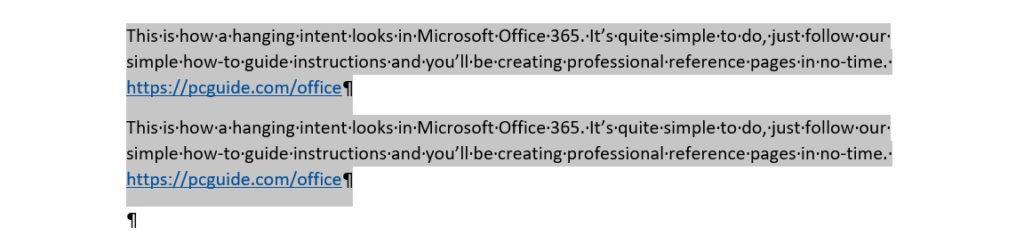
Select the text that needs a hanging indent. Users can select multiple paragraphs by holding down left-click and dragging the mouse cursor over the text from left to right, releasing the click at the end of the text needed. For single paragraphs, just make sure the cursor is in the desired paragraph.
Slide the marker
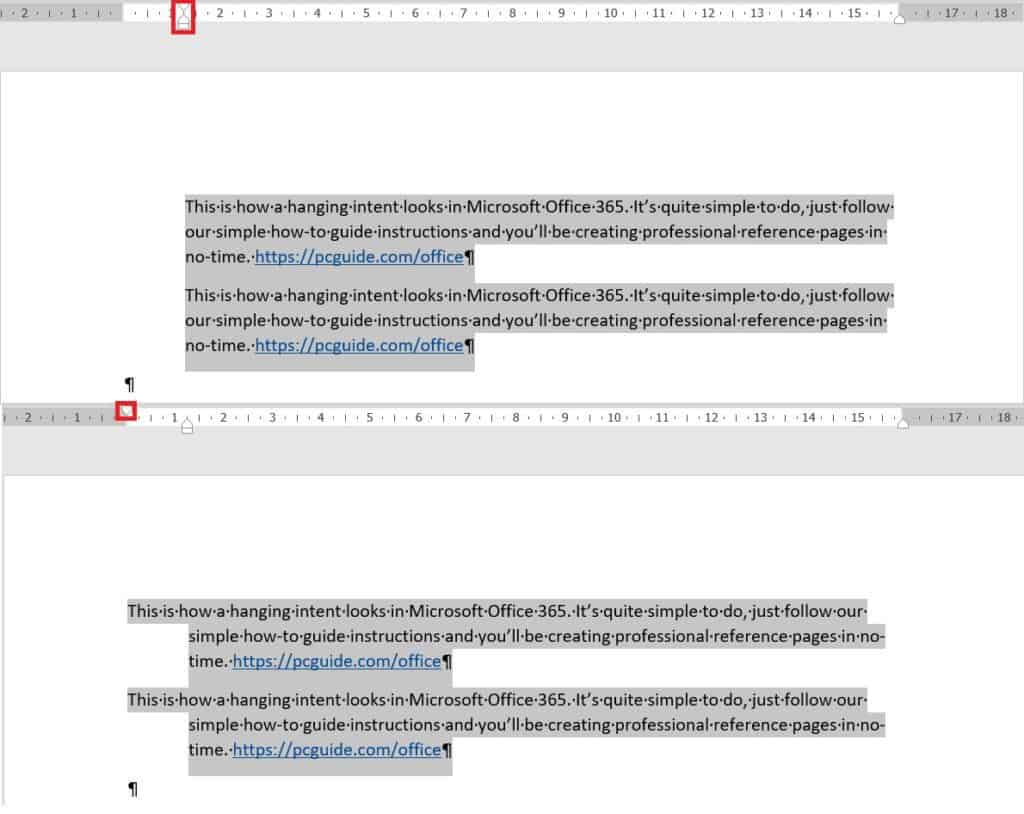
Next, select the bottom-right slider on the ruler and move it to the right for the desired hanging intent length. For some, the top slider may move along too, but don’t panic. Move both sliders to the desired indent point, then move the top slider back to the standard margin position as pictured below.
How to do a hanging indent on Word with the paragraph menu

The paragraph menu gives precise measurements for hanging indents, which come in handy for more detailed pieces of work. Make sure to highlight the paragraphs where hanging indents are needed before continuing.
Locate the Paragraph Menu

The paragraph menu can be located in the Microsoft Word top bar. It’s the icon that looks like a paragraph with up and down arrows to the left. Users can also right-click anywhere on the highlighted text and select the Paragraph menu from there.
Select the correct hanging indent option
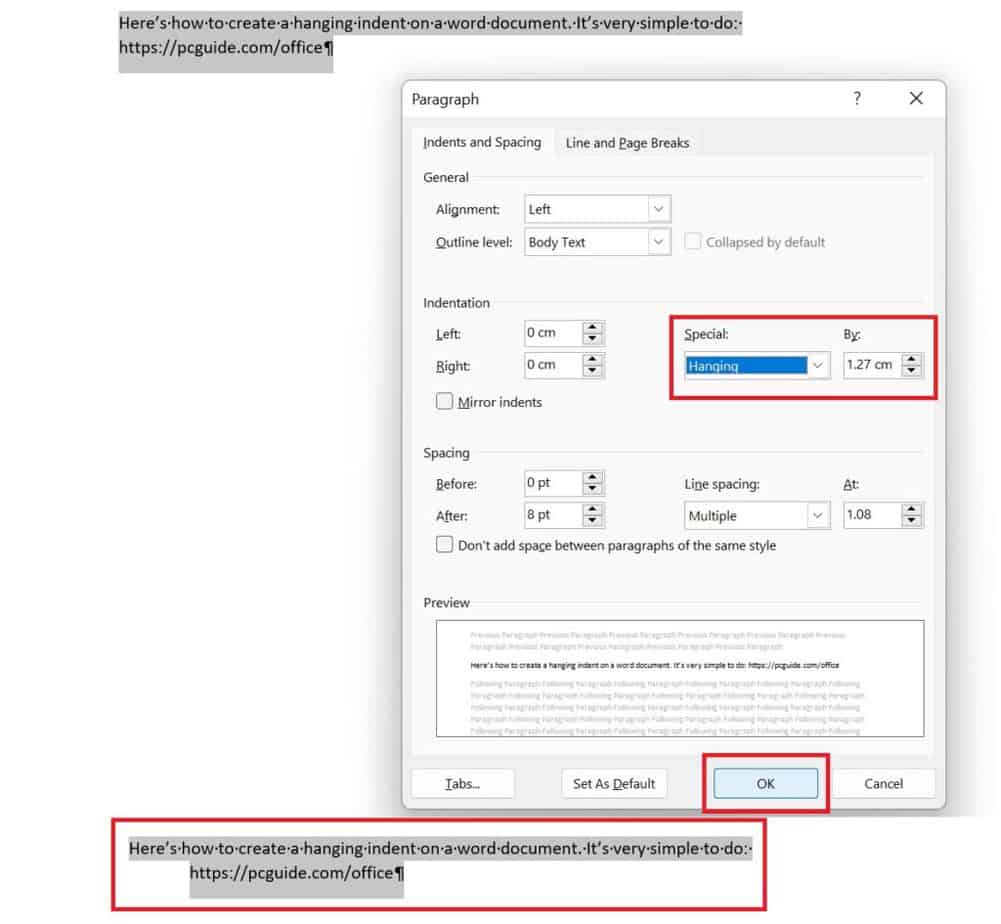
Under the ‘Special’ heading under the ‘Indents and Spacing’ tab, click the drop-down menu and select ‘Hanging’. Finally, click OK at the bottom of the menu to find your selected text displaying a hanging indent.
Thanks for choosing PC Guide for learning how to do a hanging indent on Word. For more help with Microsoft products, make sure to check out our Windows 10, 11, and Office hubs.
